
The annotation tool in Blender is used to make notations in the 3D viewport. These can be for reference, instructions or to outline ideas for composing a scene. The annotations do not render and are less-than-intuitive so here’s a full guide on using them.
This page may contain affiliate links which pay me a commission if used to make a purchase. As an Amazon Associate, I earn from qualifying purchases.
Uses of the Annotate Tool
The annotate tool in Blender is simply a way of creating notations in a 3D scene. They can really be used for anything we want – as long as they don’t need to appear in the final render (because they won’t). Here are a few things I’ve used annotations for in Blender:
The Annotate Tool
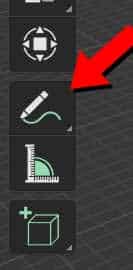
The annotate tool is located in the tool bar located on the left of the 3D Viewport. The toolbar’s visibility is toggled on and off with the keyboard shortcut “T.” The annotate tool functions exactly the same in Object Mode and Edit Mode.
The shortcut for the annotate tool in Blender is Shift + Spacebar and then “D.”
If we left click and hold the icon in the toolbar, we actually see four sub-tools of the annotate tool.
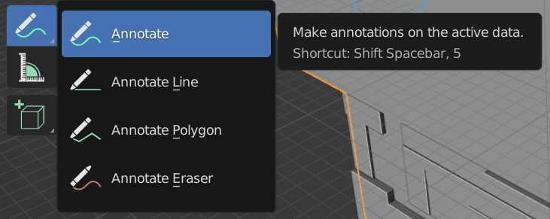
Annotate
The default annotate tool will operate as a pen. The annotation lines will follow the path of our mouse when we click and drag or the path of our tablet and pen. If you’re looking for a good drawing tablet to use with Blender, here’s the one I like:
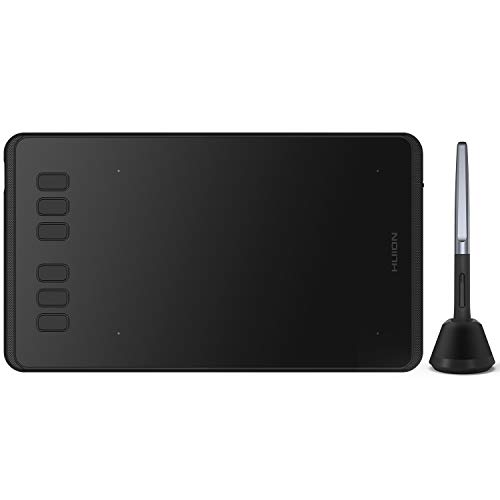
Huion Inspiroy H640P Tablet
An affordable drawing tablet and pen for Blender artists.
Annotate Line
Annotate line will allow us to draw a straight line. Simply click and drag out a line. Release when the cursor is at the desired end point.
Annotate Polygon
If we want to make a polygon of straight lines (maybe to outline the border of something), the Annotate Polygon tool allows us to do so. Click once and then either drag out a line or just click where we want the line to go to. Repeat for each subsequent line.
Annotate Eraser
One of the most common and frustrating questions I’ve come across about the annotate tool is how to use the eraser. Well, this is how.
To erase annotations in Blender, left click and hold on the annotation tool in the toolbar. Choose “Annotate Eraser” from the options to enter eraser mode.
Annotate Tool Settings
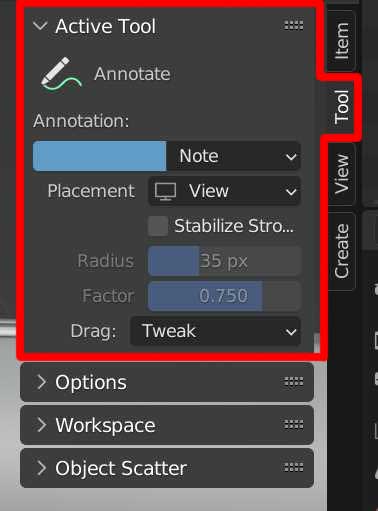
The main settings for the annotate tool are located in the Sidebar Menu on the right side of the 3D Viewport. We toggle the visibility of this menu with the keyboard shortcut “N.”
When the annotate tool is selected, most of its settings are located under the “Tool” tab in the sidebar.
Color
One of the first settings we might want is to change the annotation color (it defaults to a light blue).
There is initially no color setting available!
To change the color for the annotation tool in Blender, we have to first create an annotation. Then the color picker will appear in the tool settings of the sidebar menu).
Annotation Placement
When using 2D notations in 3D space, there are several ways the annotations can be placed. The placement setting contains three methods of how the annotation marks are placed in relation to our current view.
3D Cursor
This method is turned on by default and will place annotation strokes at the current depth of the 3D cursor. The annotation will remain in place and when we change our view in the viewport, they will not move with the view. This is the default setting.


Surface
When surface is selected for the placement, annotation marks will be pushed to the depth of the surface behind the marks and will remain there. This is useful if we want to write on the surface of an object.
View
When view is selected, the annotate tool will treat our current view like a 2D canvas and when we adjust our view, the annotations will adjust with it. Imagine writing on the camera lens. The annotations will remain the same size if we zoom out and will always be facing us.
In the below images, each of the three placement options was used. I then rotated the viewport position to demonstrate the effects.
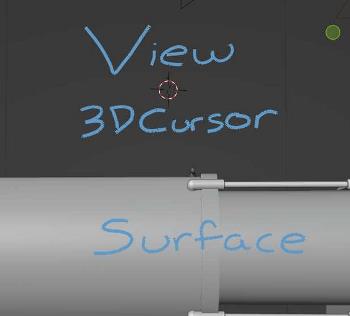
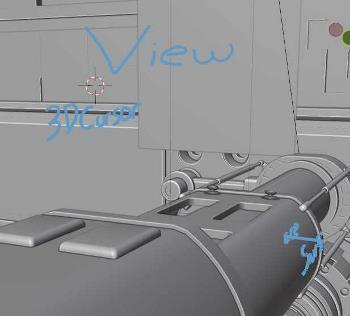
The “3D cursor” remains floating where my 3D cursor was. The “Surface” remains stuck to the surface. “View” moved with the viewport.
Stabilize Stroke
When the option to “stabilize stroke” is checked, Blender will smooth out the annotation line as it is drawn. Once checked, the stabilization can be adjusted with the “radius” and “factor” settings.
Increasing the radius will increase how far the smoothing will have an effect. Increasing the factor will increase the strength of the smoothing.
Annotation Sketchbooks and Layers
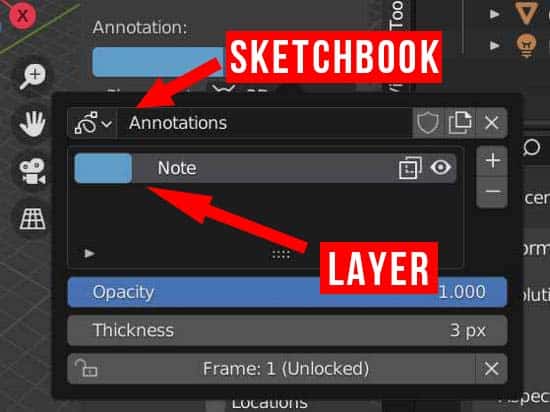
There are two ways to organize annotations in Blender: Sketchbooks and layers. Each sketchbook can have multiple layers, but only one sketchbook can be loaded and viewed at a time. Think of a sketchbook as a folder and a layer as a file (sort of).
Before we add a notation, there will be no layers or sketchbooks. Once an annotation mark is made, a default layer and sketchbook will be created.
There are two locations where we can view and edit layers and sketchbooks. Once an annotation is created, the sketchbook controls appear in the active tool tab of the (N) Sidebar. Click on the label that says “Note” to see our current layers.
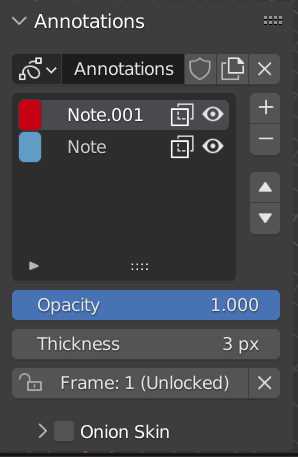
We can add layers to the sketchbook by using the plus icon on the right. Each layer can be a different color. The visibility of each layer can independently be turned on or off.
We can create an entirely new sketchbook by using the “New” button to the right of where it says “Annotations.” Each sketchbook can have multiple layers but only one sketchbook can be loaded and visible at a time.


Sketchbooks and layers can be renamed.
The second location where we can view, add and manage annotation layers and sketchbooks is in the “View” tab of the right (N) Sidebar.
Here we essentially have the same controls however, this area will be populated even before we add our first annotation to the scene.
Annotation Opacity and Thickness
The opacity and thickness of each layer can be adjusted. Thickness is limited to a maximum of ten pixels.
I hope this was helpful, please have a look around the site for more Blender tutorials, guides and references. Here’s a link to the official documentation of the Blender annotations. I also have a YouTube channel with straight-forward Blender tutorials. Stay creative!
Get Brandon’s Newsletter
By submitting, you agree to receive periodic e-mails from me. You can unsubscribe at any time.