
Editors are the main “screens” in Blender’s user interface. Each of the 23 editors do something different. These can be combined to create custom workspaces in Blender.
Some editors will be used often while others you may never used. Here’s a complete guide the editors of the Blender interface.
This page may contain affiliate links which pay me a commission if used to make a purchase. As an Amazon Associate, I earn from qualifying purchases.
The Blender 3D Viewport Editor
Blender’s 3D viewport editor is probably where you will spend most of your time. It is a large open area which displays your 3D scene.

At the top of the 3D viewport are a variety of settings. In the View, Select, Add and Object settings we have a lot of control over the viewport. It’s also how we add new objects to our scene.
On the left is the tool bar which is toggled open and closed with the keyboard shortcut “T.”
On the right of the viewport is the sidebar. This is also known as the “N” menu because it is toggled open and closed with the shortcut “N.” In addition to tool and view settings, most add-ons are controlled in the sidebar, including my favorite free Blender add-ons.
There’s a lot to cover on the 3D viewport including gizmos, overlays, view modes and more. Here’s a full guide to the Blender 3D viewport.


The Blender Image Editor
The image editor is a basic way to load and edit external images. These images can be used as textures, background images or be loaded into a scene using the “Images as Planes” feature.
Only one image can be loaded at a time. At the top of the editor is a data-block menu to choose from existing images, load an external image or create a new image.
There are overlays and gizmos that can be toggled on and off in the image editor.

The Blender UV Editor
UVs are two-dimensional maps for materials and textures in 3D software.
Imagine cutting apart a globe of the world to lay the map flat. That’s kind of what UVs are. The UV Editor is where we edit UV maps.

Similar to the image editor, we can load images in the background of the UV editor. We can switch between different UV maps assigned to an object. A lot of the functionality of moving vertices, edges and faces in the UV editor are the same as in the 3D viewport.
UV unwrapping and editing is an entire section of Blender to learn and master. Here’s a course specifically on how to use UV maps in Blender.


Compositor
Blender has a built-in image compositing tool known as “The Compositor.” After we render, we can adjust and improve our images and animations using it.
The Compositor Editor is another node editor where we can make simple or complex node trees to edit an image.

Texture Node Editor
The texture node editor in Blender may be the least talked-about editor. It allows us to use nodes to create procedural textures (not to be confused with materials or shaders).
With the standard texture nodes already in Blender, there’s not a lot of need to create custom textures.
But, the texture node editor remains in Blender and can still be used.

Geometry Node Editor

The excitement and possibility of geometry nodes all happens in the Geometry Node Editor. It is by default part of the Geometry Nodes Workspace, but can be added in any editor window. It looks and functions similar to the Shader Node Editor.
The Blender Shader Editor

The shader editor is mostly used for creating material shaders. Whether making PBR or procedural materials, we mix and combine shading nodes in the shader editor.
When the drop-down box at the top left is set to “Object” the shader editor will be used for material shading. Setting it to “World” allows us to use nodes to create a custom world background.


Video Sequencer
The Video Sequence Editor (VSE) is the main component of Blender’s video editing tools.
Similar to other video editing software, it has channels for video and audio strips to be moved, combined and edited.

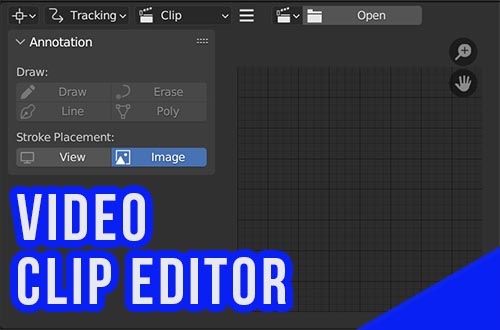
Movie Clip Editor
The Movie Clip Editor is a main tool for making VFX in Blender.
The editor is used for masking and camera tracking.
A video clip is loaded into the editor and then clip tools, marker tools and other video settings will be available on the left and the right.
Dope Sheet Editor

The Dope Sheet in Blender is one of the main animation editors. It’s used to visualize and edit the placement of key frames across multiple properties or objects.
Each horizontal channel in the dope sheet represents an animation property (location, rotation, value, etc). Time is displayed in frames and keyframes appear as circles or diamonds on the dope sheet.
This is the easiest way to correct or offset animation timing in Blender.
Timeline Editor
The timeline editor is one of the main animation tools in Blender. It shows the frame range of our animation, our current frame and the location of our keyframes. By default, this is one of the editors that appears in the Layout Workspace.

We can play our animation using the timeline and adjust its length. To learn more about the timeline, here’s my post on the basics of keyframe animation in Blender.
Graph Editor

The Graph Editor in Blender is another animation tool. Similar to the timeline, it displays time in frames horizontally. Animation channels are stacked vertically on the left.
The graph editor plots animation values on a graph. If the value of an animation value (location, rotation, emission brightness, etc) goes up, the graph will increase and vice versa.
While we can also adjust timing in the graph editor, it’s most useful in adjusting the interpolation between keyframes. Each keyframe can display a bezier handle which can be adjusted visually to change the interpolation of each curve in the graph.
F-curve modifiers can also be added to the values in the graph editor.


Drivers Editor
Drivers are a tool in Blender to control values using mathematical equations. The simplest example is if you want an animation value to increase relative to the frame number, this can be done with drivers.

Blender has a dedicated editor window for drivers. Learn more about drivers from the Blender Manual.
Nonlinear Animation (NLA)

The Non-Linear Animation (NLA) Editor is the final animation editor. This is an advanced animation tool which condenses animation keyframes into actions. Actions can be copied, repeated, resized, moved and staggered.
Once you learn keyframes, the non-linear animation tools in Blender will take your animations to the next level. Especially when using character rigs and other objects with a lot of animation values.
Text Editor
The text editor in Blender is primarily intended for programmers to write scripts.
It can also be used simply as a note-taking tool.
I’ve used it to provide instructions when sharing a .blend file as well as a to-do list for projects I’m working on.

External text files can be loaded into the text editor. It’s a nice thing to have in Blender. Here’s a short video on using the text editor for notes in Blender.
Python Console
I’m not a programmer (not even close) but Blender allows customization of its source code and the building of add-ons using Python.
The Python Console Editor is a way to execute commands and accesses the Python API.

Info Editor
The Info Editor is one of the more technical editors which you probably won’t use much.
It logs operations, warnings and error messages. Programmers probably have more use for it when identifying bugs.

Outliner
The outliner in Blender is an advanced file tree. It sorts all data in a Blender scene by data type. These data types include objects, curves, empties, nodetrees and much more.
There are different view modes for the outliner. Object can be selected and dragged into a scene. They can also be organized into collections.
To better understand the outliner, here’s an interesting read on how data works in Blender.


Properties Editor
The Blender Properties Panel has most of the settings you will use for a wide variety of tasks.
On the left of the properties editor are a series of icons. Each represents a different set of properties that can be controlled. Selecting one will display available properties in the panel.
Some properties in Blender are universal, meaning they apply to the entire scene.
Others are object-specific. Different object types have different properties. For example mesh objects have different property settings than curve objects and armatures.
Most properties tabs have organized sections which can be expanded, collapsed and re-ordered.
Some add-ons for Blender add additional sections within a property tab.

File Browser Editor
The file browser editor in Blender is a tool to navigate to files and folders on your computer.
Whenever you need to access external files (materials, models, add-ons, etc) the file browser will open in a new window.
In some cases, we may want a file browser to be open in a workspace and having it as one of our editors allows us to do that.

Asset Browser Editor
The Blender Asset Browser is a tool to organize a wide range of assets and quickly bring them into your 3D scene.

With the addition of the Blender Asset Browser in Blender 3.0, a new editor was created. It has a large area to display asset thumbnails and a system of organization called “catalogs” which are managed on the left of the screen.
Because there’s so much to cover, I’ve created a complete guide to using Blender’s Asset Browser if you want to learn more about it.
Spreadsheet Editor
With the addition of geometry nodes to Blender, a spreadsheet editor was created to view and manage large amounts of data for attributes created with geometry nodes.
This editor is much more for inspecting data than actually manipulating it. In all likelihood, you won’t use it unless you really go down the geometry node rabbit hole.


Preferences
In Blender, the User Preferences editor is how we control all the behind-the-scenes settings for Blender.
While it is an editor and can be opened in an workspace, it’s also one of the few screens in Blender that will open as its own window.
The user preferences can be accessed by going to Edit in the Top Menu and choosing “Preferences.”
Here’s a detailed guide to all of Blender’s user preferences settings.

Conclusion
Blender has 23 “Editors” which are unique screens designed to perform specific task in Blender. In any workspace, editors can be changed, resized or repositioned to create a highly customized interface.

Some editors will be used often in Blender while others will hardly be used at all. In this guide, we’ve covered the basics of each editor. See the main page on the Blender user interface to continue learning. Stay creative!
Get Brandon’s Newsletter
By submitting, you agree to receive periodic e-mails from me. You can unsubscribe at any time.