
Blender’s Array Modifier allows us to create Instances (copies) of an object and arrange them in a pattern.
Because the modifier uses instancing, it is an efficient use of memory and data. Here’s how to use it.
I also have a guide on all 54 Blender modifiers.

This page may contain affiliate links which pay me a commission if used to make a purchase. As an Amazon Associate, I earn from qualifying purchases.
What is the Array Modifier?
The Array Modifier can be added to a mesh object. Parameters can be set for how many copies we want of the object and how to arrange them. The alternative is to manually duplicate objects with linked data and place them manually.
The array modifier can efficiently create hundreds of copies of an object. Each copy is an Instance which shares the data of the original. When the original mesh is edited, all instanced copies of the object are updated immediately.

The number of instanced copies for the object can be chosen in three ways:
The “Offset” of the object refers to how each instance is placed in relation to the previous. Offset can be set in different ways:
We’ll cover exactly how to use the array modifier next.


Using the Array Modifier
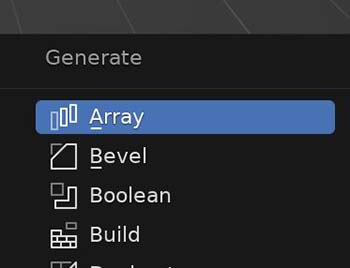
To use Blender’s Array Modifier, select the object we wish to array. Go to the modifiers tab in the Properties Panel. Choose “Array” from the Generate column.

The modifier’s controls will appear in the Modifier Stack. Let’s look at some of the array modifier’s settings.
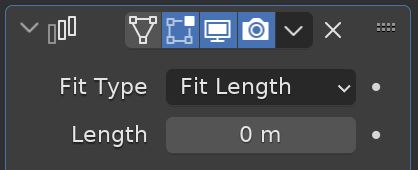
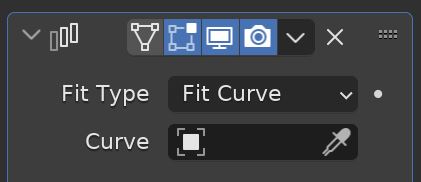
Fit Type:
The fit type is how the modifier decides how many copies of the object to make.
Fixed Count: Creates a number of copies specified in the “Count” setting.
Fit Length: Creates enough copies to fill a specified distance.
Fit Curve: Creates enough copies to fit the length of a selected curve.
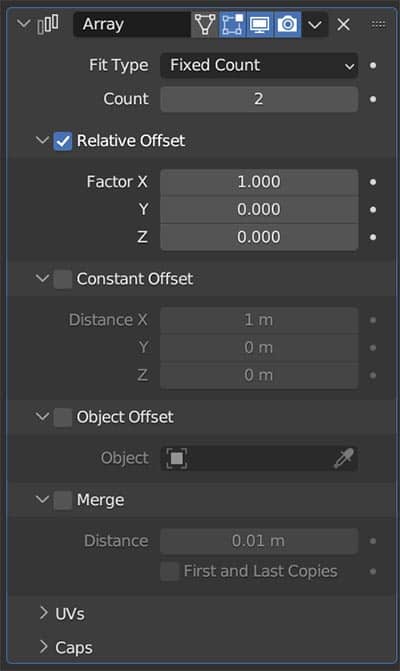
Array Offset:
The offset is how far away from each other (and in which direction) each copy in the array will be from the previous. There are three types of offset for the array modifier in Blender.


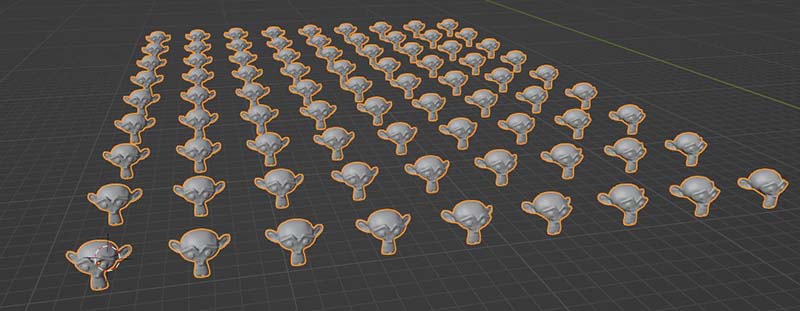
Relative Offset
Relative offset is the default offset for the array modifier. This offset can be set along the X, Y or Z axis. It can also be entered as a combination of two or all three axes.
This offset is relative to the size of the object the modifier is assigned to. A relative offset of 1 will have each copy of the object begin exactly where the last one’s geometry ends.


Raising the relative offset to 2 will cause a gap the exact size of the object to be placed between each copy. A negative offset will overlap the copies with each other.
Increasing the size of the object will increase the gap between arrayed instances.
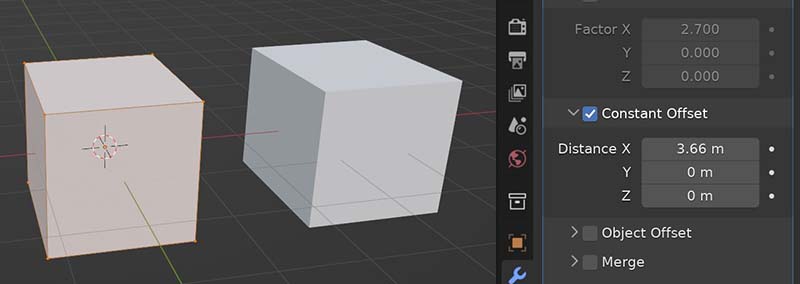
Constant Offset
Constant offset can be applied along the X, Y or Z axis (or a combination). Instead of being a distance relative to the object’s size, the distance is set and fixed in whichever units of measurement the scene is using.
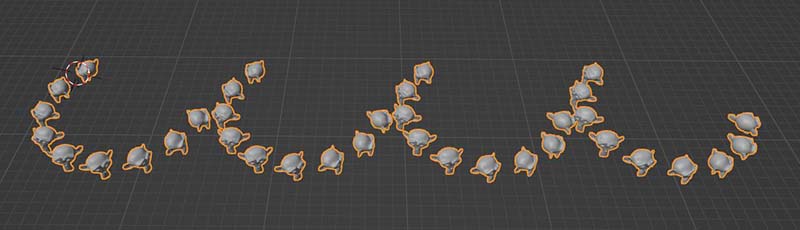
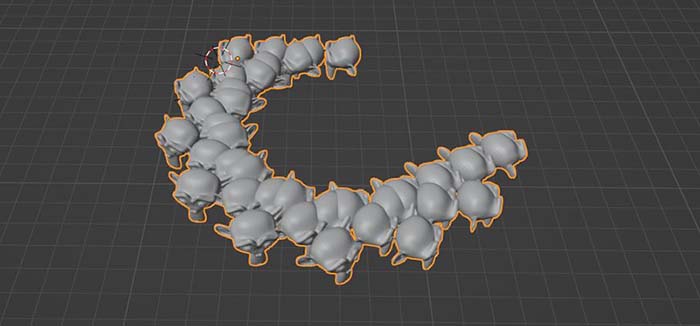
Object Offset
Object offset for the array modifier is different than relative and constant offset. It is not limited to an axis and can control both the scale and rotation of the instanced copies.
Instead of choosing an axis and distance, we select an object in the scene to use as reference for the offset. This is often an Empty Object but can be any object.
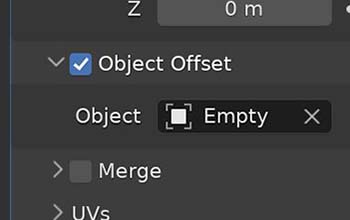
Once a reference object is selected, moving that object will adjust the array modifier’s offset. It will adjust both the distance and direction of the array’s offset.

When we rotate the defined offset object, it affects the array’s rotation.

And if we scale the offset object, the copies will scale proportionally each iteration.

The object offset feature can help create unique arrays. I’ve personally used it for spiral staircases and other effects. Here’s a short YouTube clip on it as well.


Merge
The “Merge” setting in the array modifier can be checked if we want instances of the array to merge when they are within a certain distance of each other. The distance slider can move to a maximum of 1 by default. But higher values can be typed in.

UV Offset
When we create an array the object’s materials are placed exactly the same on each Instance by default. In the array modifier’s settings, there is a UV offset feature to change the textures along either the U or V axis.

Array End Caps
We may want to cap our arrays with different objects. Of course we could do this manually, but there is a feature on the array modifier called “Caps.” We select an object for the start and end cap and it is placed on the corresponding ends of the array.
In the following example, the blue fence is an array created from a single post. The red object is what I want to use as an end cap. This is a separate object.
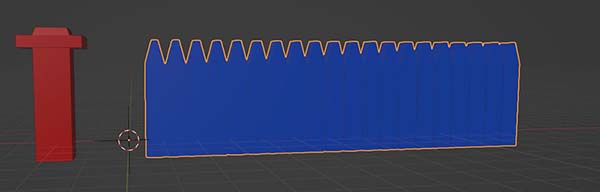
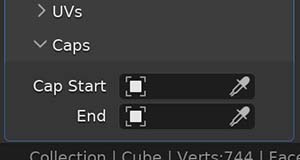
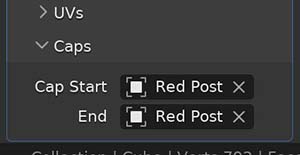
We can choose the red object from a drop-down box of all objects in the scene. Or we can use the eye-dropper tool to select the object we want as an end cap for the array.
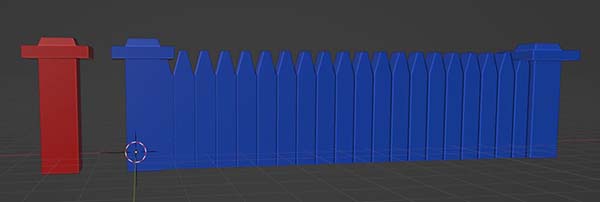
Notice the post is added to the array on each end and it is given the blue material of the arrayed object. The material of the array object overrides the material of the end cap object.
Using Multiple Array Modifiers
We can add multiple array modifiers to the same object in Blender. A simple example of this is to add an array along the X axis and then one along the Y axis to achieve something like this:
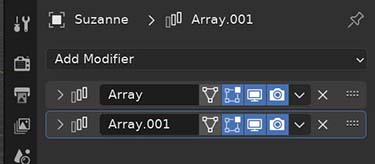
As with all modifiers, their order in the Modifier Stack matters. The modifier at the top of the stack will affect the object first. Then the second, then the third…
For example, I’ve applied two array modifiers to the same object. One modifier uses a fixed offset along a single axis. The other uses an object offset to rotate (curve) the array. Here’s what happens when the object offset (curved) array is on top:
The curved object offset array is applied first and then that array is arrayed along an axis by the second modifier. If we switch the order, we get this instead:
This time, the Suzanne is arrayed in a line four times and then that line was arrayed in a curve with the object offset array. The lesson is changing the order of the modifiers can create very different outcomes.


Creating a Circular Array
This is really bonus material since it technically doesn’t even use the array modifier. I often see Blender users asking how to create a circular array in Blender. There are several add-ons which do it, but we can also use the spin tool.
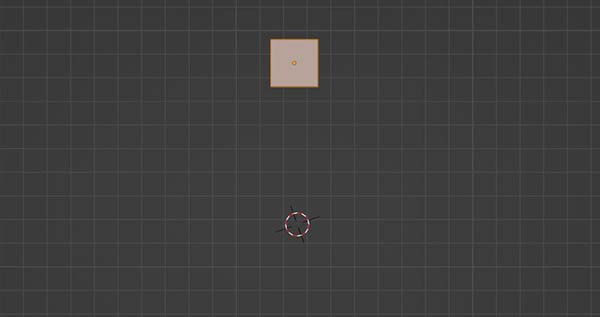
Step 1: Place Object and 3D Cursor
Place the 3D cursor where we want the center of the circular array to be. Here’s a tutorial about using and moving the 3D cursor. Place the object at the distance from the 3D cursor we want to be the radius of the circle.
Step 2: Use the Spin Tool
With the object and 3D cursor in place, select the object and enter Edit Mode. Select the entire mesh of the object by pressing “A” on the keyboard. Then use the shortcut Alt + E to activate the extrude tool menu. A menu of options appears.
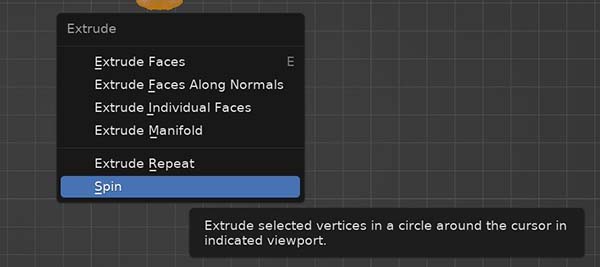
Choose “Spin” or press “S.”
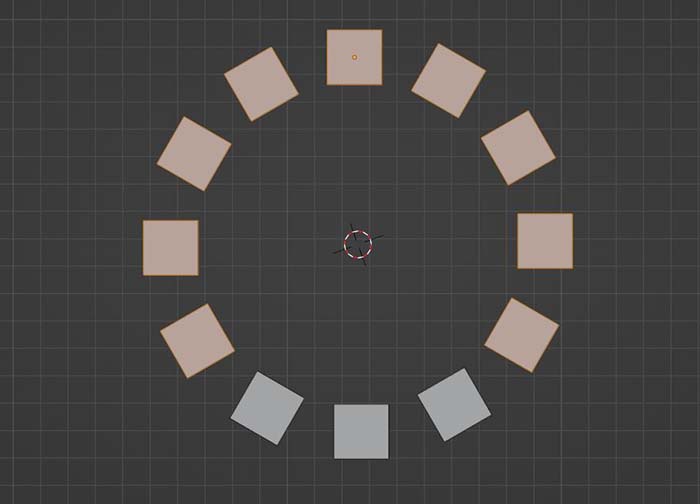
Again, this isn’t technically an array. It’s using the spin tool to make an array, but it is often what users are trying to accomplish with a circular array. Settings for the spin operation can be adjusted in the Operator Panel.
Thank You!
Thank you and I hope you found this Blender tutorial helpful! Here’s a link to the official documentation on the Array Modifier from Blender. Please have a look around the site for more on Blender 3D and digital art. I also do video tutorials on YouTube if you’re interested.
Consider signing up below for my e-mail list to stay in touch! Stay creative!
Get Brandon’s Newsletter
By submitting, you agree to receive periodic e-mails from me. You can unsubscribe at any time.