
Dynamic Sky is a free add-on that comes pre-installed in Blender. It just needs to be activated in the user preferences. The add-on allows us to create custom, procedural sky textures for our world – right inside Blender.
This page may contain affiliate links which pay me a commission if used to make a purchase. As an Amazon Associate, I earn from qualifying purchases.
Skies created with Dynamic Sky aren’t going to be as realistic as an HDRI. I have another post on how to use HDRIs in Blender. But, we can get some decent, stylized effects from the add-on that work great in both Cycles and Eevee.
How to Activate Dynamic Sky
Dynamic Sky is already installed in Blender but we will need to activate it. Go to “Edit” in the top menu and choose “Preferences.” Select the tab on the left labeled “Add-Ons.”
Use the search bar to find “Dynamic Sky” and check the box to activate it. Close the preferences window. See this post for more: How to activate add-ons in Blender.
Oh….and by the way here’s a quick video tutorial on Dynamic Sky:

How to Add a Dynamic Sky

The controls for the Dynamic Sky add-on are located in the sidebar (or the “N” menu). It’s the menu on the right of the 3D viewport and it is toggled open by pressing “N” on the keyboard.
When the add-on is activated, a tab labeled “Create” will display in the Sidebar. With this tab selected, we find our controls labeled “Dynamic Sky.” We may need to click the arrow to the left of the label to expand the controls.
To create a Dynamic Sky, press the “Create” button located in the sidebar controls.
Then, go to the World Properties Panel. In the data block menu, we will change from the default world to a newly created world that will be labeled “Dynamic_1.” The settings for the new world will now appear in the sidebar.

Dynamic Sky Visibility
The world background created by the Dynamic Sky add-on will be visible depending on your world visibility and film settings. If film is set to transparent in the Render Properties Panel, it will not display.
The world background should always display in rendered view. It can also be visible in preview mode if you click on the view options and check the box next to “Scene World.”
Dynamic Sky Settings
Here is a quick overview of each setting for Dynamic Sky. Most are fairly self-explanatory.
Scene Control

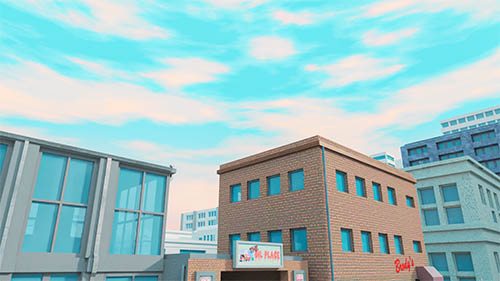
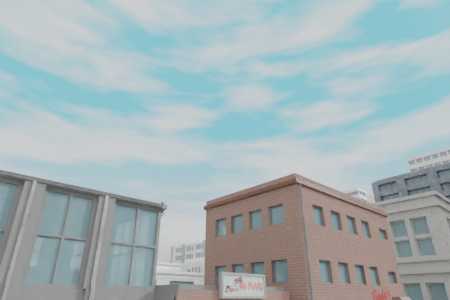
Under scene control, we can change the brightness and the shadow color saturation.
Brightness is fairly straight forward. It’s how bright the sky is. Shadow color saturation is how saturated the colors become. Higher saturation will colorize the shadows which can be a cool effect to have in a scene.
Sky Control
In the Sky Control settings, we have three color settings as well as settings for the cloud opacity and density.

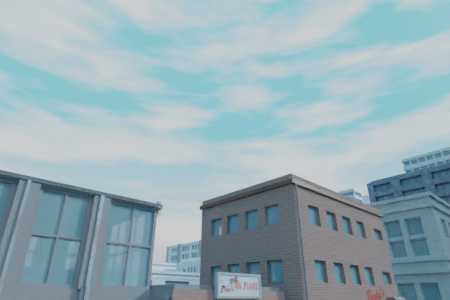
The sky color is obviously for the sky. The cloud color is self-explanatory. The horizon color is a great tool to add a different color to the horizon for a two-toned world image.
Cloud opacity is how transparent the sky will be. To completely remove clouds from the sky, turn the opacity to zero.
Cloud density is how dense the clouds will be. Only a certain portion of the sky can be covered with clouds. Turning the density all the way up will make the clouds thicker, but not cover any more of the sky.
Sun Control
In addition to getting a sky for our Blender scene, the Dynamic Sky add-on gives us a sun we can control as well.

In the sun control settings, we can control the color of the sun in the sky.
The sun value is how strong the sun is.
The soft / hard slider causes the light to cast softer or sharper shadows. This is a value between 0 and 1 with 0 being completely soft and 1 being very sharp shadows.
The last setting is similar to a track ball. We grab and rotate the sphere to change the direction of the sun. This can be confusing if you are not in the correct view, but here’s how to use it.
To adjust the direction of the sun with Dynamic Sky, press “7” on the keyboard to view the scene from “Top View.” This will align the trackball in the controls to the direction of the sun in the scene.

Now, click to drag the track ball and move the direction of the sun.


Dynamic Sky Limitations
Here are some limitations and frequently asked questions about the Dynamic Sky add-on for Blender.
Can you add stars to a Dynamic Sky in Blender?
No. The Dynamic Sky addon does not support adding stars to a sky.
Can you add multiple suns to a Dynamic Sky?
No. The Dynamic Sky addon does not support more than one sun. You could add them manually using sun lamps. Here’s a tutorial about adding lights in Blender.
More About the Dynamic Sky Add-On
The Dynamic Sky addon is bundled with Blender. That means it comes pre-installed with the current Blender version (Blender 3.4 as of this article). It was created and is maintained by Pratik Solanki under a GPL license. You can see documentation from the Blender manual on Dynamic Sky here.
Speaking of add-ons, I have a list of my favorite add-ons for Blender. I’m always adding Blender tutorials and resources to this site, so please have a look around. Also, be sure to check out my YouTube channel for more Blender tutorials. Stay Creative!
Get Brandon’s Newsletter
By submitting, you agree to receive periodic e-mails from me. You can unsubscribe at any time.