3D Text in Blender is created by adding a Text Object. Text objects are one of many types of objects in Blender. Text is great for animated intros. This tutorial will cover how to add 3D text, editing 3D text and more in Blender 3D.
This page may contain affiliate links which pay me a commission if used to make a purchase. As an Amazon Associate, I earn from qualifying purchases.
This tutorial will cover the following Blender Text topics:
How to Add 3D Text in Blender?
Text is a type of object in Blender so we must be in Object Mode to add it.
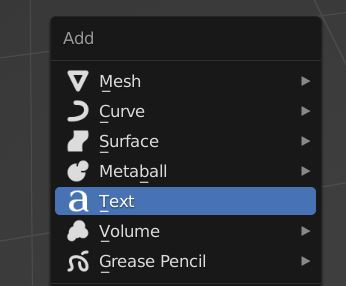
To add 3D text in Blender, hover in the 3D Viewport and press “Shift + A” to add an object. Choose the object type “Text.”
Alternatively, we can choose “Add” from the top menu and choose the object type “Text.”
The default text object will be brought into the Blender scene and will display the word “Text.”
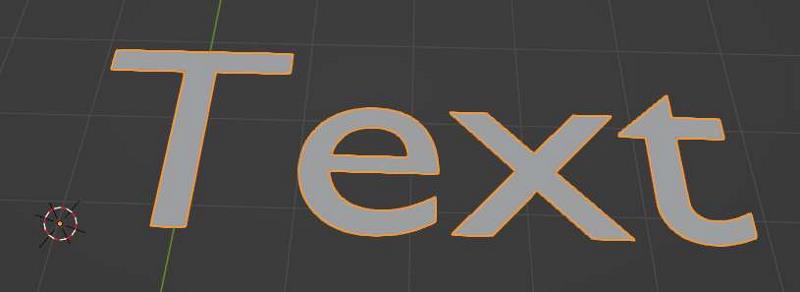
While in Object Mode, we can select and manipulate Text Objects the same way we do with mesh objects:
- We move text objects with the shortcut “G”
- We rotate text objects with the shortcut “R”
- We scale objects with the shortcut “S”
When a text object is selected, a special text tab will be added to the properties panel. This tab includes all the settings and controls for our selected text object.
However, editing text objects works a little differently than mesh objects.
How to Edit Text in Blender?
With our text object selected in the 3D viewport, we enter edit mode by pressing “Tab” on our keyboard.
Unlike mesh objects, we won’t see any vertex, edge or face options. We will instead see the text with a cursor displayed at the end of it.
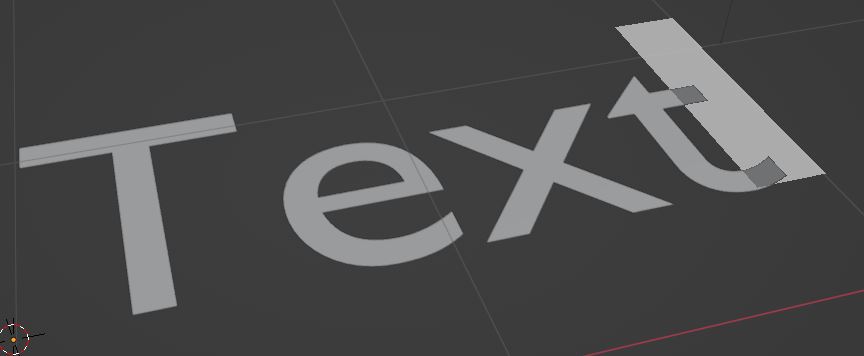
To edit text in Blender, select the text object and press “Tab” to enter edit mode. Use backspace and the keyboard to type what you want the text to say.
While in edit mode, we can edit what the text says. We can use backspace to delete the default text and type our new text. Because we are in a typing mode, the usual shortcuts won’t work in edit mode with text objects.
While in edit mode, we won’t be able to move, rotate, scale or perform other shortcuts. This is because the shortcut keys will instead type their respective letters into the text. Except for typing the actual text, all editing will be done in Object Mode.
Now when we type our text, we can return to object mode by pressing “Tab” on the keyboard.
How to Edit Text Font and Style
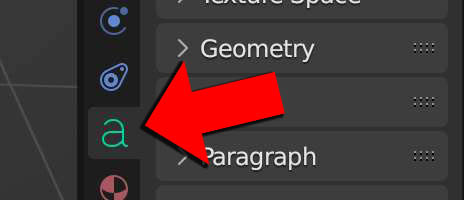
To edit the text’s font and other style settings, we must go to the Properties Panel while the text object is selected. We will find a properties tab specifically for text objects. The icon displayed on the tab is a lower case “A.”
We will cover the important text settings in the order they are displayed in the text properties panel.
Shape (Resolution of Text)
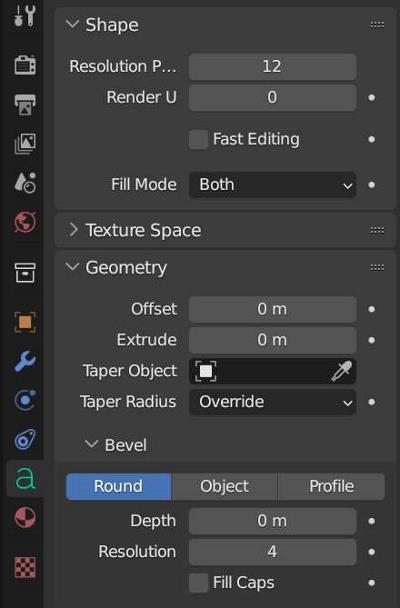
Text objects are a form of curve objects and in the “Shape” category, we can adjust the resolution of the curves used to make the text.
A higher resolution will give the text a smoother appearance but will use more data and geometry. Lower resolutions will be blockier.
A separate resolution can be set under “Render Resolution U” that can be used for only when the text is rendered.
We may be looking to add thickness and extrusion to the text object and those settings are actually in the geometry settings below.
Geometry (Giving the Text Depth)
In the geometry settings, we can make the two-dimensional text into 3D text. We do so by increasing the value in the slider labeled “Extrude.”
Also, we can make the edges of the text smoother by expanding the “bevel” tab.
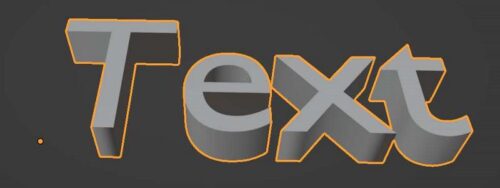
Increase the size of the edge’s roundness by increasing the bevel depth. Also, we can increase the smoothness of the bevel by increasing its resolution. Higher resolution results in more geometry when we convert the text to a mesh object (which we’ll cover below).
I have another post that covers everything about beveling in Blender.
Font
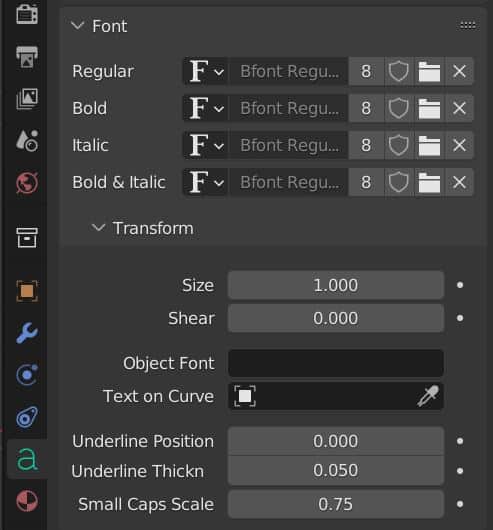
Not surprisingly, the font settings are where we can choose a font and style for our 3D text. Unfortunately, this isn’t as intuitive as most other programs.
We see the following four boxes under the font setting:
Choosing a Font
Fortunately, we can completely ignore everything except the top box labeled “Regular.” To add a font, we choose one from where fonts are stored on our computer.
Next, select the file folder icon next to the “Regular” box at the top. Then, we need to navigate to where our fonts are stored on our computer. While this may be different for every user, but if you’re using a Windows PC, they are usually located in the following directory:
C:\Windows\Fonts\
Now in the file browser, we see previews of what the font will look like if we have the view settings set to “icon.”
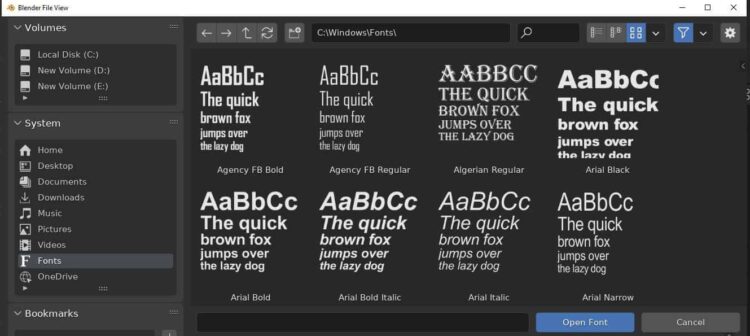
Choose a font to be loaded for the text object.
Making Font Bold or Italic
How do we make the font bold or italic? Well, you actually have to load the bold or italic version of the font in. As far as I’m aware, we can’t take a base font and make it bold or italic in Blender.
So I know this isn’t a great system. Please don’t hurt the messenger!
Font Size and Shear
When we expand the “Transform” tab, we can change the size of the font and adjust the “Shear” which will slant the text forward or backward (this could be used to italicize the font).
Font Curve on Object
We can have the text follow a curve by choosing “Text on Curve.” This will require a curve object (like a Bezier curve) to be in the scene. Then we can choose the curve from the selection box. The text will follow the curvature of the curve object.
We can manipulate the curve of the text by manipulating the shape of the curve object. This may take some playing around with to get it the way we want it.
There are a handful of other settings in the font controls that are not commonly used.
Paragraph
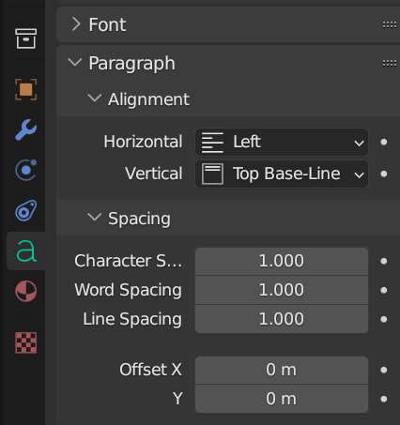
In the paragraph settings, we can change the alignment of the text both horizontally (left, right, center, justified) and vertically (top, center, bottom, etc).
We can also adjust character spacing, word spacing and line spacing. These are fairly intuitive.
Adding Materials to Text in Blender
What’s the use in having custom 3D text in Blender if we can’t give it materials? Luckily we can.
We add materials to text in Blender from the material properties tab. This is the same way we would add materials to a mesh object (with one possible exception).
From the materials properties tab, choose a previously created text. We can also create a new one just as we would with any other material. If you are looking for an introduction to the basics of materials, I have a thorough beginner’s course on my YouTube channel.

The only issue is we can’t add multiple materials to different parts of a text object. We also can’t UV unwrap a text object. So, if we want to add a single simple material to the text that doesn’t require UV mapping, we can do it all the same as we would with a mesh or any other object.
If we need multiple materials on text or need to UV unwrap it, we must convert the text to a mesh object.
How to Convert Text to Mesh in Blender
Text objects in Blender function differently than mesh objects. We may need to convert them to mesh for a variety of reasons.
Warning: Once we convert the text object to mesh, we can no longer edit what the text says or its geometry from the properties panel!
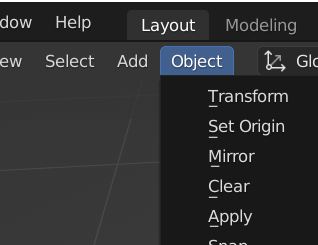
Here’s how to convert a text object into a 3D mesh object in Blender.

This will convert the text to a mesh object. The new mesh object will function like any other mesh in Blender. We can continue to model the mesh and apply modifiers to the mesh. We can animate the mesh to create animated 3D text.
For more information on Blender 3D Text – see the Blender Manual documentation.
Conclusion
Thank you for reading and I hope this covered everything you needed to know about using 3D text in Blender. Please explore my site for more Blender tutorials, tips and videos. Stay creative!
Get Brandon’s Newsletter
By submitting, you agree to receive periodic e-mails from me. You can unsubscribe at any time.


