
Blender allows us to create transparent materials for objects. Here is everything you need to know about how to add transparency to materials in Blender.
In this article, we will cover the following:
Or if you’re looking for how to render transparent backgrounds, I have a post on that.
This page may contain affiliate links which pay me a commission if used to make a purchase. As an Amazon Associate, I earn from qualifying purchases.
The Transparent Shader
One of the simplest tools for adding transparency to an object in Blender is the transparent shader. It can be added and combined with other shaders in the Shader Editor. It is a simple shader that will turn the assigned portion of the material completely transparent.

Note: Only pure white in the shader will produce transparency.
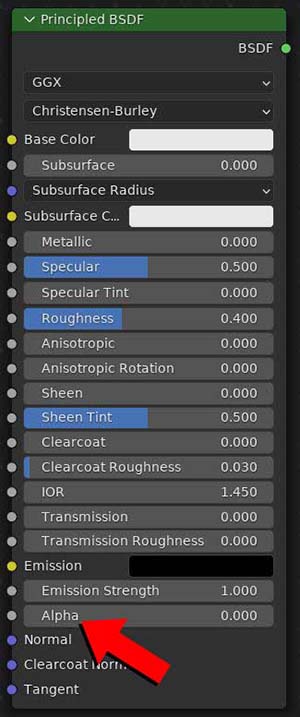
Principled BSDF Shader Transparency
We can add transparency with the default Principled BSDF Shader. Toward the bottom of the shader is a slider for the Alpha Value which defaults to “1.”
In Blender (and most other programs) Alpha represents the level of transparency for each pixel. A value of 1 is fully non-transparent while a value of 0 is fully transparent.
These values can also be represented in black and white alpha masks which we will cover next.
To make a material transparent using the Principled BSDF shader, slide the alpha value toward zero. It will become increasingly transparent as we near zero.
The following demonstration is done in Cycles.


Above is a cube with a default material. Using the alpha value in the Principled BSDF shader, the transparency is increased as the alpha value is slid to zero. Cycles transparency works very well with the alpha channel in the Principled shader.


Glass Shaders & IOR
Another common use of transparency in Blender is to create glass. But glass and other materials in the real world are not fully transparent. The way light interacts with glass is complex but can be mimicked fairly well in Blender (at least in Cycles anyway).
Glass BSDF Shader
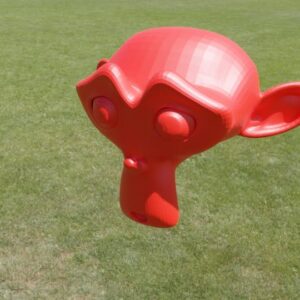
The simplest way to make glass (perhaps not the most realistic) is using the Glass BSDF Shader. In Cycles, simply plugging the glass shader into the material output of a material will give us the following result…not bad.


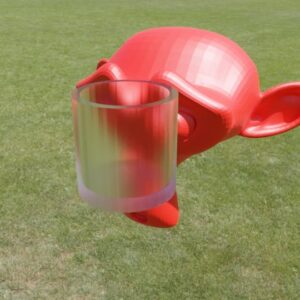
However, the Blender Manual recommends mixing the glass shader with a transparent shader because of issues with caustics and shadows.
Note: Only pure white in the color of the shader will produce transparency.
Index of Refraction
In physics, the Index of Refraction (or IOR) is a measurement of how light bends when passing from one medium to another (courtesy of the Britannica Encyclopedia).
When light hits a translucent material, it reflects in different ways depending on the material. The IOR simulates that effect in Blender.
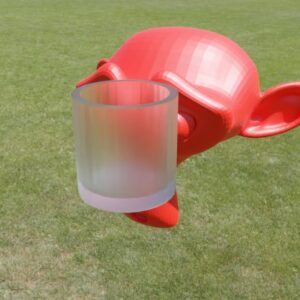
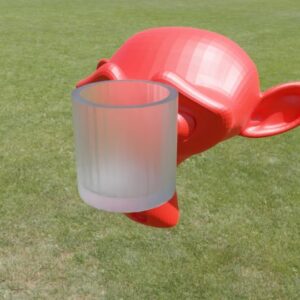
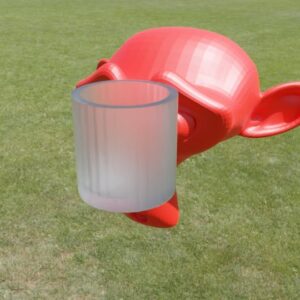
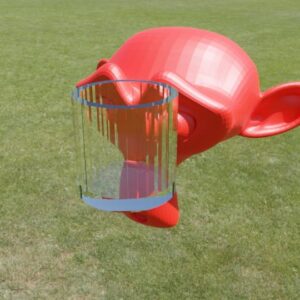
The default IOR is 1.45 because that is a standard IOR for most glass. We can play around with changing it to give the glass material different looks. An IOR closer to 1 will be closer to full transparency (when light travels straight through the surface).
Moving away from one in either direction will cause the light to refract more. Here are some examples of different IORs for the glass in the image.
The index of refraction for many materials in the real world can be found with a simple internet search. Here are a couple examples provided on the University of Maryland’s website:
Roughness
The second setting on the Glass Shader is Roughness. As in other areas of Blender, roughness describes how rough the material is at a very detailed level. Lower roughness values will be closer to fully transparent as demonstrated with the next three examples.
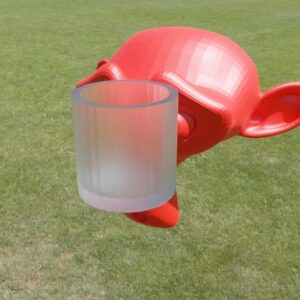
In all the above images the IOR is set to the default 1.45 but the roughness has been changed.
Alpha Masks
We may not want all areas of a material to be equally transparent. Fortunately we can use an Alpha Mask to tell Blender which parts of a material should be transparent.
An alpha mask is a black and white image that we plug into an alpha input for a node. Where the image is black, the material will be transparent. Where the image is white it will be fully non-transparent. Any grey values will somewhere in between.
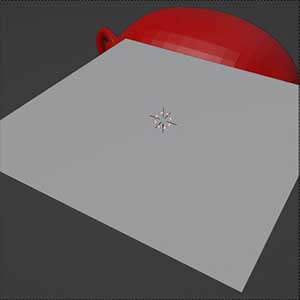
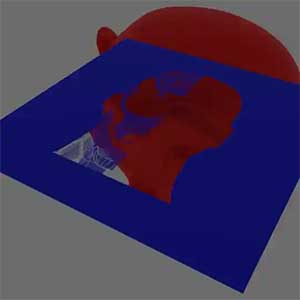
In the above example, I plugged the first image into the alpha channel of a blue Principled BSDF shader assigned to a plane. The setup is shown in the second image and the rendered result is in the third. Here is node setup used:

As we see in the above example, white areas of the image were not transparent and displayed the blue material. Areas of the image that were black displayed as fully transparent. And there were some areas with grey that were translucent.
Rendering Transparency
There are a few settings in Blender to render transparency. In the Cycles Render Engine, the transparency should render well with the default settings. If using the Eevee Render Engine, we will need to change some default settings for a material to render transparently.


Cycles
Cycles will render transparent materials pretty much out of the box. In some cases, we may need to adjust the light path settings if we are getting black areas in our render.
Light Path Settings
If you are using Cycles with a lot of transparent objects and are seeing black areas in you render, you likely need to increase the max bounces for transparency (read on).
Using Cycles, we may need to adjust the “Max Bounces” in our Light Path Settings. The max bounces setting exists to improve performance by limiting how many times Cycles will attempt to have light bounce on different types of surfaces – including transparent ones.
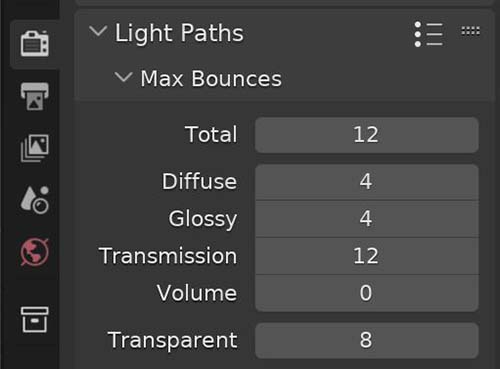
In the max bounces setting, we have a “Total” setting which caps all light bounces (except for transparent ones!). Below that are controls for Diffuse, Glossy, Transmission and Volume. In a separate box we see a control for “Transparent.”
Note: The transparent bounces are independent of the “Total” bounces and can be set to a higher value than the total.
The number in the transparent setting represents how many times the camera can see through a transparent surface before Blender stops recognizing transparency.
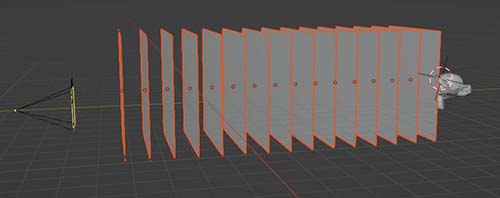
In the demonstration below, I placed 15 transparent planes between the camera and the Suzanne monkey. The default transparent max bounces is set to 8.
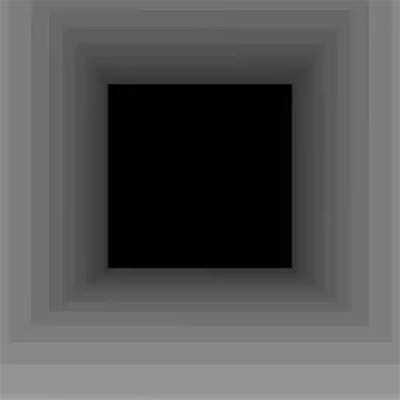
The render result is shown below. After the camera sees through the first eight planes, it stops and renders the remaining transparent surfaces as black.
To fix this, we need to increase the transparent max bounces to at least 15 (because I have 15 transparent planes).
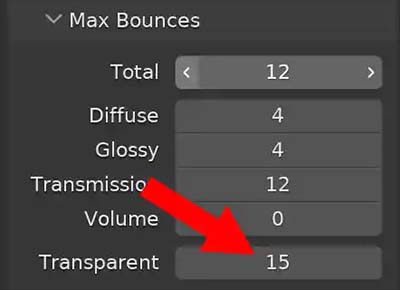
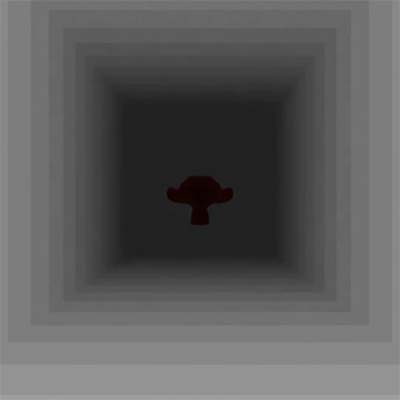
With the transparent max bounces raised to 15, the camera sees through all 15 planes and renders the monkey.
If using a large number of transparent planes (ie: leaf cards in a tree) you may need to raise the max transparency bounces very high – in the 100’s possibly). It may slow render times, but not dramatically.
Eevee
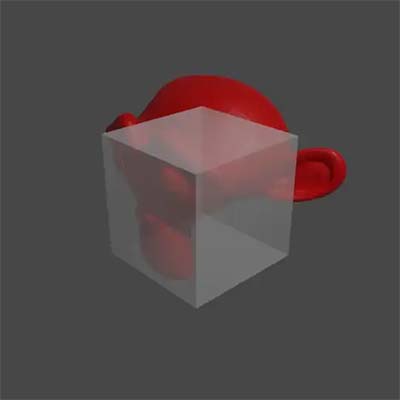
Eevee may not show transparent materials with the default settings. Instead of changing render settings, we need to adjust a setting on the transparent or translucent material itself.
Alpha Blend Mode
If we add a transparent material to Blender’s default cube and render with the default settings, the render will look like this:

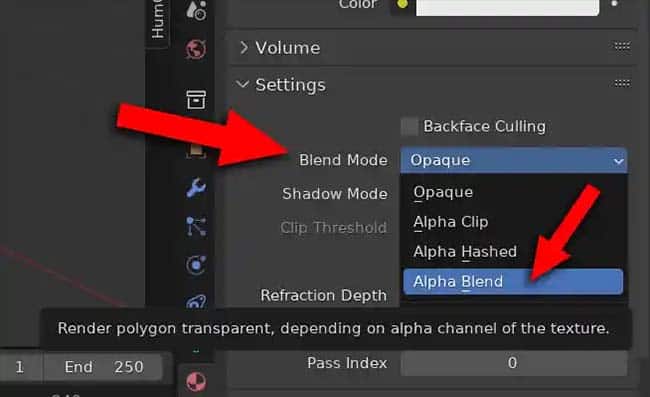
For each material with transparency, we need to go to the Material Properties in the Properties Panel. Scroll down and expand the “Settings” properties for the selected material.
Find the “Blend Mode” and change this from “Opaque” to “Alpha Blend.” This will allow the transparent areas of this specific material to be rendered properly.
Now when we render, the cube is transparent. In the image below the Suzanne monkey can be seen through the cube. Unfortunately, Eevee transparency is never going to be as accurate as Cycles.
Final Thoughts
I hope this article helped explain how to use transparent materials in Blender. Please take a look around the site for more helpful content like how to bake textures in Blender. Check out my YouTube channel or sign up for Blender tutorial updates below. Take care and stay creative!
Get Brandon’s Newsletter
By submitting, you agree to receive periodic e-mails from me. You can unsubscribe at any time.