There are several reasons to directly import an image as a plane in Blender. The “Import Images as Planes” add-on is free and pre-installed in Blender. It’s the simplest way to add an image to a 3D scene. Read on to see exactly how to import images as planes in Blender 3D.
This page may contain affiliate links which pay me a commission if used to make a purchase. As an Amazon Associate, I earn from qualifying purchases.
The Import Images as Planes Plug-In
Unlike third-party Blender add-ons, the Import Images as Planes plug-in comes pre-installed in Blender. We just need to activate the add-on in the user preferences. In the add-ons tab, find and activate “Import-Export: Import Images as Planes.”
Once it’s activated, we have a new option for importing objects in object mode.
How to Import an Image as a Plane
In the 3D Viewport, hover your cursor and press “Shift + A” to add an object. In the context menu, expand “Image” and choose “Images as Planes.”
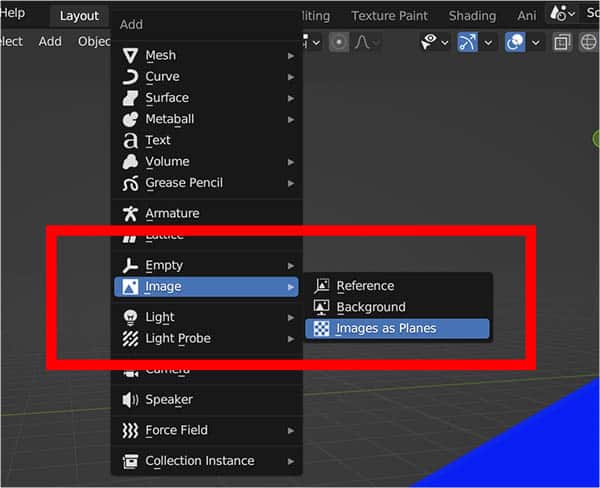
A file browser will open and we navigate to the image file we want to import.
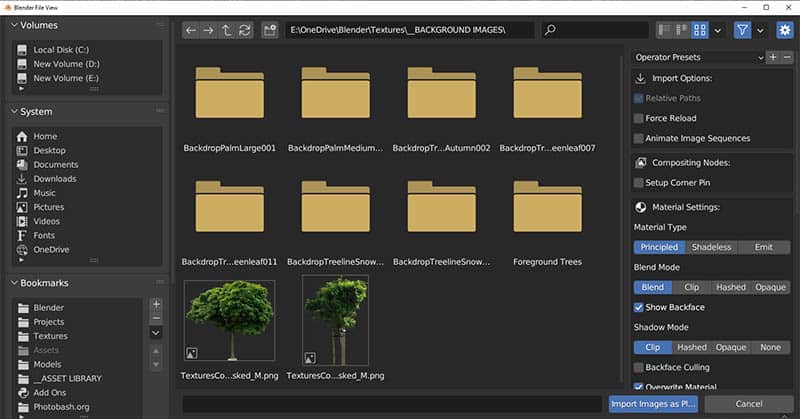
On the right side of the file browser, we have options for how to import the image (we will cover these in the next section). If you don’t need to change anything, just press the “Import Images as Planes” button.
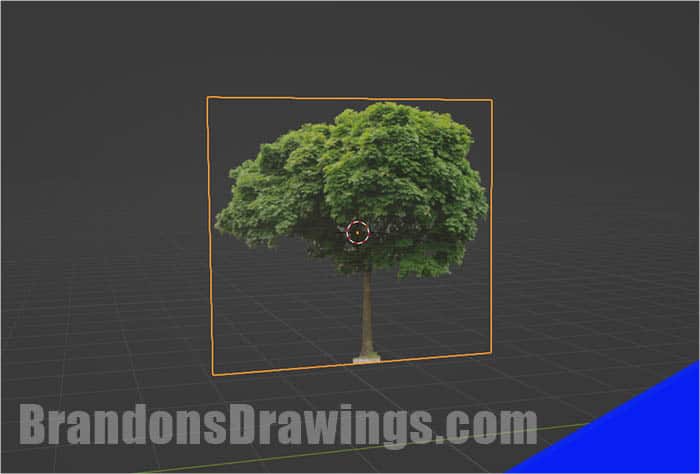
The image is brought into the 3D scene as a material texture added to a plane. The plane will automatically be in the proper aspect ratio for the image. With the default settings, transparency will be recognized for image files that support alpha (such as a PNG).
The plane will act just as any other plane object. We can enter edit mode or move, rotate and scale the plane.
Now let’s take a closer look at the settings for the Import Images as Planes add-on for Blender.
Import Images as Planes Settings
When we import an image as a plane in Blender, we have options for how the plane and material are created. These are located on the right side of the file browser window where we select the image to import.
General Image Settings
The first options are general settings for how we want the image brought into the scene.
Force Reload will force the image to be reloaded if it’s an image that already exists in the scene.
If we are importing an image sequence, we can choose to have it animated. We can set up nodes in the compositor for the image as we bring it into the scene.
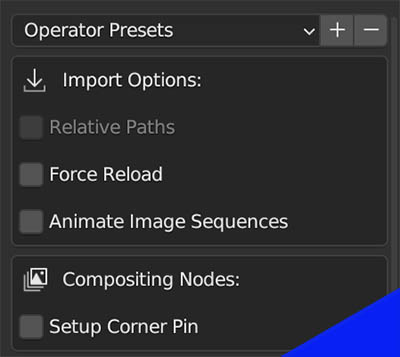
Image Material Settings
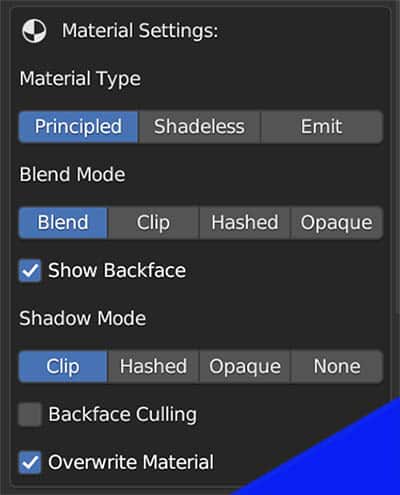
The material settings for the plane are probably the most important settings for this add-on.
Image Material Type
The material type determines how the nodes for the material will be setup. By default, they are created with the Principled BSDF Shader. It will have a simple image output.
If we choose “Shadeless” the images will be setup with a combination of nodes to remove all shading effects from the material.
The “Emit” type will use a principled BSDF Shader but with the image routed through the emission sockets. This allows the image to emit light which can be useful.
To learn more about emissive materials, it’s covered in my full guide to adding light to a Blender scene.
Image Blend Mode
The Blend Mode is how alpha transparent portions of the image will be handled. It defaults to “Blend” which will work for most scenes. If you see issues with the transparent portions (if you have any), try “Hashed” or “Clip.”
The “Opaque” blend mode will not support alpha and all transparent parts of the image will be black.
Additional Image Material Settings
We have similar options for how shadows are handled.
If “Backface Culling” is checked, the image will be entirely transparent when viewed from the back.
If “Overwrite Material” is checked (and it is by default) a new material will overwrite the old material if importing an image already in the scene.
Image Texture Settings
The texture settings only apply if we are going to be using the material as a texture.
There are likely advanced uses of these settings that are beyond me. I have never used them.
I recommend leaving the texture settings for the imported image at the default unless you know what you’re doing.
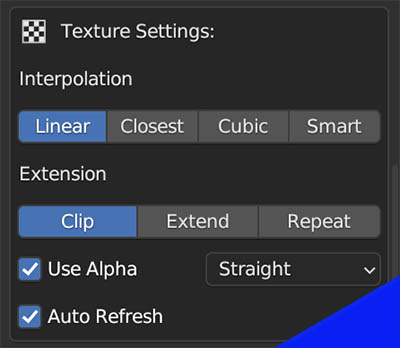
Image Position Settings
The image position settings adjust how the image is placed when brought into a scene. In general, we will want to use the default settings.
The Plane Dimensions control how large the plane that’s created for the image will be. By default this is “absolute” but we can manually change the height.
If we change the plane dimensions to “Camera” the image will take up the entire vertical length of the camera view. With this setting, we can import the image as a background image.
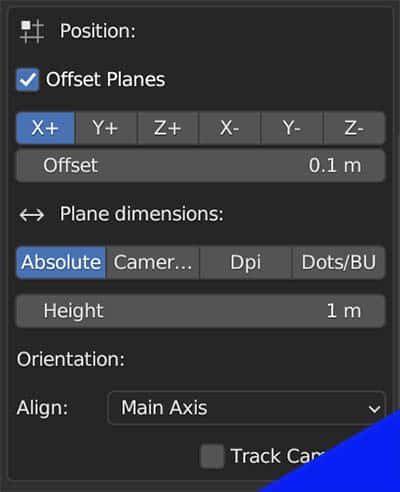
The orientation settings change which direction the image will be aligned to.
An interesting feature is the “Track Camera” checkbox at the bottom. If we check this, a constraint will be applied to the image so it is always facing the camera. If we move or animate the camera, the Image as Plane will move and rotate so it is always facing it.
Here’s an introduction on how to animate in Blender.
Conclusion
If you ever need to use an image in your scene as a background, decal or for other reasons, the Import Images as Planes add-on is a great tool. It comes with Blender for free, you just have to activate it in the user preferences.
Please have a look around the site. I have lots of helpful Blender tutorials for free. If you’re interested in Blender add-ons, be sure to check out this list of my favorite free add-ons for Blender. As always, stay creative!
Get Brandon’s Newsletter
By submitting, you agree to receive periodic e-mails from me. You can unsubscribe at any time.


