In Blender and other 3D software programs, the object origin point (or “object origin”) is an important reference point for 3D objects. Here’s a quick rundown of everything you need to know about object origin points in Blender 3D.


This page may contain affiliate links which pay me a commission if used to make a purchase. As an Amazon Associate, I earn from qualifying purchases.
What is an Object’s Origin Point in Blender?
In Blender, 3D space is essentially infinite. Three dimensional objects are assigned a single point in 3D space to serve as reference for where the object is placed. A single point (such as the origin point) has no depth, width or height.
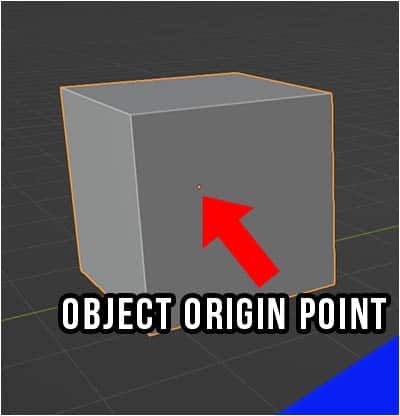
An object’s origin point is represented in Blender as a small orange dot. When an object is selected, you will notice the dot.
Even if you enter edit mode and delete all of a mesh object’s geometry, the object will still exist and will still have an origin point.
Origin points of unselected objects will not appear by default in the 3D viewport (only those of selected object).
By default, the origin point will be in the center of a new object when it is created. However, as we model and change the geometry of an object it may no longer be centered.
When we move an object to a location in Blender, we are giving its origin point a new location in 3D space. The location of the mesh will be based off its relative location from the origin point.
Mesh objects are not the only type that have origin points. All objects have them. This includes empties, curves, cameras, lights and more.
Object Origins as Transform Reference Points
Whenever we move, rotate or scale an object in Blender, we need to do so from a designated reference point. The reference points can be changed, but object origin points are often used.
The reference point for transformations can be changed using the “Transform Pivot Point” menu at the top of the 3D viewport.
All options except “3D Cursor” take the object origin point(s) into consideration when calculating this.
If you’re having problems with how an object is scaling or rotating, you may need to check that your origin points are where they should be. If they’re not, you may need to move the origin points.

How to Move an Object’s Origin Point in Blender
When we move an object in object mode, the origin point moves with the object. If we enter edit mode on a mesh object and move the mesh, the origin point for the object does not move in the 3D scene.
To move an object’s origin point, select the object in object mode. Go to the “Object” menu at the top of the viewport and choose “set origin.” Five options will appear for where we can place the object origin.

Set Geometry to Origin
The first option labeled “Geometry to Origin” will move the entire geometry of the object and center it around the existing origin. The result will be that the object itself moves and the origin point does not.
Set Origin to Geometry
The second option, “Origin to Geometry” will move the origin point to the central (or “mean”) location of the mesh. In cases where you don’t want the object to be moved in the scene, this is more likely what you want to use.
Set Origin to 3D Cursor
The option “Origin to 3D Cursor” is a method to place the origin point at a specific location in 3D space is to move it to the location of the 3D cursor. We of course need to first move the 3D cursor to where we want it. This is useful for placing origin points on corners or edges of an object.


Set Origin to Center of Mass (Surface)
The option of “Origin to Center of Mass (Surface)” calculates the center of the geometry using the surface area. This will often give a similar result to “Origin to Geometry” but may be more appropriate depending on your specific need.
Set Origin to Center of Mass (Volume)
The final option for how to move the object origin is labeled “Origin to Center of Mass (Volume)” and is calculated using the volume of the object as opposed to its surface area. The result may be different depending on the shape of the object.
This method requires the mesh to be a manifold mesh (fully enclosed, no holes) and its normals must be consistent. Again, for most applications “Geometry to Origin” will achieve the result you are looking for to center the origin point inside the object.
Here’s a link to more lessons about navigating Blender and its User Interface.
Author:
Brandon Stocking

Get Brandon’s Newsletter
By submitting, you agree to receive periodic e-mails from me. You can unsubscribe at any time.