High Dynamic Range Images (HDRIs) are great tools in Blender for adding a background or lighting to a scene. But sometimes we want them rotated. Here’s a step-by-step tutorial on how to rotate an HDRI in Blender 3D.
This page may contain affiliate links which pay me a commission if used to make a purchase. As an Amazon Associate, I earn from qualifying purchases.
HDRIs in Blender
HDRI backgrounds in Blender are 360 degree wrapped images that serve as both a background and a source of lighting.
Let’s say we have an HDRI installed in our scene. I covered how to set up an HDRI in another article. But, we want to rotate the HDRI. It’s a fairly easy process. It’s done in the Shader Editor with the addition of just two nodes.
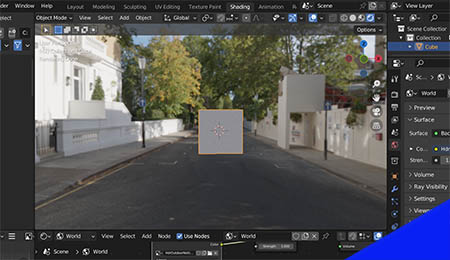
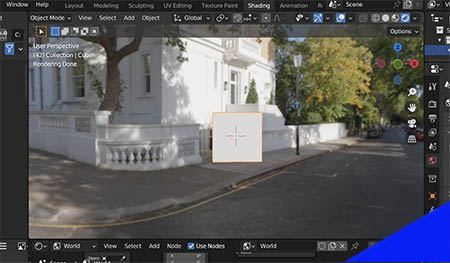
For example, the following two images show an HDRI from Poliigon added to a default Blender scene and the same HDRI rotated 30 degrees.
How to Rotate an HDRI in Blender
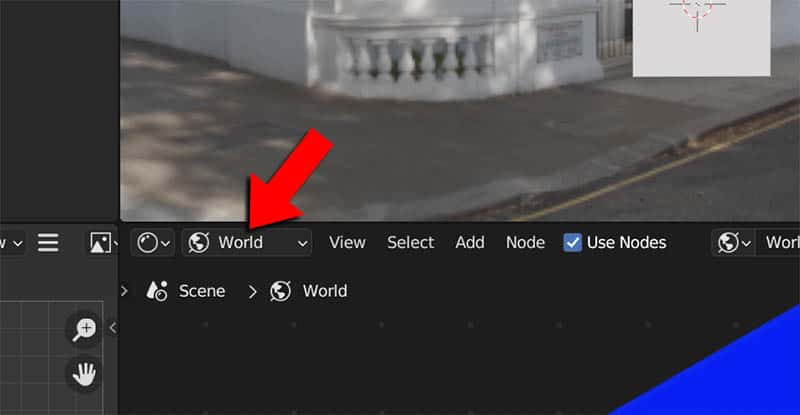
To rotate an HDRI background in Blender, go to the Shader Editor. In the top left corner, we need the drop-down selector to be set to “World” instead of object.
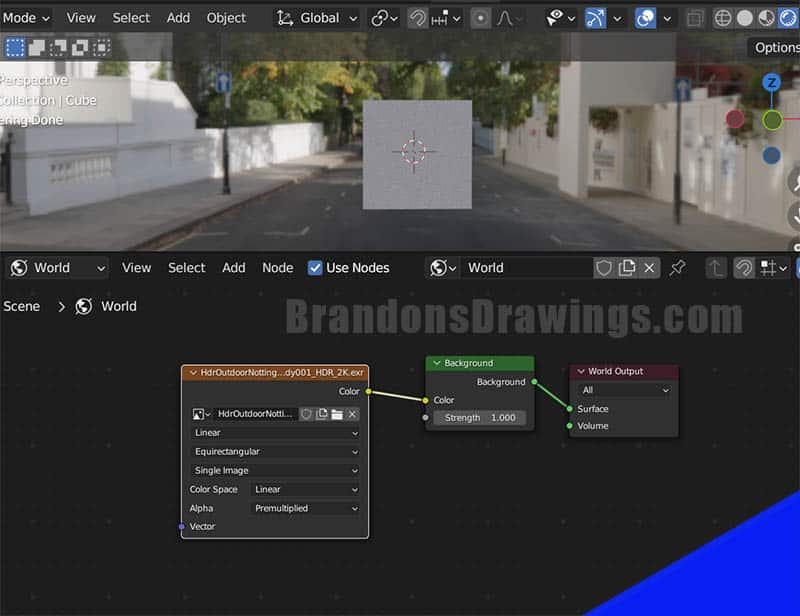
If we have the HDRI set up properly, we should see something like this in the Shader Editor:
Step 1: Add a Mapping Node
The first thing we need to do is add a mapping node. Press “Shift +A” on the keyboard to add a node and search for the mapping node. It can also be found by browsing the “Vector” category of nodes.
Drag to connect the purple output socket of the mapping node into the purple input socket labeled “vector” on the environment node.
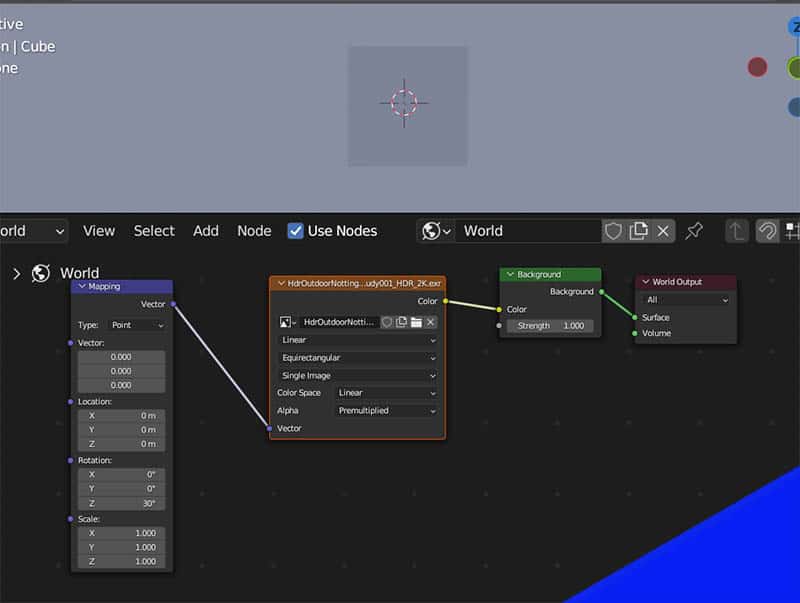
The HDRI will temporarily disappear. That’s ok. It will be visible after the next step.
Step 2: Add a Texture Coordinate Node
The second step is adding a texture coordinate node and connecting it to the mapping node.
Press “Shift +A” on the keyboard and search for a texture coordinate node. It can also be found by browsing to the “Input” category of nodes.
There are several output sockets on the texture coordinate node and a few of them will work. I recommend using the “Generated” output socket and connecting that to the purple input socket labeled “Vector” on the mapping node.
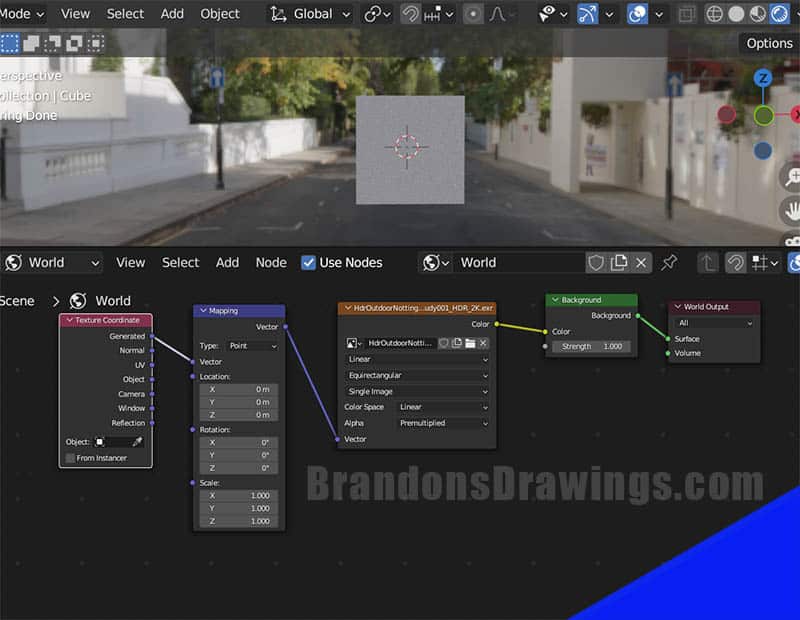
You may think we would connect the texture coordinate to the “rotation” input on the mapping node, but it needs to go to the “vector” input.
Step 3: Adjust HDRI Rotation
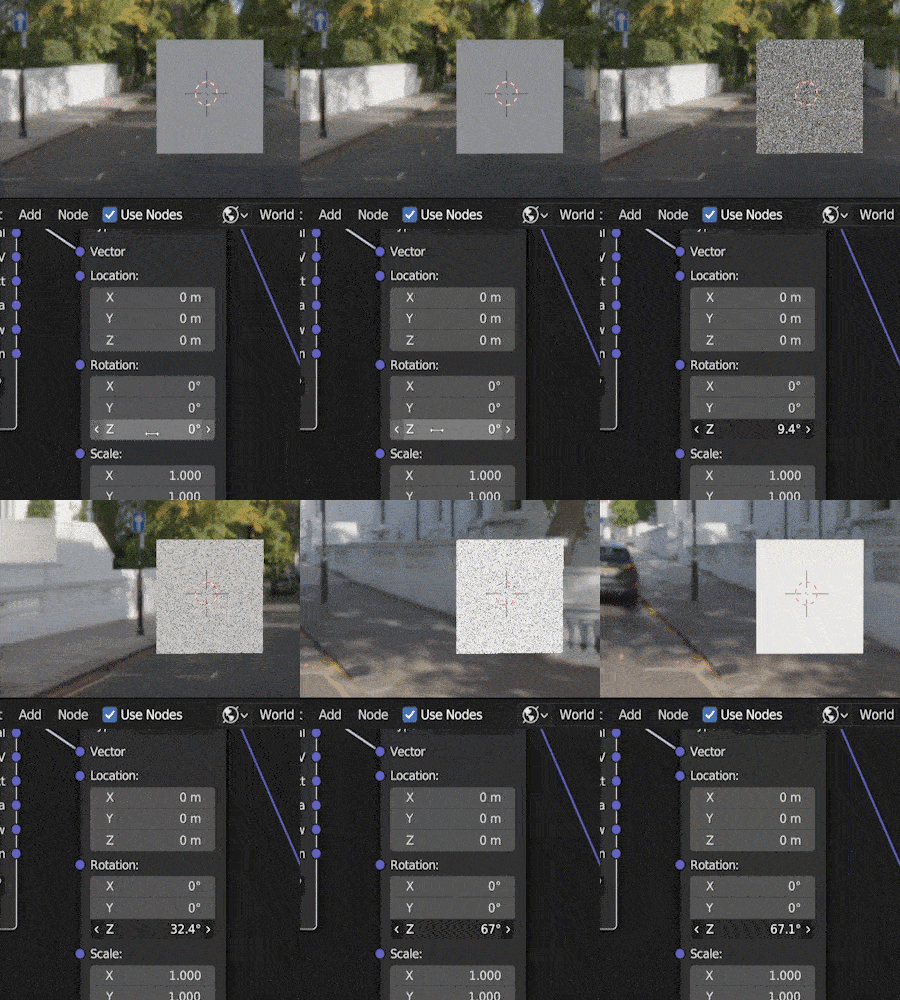
The next step is to adjust the HDRI’s rotation by using the “rotation” controls on the mapping node.
We can adjust on the X, Y or Z axis.
In most cases (and in the example above) you’ll want to rotate along the Z axis to spin the HDRI.
Rotating on the X or Y axis will cause the HDRI to be tilted (maybe that’s what you want).
That’s It
Congratulations, that is how to rotate an HDRI image in Blender. Check out my YouTube channel filled with quick tutorials and join my e-mail list below for special Blender tips sent straight to your inbox. Stay creative!
Get Brandon’s Newsletter
By submitting, you agree to receive periodic e-mails from me. You can unsubscribe at any time.


