In Blender and other 3D software, the 3D Cursor is an important tool for scene navigation. Here’s how to move the 3D cursor in Blender and how to reset its position.
This page may contain affiliate links which pay me a commission if used to make a purchase. As an Amazon Associate, I earn from qualifying purchases.
What is the 3D Cursor in Blender?
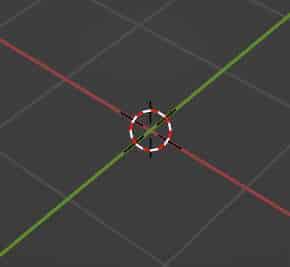
The 3D cursor is a gizmo which originates at the world origin of every Blender scene. It’s a white and red ring with black points extruding in four directions.
The 3D cursor marks where new objects or geometry is placed in a scene. In Blender, here are some of the things we use the 3D cursor for:
How to move the 3D Cursor in Blender
There are three ways to move the 3D cursor in Blender.
1. Move the 3D Cursor Using a Shortcut
The shortcut to move the 3D cursor in Blender is Shift and right click with the mouse. See my full list of Blender Shortcuts to learn more.
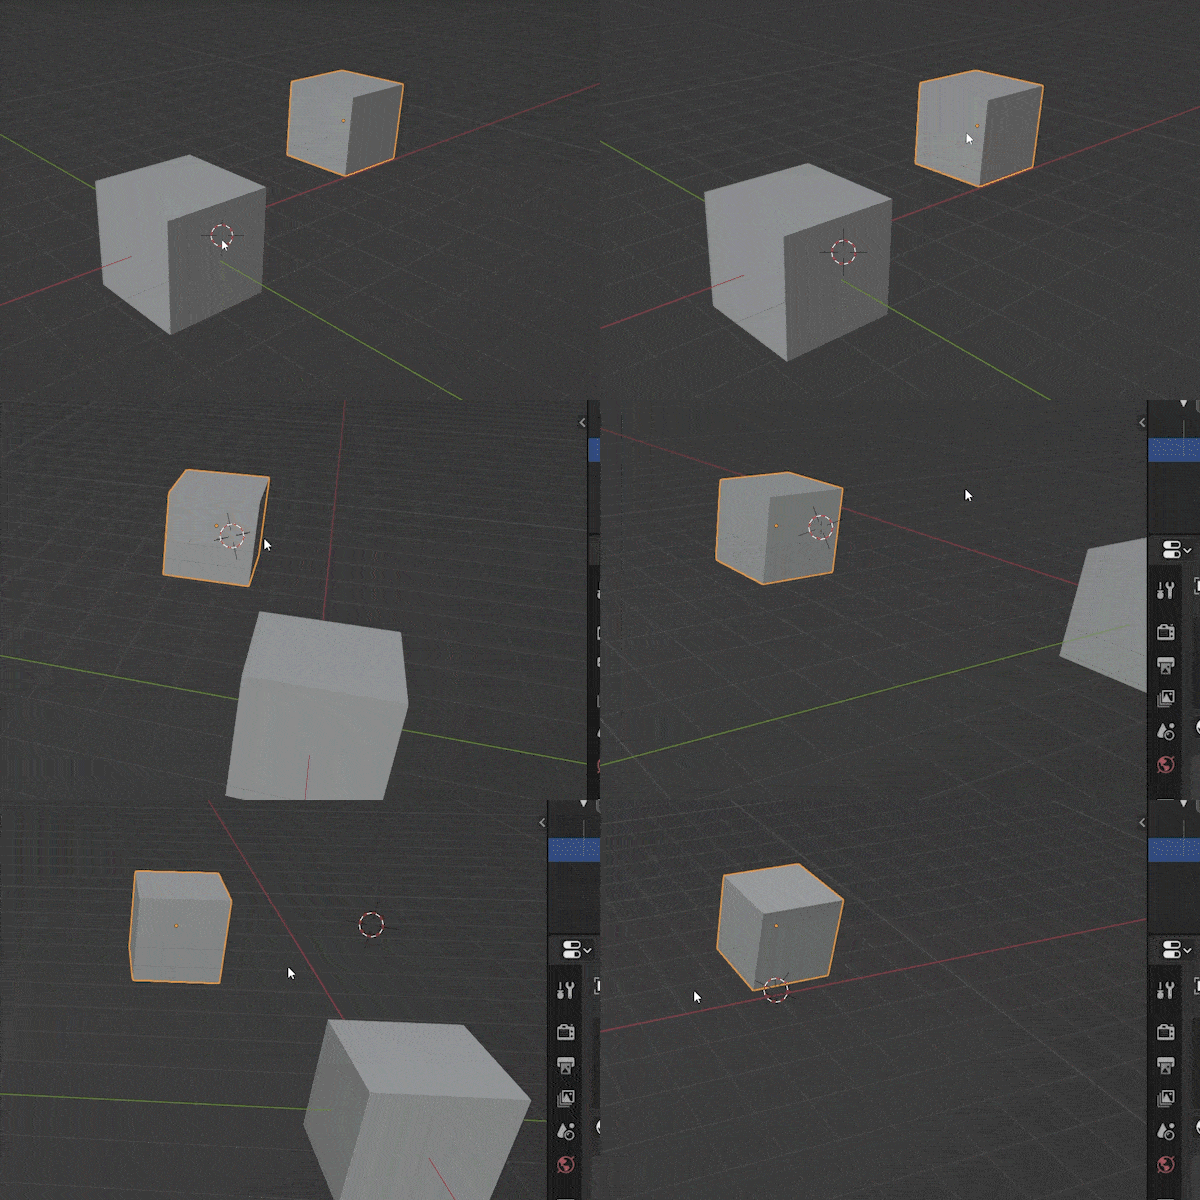
If we click onto an object, the 3D cursor will snap to the surface of the object. If we click into 3D space, the cursor will remain at the depth it was previously, but move to the position from the current view. This is so the cursor is not placed infinitely far away from the camera.
2. Use the “Move 3D Cursor” Tool
In the toolbar to the left of the 3D Viewport is a tool to move the 3D cursor. To toggle the Toolbar open and closed, we press “T” on our keyboard. In both Object Mode and Edit Mode, the tool will be the second from the top.
When we select the Move Cursor Tool, we simply left click in the 3D viewport and the cursor will be moved.
The same rules apply to how deep the cursor will be placed. If we click onto an object, the cursor will snap to the object’s surface. If we click in 3D space, the cursor will remain at its previous depth but move to the location from the current view.
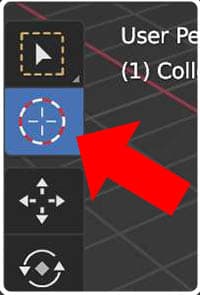
We will not be able to make selections of objects or geometry while using the move cursor tool. We have to switch back to the selection tool above it to continue selecting.
3. Move or Reset the 3D Cursor with the Pie Menu
The third way to move the 3D cursor in Blender is to use the pie menu. This is also how to reset the 3D cursor’s location in Blender. While in the 3D viewport, press “Shift + S” to open a pie menu that contains eight options.
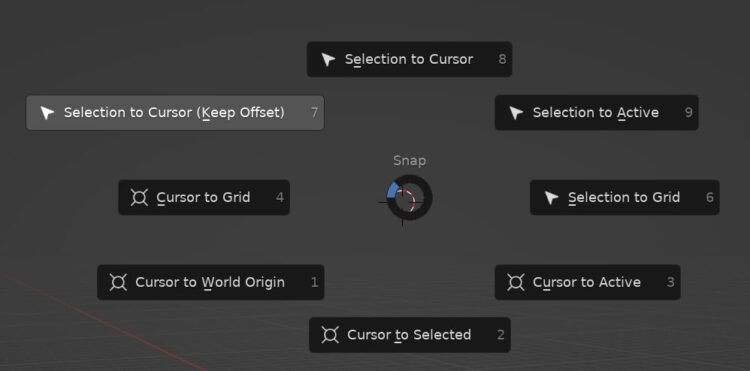
Not all of these options are for moving the cursor. Notice in the image above that each option has a number next to it. These are shortcuts that can be pressed while the pie menu is open to perform the task next to the number.
Each of the following options move the 3D cursor and can be used for more precise placement of the cursor in our scene.
#1: Cursor to World Origin
Option #1 moves the 3D cursor to the World Origin of the scene. The world origin is where the X and Y axes intersect at the center of the scene.
By the way, I have a glossary of Blender terms on the site if you want to learn more Blender terminology.

#2: Cursor to Selected
Option #2 moves the 3D cursor to the location of whatever is selected in the 3D viewport. If a single object is selected in Object Mode, the cursor moves to the origin point of the selected object.
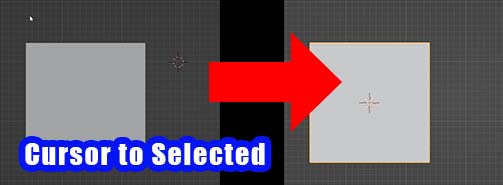
If multiple objects are selected, the cursor will move to the average (mean) location of the origin points of the objects.
The function will work similarly in Edit Mode. If a single vertex, line or face is selected, the cursor moves to the location of the selected part of the mesh. If multiple elements are selected, the cursor moves to the mean location (in the middle of them).
#3: Cursor to Active
Option #3 is “Cursor to Active.” If we have multiple objects selected in object mode and choose this option, the cursor will move to the origin point of the active object.
Only one object can be the active object at any time. It is usually the last selected object and has a yellow outline in the viewport instead of an orange outline.

The same applies in edit mode. Regardless of which selection mode we are in (vertex, edge or face), the last selected element will be the active element and will display white instead of yellow. In edit mode, “Cursor to Active” will move the cursor to the active element’s location.
#4: Cursor to Grid
The 4th option is “Cursor to Grid” and refers to the grid displayed in the 3D viewport.
This option will move the 3D cursor to the closest intersection of X-axis gridlines and Y-axis gridlines.
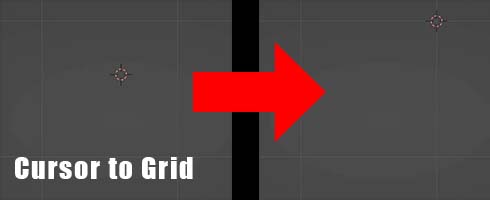
It will completely ignore the Z axis and won’t affect the height of the 3D cursor in the scene. This will be most noticeable in Top View.
Here is Blender’s own explanation of the 3D cursor if you’d like to learn more.
Conclusion
I hope this explained everything you need to learn about how to move the 3D cursor in Blender and how to reset the location of the 3D cursor when you need to. Please have a look around the site as I’ve tried to pack it full of helpful Blender tutorials. I also have a YouTube channel with Blender tutorials for beginners.
Join my email list for quick tips and Blender news every couple weeks. Stay creative!
Get Brandon’s Newsletter
By submitting, you agree to receive periodic e-mails from me. You can unsubscribe at any time.


