The knife tool is used for 3D modeling in Blender. It can be messy but useful in cutting custom geometry right into an existing mesh. The knife tool is activated using the keyboard shortcut, “K.”
Keep reading for more on how to use the knife tool in Blender 3D.
What Does the Knife Tool Do?
The knife tool allows us to drag our cursor along the surface of a mesh to create new geometry as we drag. It can also create straight geometry cuts between two or more points. The knife tool adds a vertex when it crosses an existing edge and connects the vertices it creates.
It will only create new geometry when it crosses an existing edge or when we click in a specific location that is not on an existing edge or vertex.
We can use the knife tool to make single cuts, multiple cuts or closed-loop cuts on an object. The knife tool can be used on one or many mesh objects at a single time.
The knife tool is generally used only when you really need it. It’s not one of the four most common tools I use for modeling.
How to Use the Knife Tool in Blender
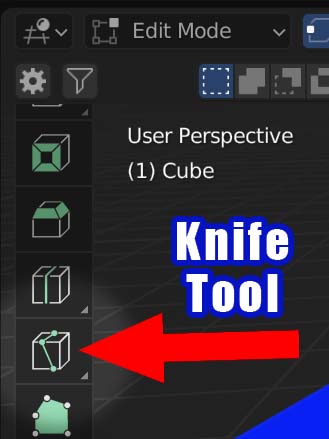
The knife tool can be activated in Edit Mode either by clicking the knife tool icon in the toolbar of the 3D viewport or by using the shortcut “K” on the keyboard.
There are a few ways to make cuts covered below, but when we are finished cutting, press “Enter” on the keyboard to confirm the cut.
When the knife tool is active, a red line will appear on the mesh to indicate where the knife cuts will be made. Red squares will indicate vertices created by the cutting we have done so far.
The knife tool is one that may be easier to use with a good drawing tablet like this one on Amazon.
Create a Single Cut
To make a single, non-straight cut with the knife tool in Edit Mode, press the keyboard shortcut “K.” Click and hold the left mouse button. Drag your cursor over the surface of the selected object. As you cross edges of the geometry, red squares will appear showing where the cut will add new vertices. Press “Enter” to confirm the cut.
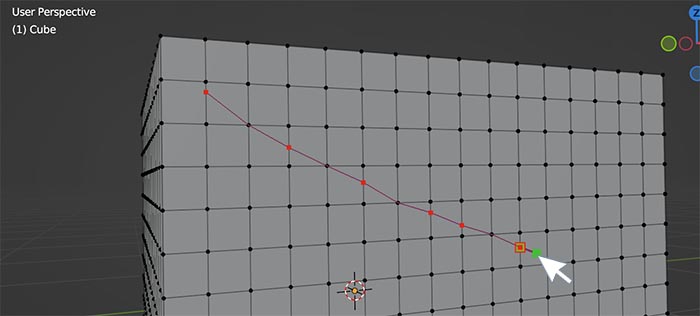
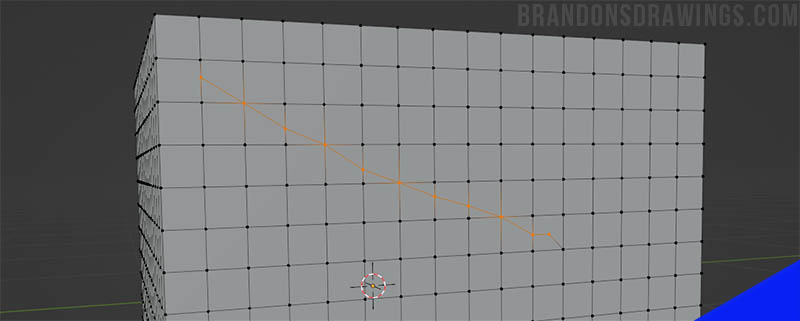
The above instructions will create a single cut from the first edge we crossed with our cursor to the last. The cut will follow the general direction in which we drag the cursor.
It will also connect the first and last vertices created to the nearest edge if they are not created on an existing edge.
Close the Loop of a Cut
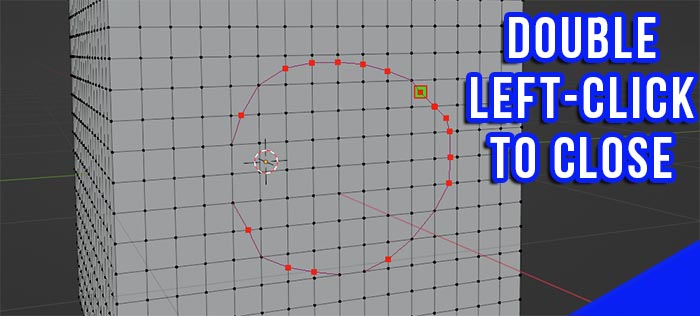
If we want to cut a closed shape (a circle for example) we can connect the last vertex created with the first vertex we created by double-clicking the left mouse button.
Create a Straight Cut
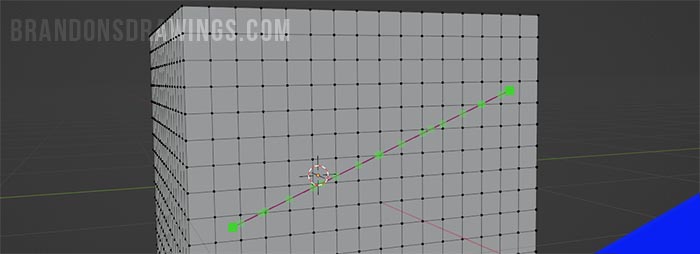
To create a single, straight cut with the knife tool in Blender, press the keyboard shortcut “K” and left click the location where the cut is to begin. Do not hold the left mouse button down. Left click again in the location we want the cut to end.
A straight line of cuts will form between the two points. Press “Enter” on the keyboard to confirm the knife cut.
Restrict Knife Cut Along Axis
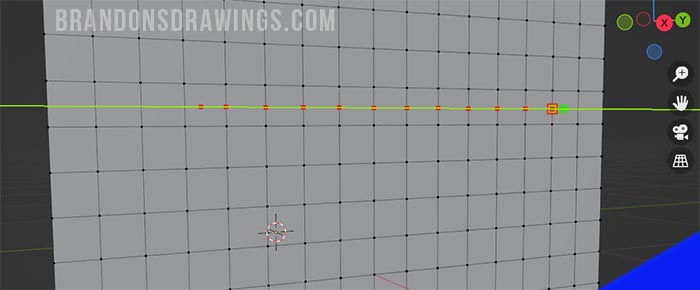
When the knife tool is activated and once we place a starting point of a cut, we can restrict the cutting to be along one axis. To restrict the knife cut along an axis, press either X, Y or Z. Then move the mouse and the cut will remain straight along the designated axis.
Create Multiple Cuts at Once
Before we confirm a cut with the knife tool, a red line will remain between the last cut and our cursor. This allows us to continue the first cut in a different direction by again dragging or left clicking.
If we want a break between where we have cut and the next area we wish to cut. In other words, if we want to make a second, unconnected cut, without confirming the entire knife operation. We right click with the mouse and the knife tool will disconnect but remain active.
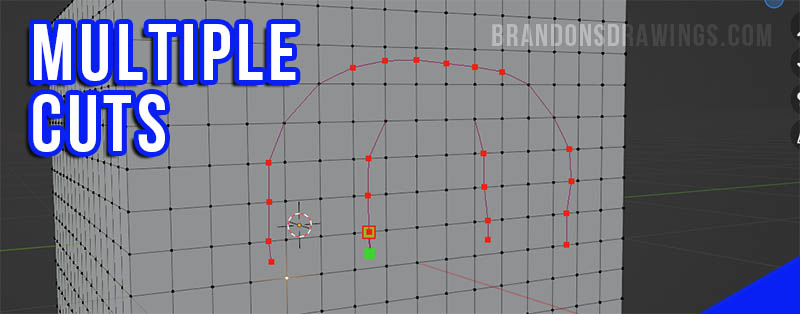
We can then left-click somewhere else on the mesh to begin a new, disconnected cut. We can do this as many times as we wish before pressing “Enter” to confirm the cut or “ESC” to cancel all of the cuts.
Restrict Knife Cut to Selected Mesh
We can limit the knife cut’s effect to only the selected portion of an object’s mesh. Prior to doing this, select the area we want to limit the cut to. I recommend being in Face Select Mode to do this. We will only be able to cut within this portion of the mesh.
To restrict the knife tool to the selected area of a mesh, use the keyboard shortcut “Shift + K” instead of “K.” The knife operation will work the same, but only cuts across the selected geometry will be made.

Cuts made outside the selection area will not be made.
How to Cancel a Knife Cut
If we begin to make a cut, but no longer wish to, we can cancel the knife tool operation by pressing “Escape” (ESC) on the keyboard.
If we have already confirmed the cut by pressing “Enter” we will need to undo the cut using the shortcut “Ctrl + Z.”
Reasons Not To Use the Knife Tool in Blender
I referred to the knife tool as “messy” when we began. While the knife tool gives us the freedom to make cuts almost anywhere on a mesh, it is not a precise modeling tool. Sometimes that’s good. Sometimes it’s bad.
The knife tool can (and in most cases will) create triangles and ngons which are not ideal for geometry. This will become problematic if we try to animate the object later. For some, it may not be an issue.
In general, I only recommend using the knife tool when there’s not another alternative to achieve the modeling effect you’re going for.
See the Blender Manual for more about using the knife tool in Blender.
Conclusion
The knife tool is useful for making custom cuts on mesh geometry. The benefit is the flexibility of the knife tool while the drawback is a lack of precision and the “messy” geometry it can create.
The shortcut to activate the knife tool is “K” and we press “Enter” to lock the cuts into place. There are different ways to create cuts and if we don’t like a cut, we can press “Escape” to exit the operation.
I hope this helped. Please take a look around my site. I try to provide a lot of free resources for learning Blender 3D. I also have a YouTube channel with free video tutorials. Thank you and stay creative!
Get Brandon’s Newsletter
By submitting, you agree to receive periodic e-mails from me. You can unsubscribe at any time.


