Blender 3D is a powerful software with a sleek one-window interface. The key to working efficiently in Blender is understanding how to use workspaces. Here’s everything you need to know.
This page may contain affiliate links which pay me a commission if used to make a purchase. As an Amazon Associate, I earn from qualifying purchases.
What are Workspaces in Blender?
Workspaces in Blender are custom layouts for the user interface. They are simply combinations of editors (different screens in Blender) arranged in a specific way.
When we open Blender, we are given several default workspaces built in. You can see these at the top of the user interface. Clicking on a workspace tab will change the interface to that workspace.

Each workspaces is designed to give a user the tools they will need for certain tasks such as modeling, shading, animating, compositing, etc. Below is the default “Layout” workspace in Blender.
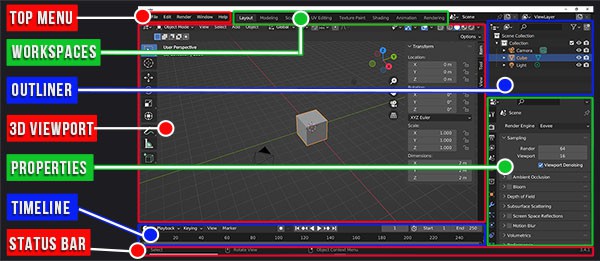
The layout workspace in Blender includes a large 3D Viewport in the center. On the right are the Outliner and the Properties Panel. At the bottom is a Timeline Editor. These are the basic tools for laying out a scene.
We can also change the default workspaces or create brand new ones. If you can’t see all of the workspaces, hover your cursor over the workspaces and scroll with the middle mouse wheel.
At the end of the workspaces is a plus (+) icon. Clicking this will open the “Add Workspace Menu” and allow you to choose from additional workspace presets or to duplicate the current workspace.
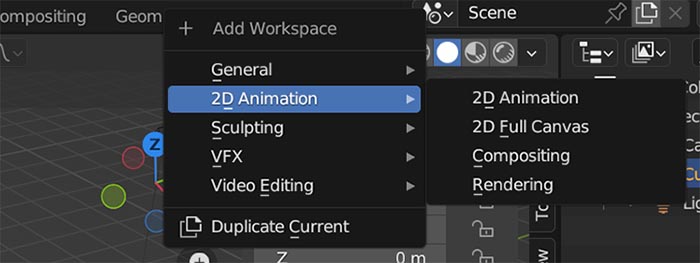
The ability to customize many different workspaces gives us full control over how the Blender user interface appears.
The Default Workspaces in Blender
The default Blender startup file has several pre-constructed workspaces built for different purposes. Each of these can be customized and/or saved as new workspaces.
Again, a workspace is simply a layout of the tools and editors for a specific task or a user’s individual preference. Here’s an overview of the default workspaces available in Blender:
Layout Workspace
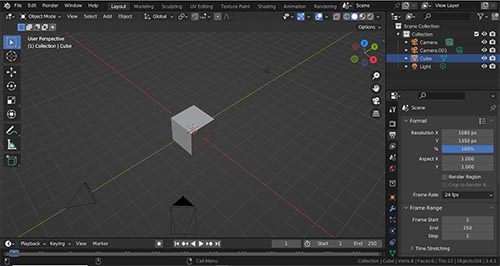
Layout is a general workspace suitable for setting up and creating the overall 3D scene.
With the 3D Viewport taking up most of the workspace and the outliner, properties panel and timeline editors available, you can do most scene building with this interface.
Modeling Workspace
The modeling workspace is very similar to “layout” but it increases the space dedicated for the 3D viewport.
The outliner and properties panel are still available on the right side of the screen but the animation timeline has been removed.
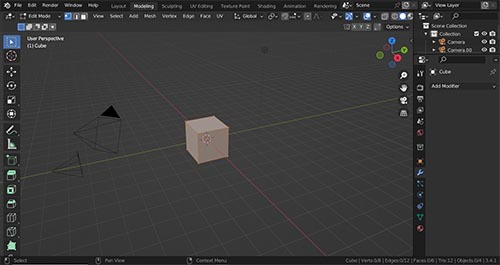
The purpose of this workspace is to give the user more space for modeling 3D objects while keeping only the most essential editors on the screen.
Sculpting Workspace
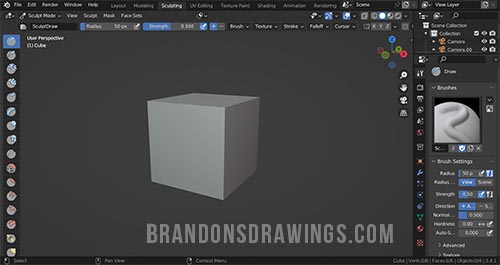
Sculpting is an entirely different mode of Blender than modeling in edit or object mode.
The sculpting workspace isn’t that different than the modeling workspace, but defaults to all the sculpting tools instead of those for modeling.
UV Editing Workspace
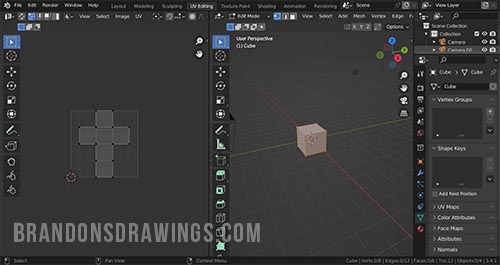
UV editing requires being able to see a 3D object in the viewport as well as the two-dimensional UV map.
Those are exactly the two things the UV Editing workspace highlights. You’ll want to use this for unwrapping and adjusting UVs in Blender.
Texture Paint Workspace
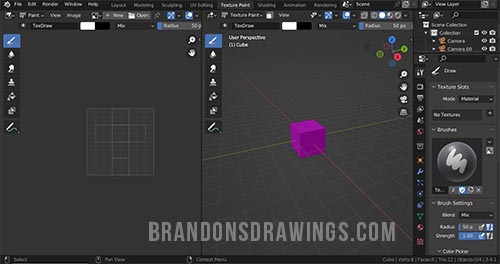
Texture painting requires we see the 3D object we are painting in the viewport. It’s also handy to see the two-dimensional texture we are painting on.
The texture paint workspace features these two necessary editors as well as the properties panel with tool properties displayed.
Shading Workspace
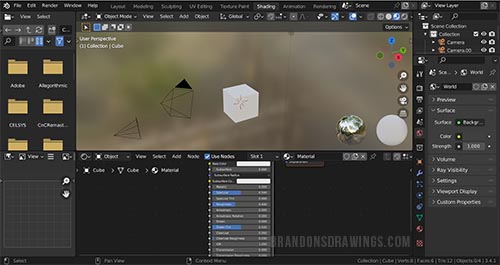
Creating materials in Blender uses the shader editor which is displayed in the shading workspace. Also displayed is a 3D viewport set to look dev display mode, a file browser to access 3D material files, an image editor and the properties panel.
If you’re new to shading in Blender, see this beginner shading tutorial to get started.
Animation Workspace
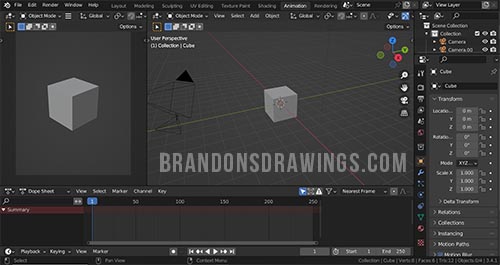
Animation is one of the most exciting things we can do in Blender and this workspace sets us up for success.
We have two 3D viewports with different settings, a dope sheet editor, timeline, properties panel and outliner.
To get started in the world of animation, be sure to see my free beginner’s guide to keyframe animation.
Rendering Workspace
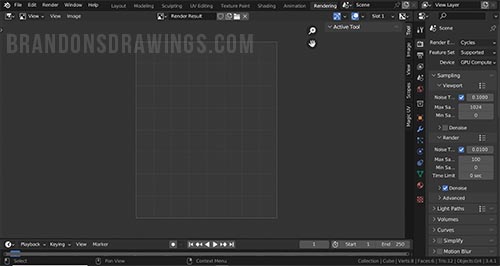
This may be the most boring of the Blender workspaces. The rendering workspace is where we watch our final image get rendered.
Since everyone wants to render faster, most artists hope to spend as little time in this workspace as possible.
Compositing Workspace
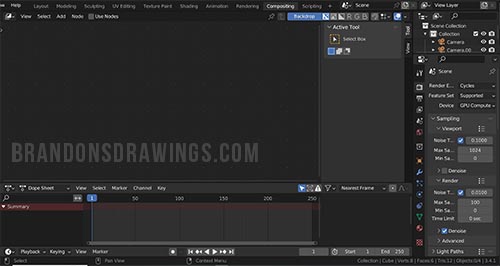
The Blender compositing workspace is where you’ll do all the work that comes AFTER a render is complete. It’s set up to do post-processing work on both still renders and animations.
The compositor is the main element of this workspace and is an entire lesson in itself.
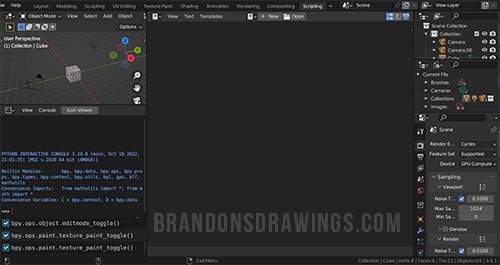
Scripting Workspace
Admittedly I’m not a programmer, but the scripting workspace is where the magic of python scripting happens.
If you want to create custom scripts or add-ons for Blender, you’ll probably work in this workspace.
Additional Workspaces
As mentioned above, there’s a plus (+) icon that allows us to choose additional workspaces. These include workspaces created for 2D animation and drawing as well as work with VFX and video editing.
Editing and Resizing Workspaces in Blender
Workspaces are highly customizable. Editor screens can be added, resized and collapsed. This may not be intuitive at first, but learning it will improve your workflow and understanding of the Blender user interface.
With the following four operations, you can create unlimited variations of any editing workspace in Blender.
How to Change Editors in a Workspace
An editor is a “screen” inside a “window” in Blender that does a specific set of things. There are 23 different editors in Blender. Examples of editors are the 3D Viewport, the Shader Editor and the Properties Panel.
Each window can be changed to the specific editor we want it to be.
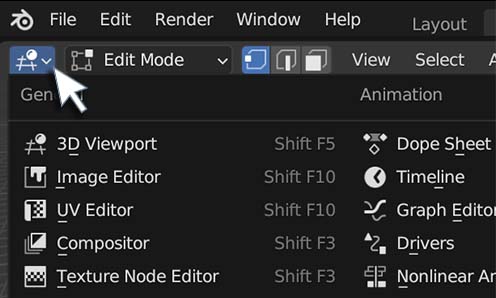
To change from one editor to another in Blender, find the editor icon in the top left corner of the editor (each editor has its own icon). Press the icon to see a drop down box of all editors and choose the one you want to switch to.
How to Resize a Workspace in Blender
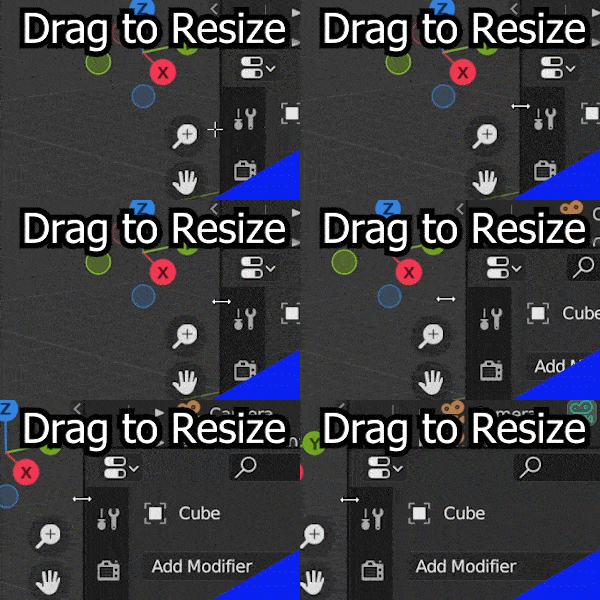
To resize editors in a workspace, hover over the divider between two editors. The cursor will change to a double-arrow icon.
Drag the icon to move the divider. This will make one editor in the workspace bigger and the other smaller.
How to Split a Workspace Window in Blender
We can split any existing workspace window vertically or horizontally. This allows us to add more editors to a workspace.
To split a workspace window, hover in the rounded area at any corner of a window. Then drag in the direction you want to split the screen. The new editor will be a copy of the original but can be changed.
The method of splitting and collapsing windows in Blender workspaces are extremely similar. Placing the cursor exactly in the gap around the rounded edge splits the screen.
If you are slightly off, you may collapse the screen unintentionally.
How to Collapse a Workspace Screen in Blender
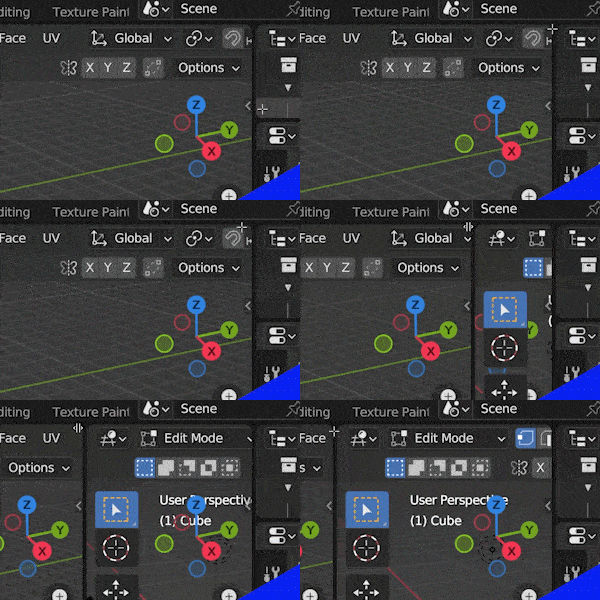
The method of collapsing two workspace screens into one is very similar to how we split the screens.
To collapse two adjacent editors into one, hover directly over the line between them (just inside from a rounded corner) and drag in the direction you want to collapse them.
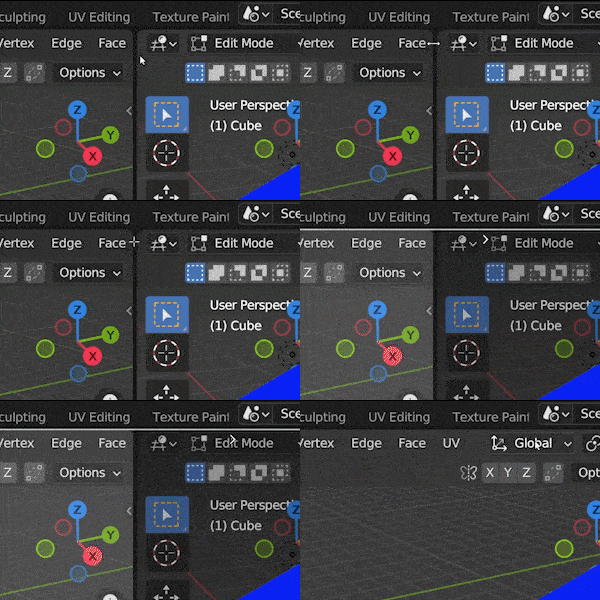
A common frustration is how similar this is to the method for splitting a window. I’ve often accidentally kept making more splits when I intended to collapse two screens.
It’s a slight difference in location of the cursor, but the cursor appears the same for both operations. Maybe Blender developers will fix this soon.
Creating a Custom Workspace in Blender
Although Blender gives us many useful workspaces by default, we can save custom workspaces as well.
We can either make changes to a workspace and save it or we can duplicate a workspace and edit the newly duplicated one.
Scroll to the end of the workspaces and find the plus (+) icon. This will open a menu with options to add a new editor but also to “Duplicate Current.”
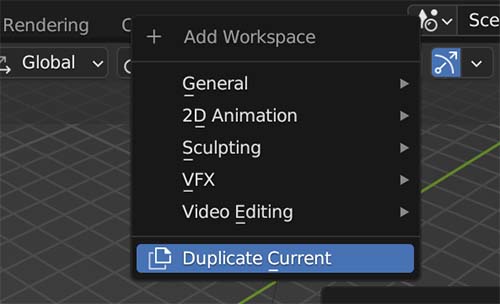
This will create a duplicate version of whichever workspace is currently open and place it next to the workspace. The new one will have the same name with “.001” added to the end.
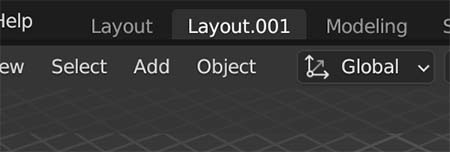
Double clicking the name allows us to rename the workspace.
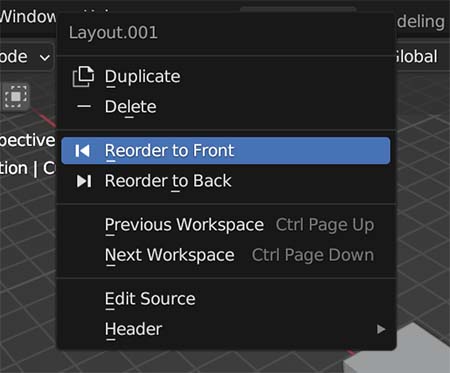
We can also right click it to open a context menu with additional options to rename, reorder or delete the workspace.
In order to have a custom workspace appear in a new .blend file, we will have to open a default file, create or rearrange our workspaces and then save the startup file.
To save the startup file in Blender, go to File – Defaults – Save Startup File. When you do this, the current .blend file (and everything in it) will become the default startup file.
Conclusion
Workspaces are the basics of the Blender user interface. They are extremely customizable and keep most elements of Blender’s workflow in a single window.
There are several default workspaces that come with Blender, but we can also create and save our own.
To learn more about the Blender User Interface and other topics, have a look around my site. Also check out the Brandon’s Drawings YouTube channel for video tutorials. Stay creative!
Get Brandon’s Newsletter
By submitting, you agree to receive periodic e-mails from me. You can unsubscribe at any time.


