I can’t sugar coat this. Texture baking in Blender is a pain! There are a lot of steps to follow and a lot of ways to screw it up. This guide will be a full step-by-step tutorial on the entire process.
This page may contain affiliate links which pay me a commission if used to make a purchase. As an Amazon Associate, I earn from qualifying purchases.
What is Texture Baking
Texture baking is the process of taking all the materials on one or several objects and condensing them into image maps. This means base materials, procedural materials, decals – EVERTHING – is reduced to just a single image.
We can use texture baking to combine multiple materials from one object into a single material. We could also combine materials from multiple objects into a single material to be used across all objects.
It should be noted the “single” baked material may contain multiple baked maps for things such as color, roughness, metalness and normals.
Below is an example of an object with multiple materials and the same object with all the materials baked.


The object with the baked materials is much more efficient and can easily be exported to another 3D program like Unity or Unreal Engine.
How and Why to Use the SImple Bake Add-On for Blender
Why To Texture Bake?
There are a few reasons to bake a texture. But, if you don’t need to do it for a specific purpose, you don’t have to. Here are some common reasons texture baking is necessary:
1. We want to export a model to another program.
Blender can do a lot, but we often want to export an object from Blender to another 3D program or game engine (Unity, Unreal Engine, etc). We may also wish to sell our model for use in another program.
Procedural materials and combinations of Blender nodes WILL NOT be recognized outside of Blender. They need to be converted to image textures.
Fortunately, baked texture maps can be universally placed on 3D objects in all 3D software. If we want to take an object into another program or sell it online, baking the materials into texture maps will be required.
2. We want to improve responsiveness and render faster
Complex materials can slow down Blender (and other programs) especially when we have them on many objects in a scene. For objects that aren’t right up close to the camera, we can bake materials to improve render times and performance.
A material created from baked textures is a very simple material. 3D programs won’t have to spend much time computing and rendering them. For game developers, this is very, very important.
If we are animating… and will be rendering the same object over and over again, baking can vastly reduce the time spent re-calculating materials for every single frame.
3. We want to share (or sell) models with licensed materials used in them
A seldom talked about reason to bake materials is to keep others from gaining access to the original PBR or procedural materials used to create them.
Sharing or selling a 3D model with somebody else’s raw materials may be a violation of the license we’ve purchased or received in order to use the materials.
Let’s use Poliigon for example. Poliigon sells high quality materials that can be used commercially. Although we’re allowed to use Poliigon materials in objects we sell, the intention is not to give the third party (the purchaser) access to Poliigon’s materials.
Baking can solve this problem and keep us out of trouble when using licensed materials. When someone buys a model with baked textures, they don’t have access to the original PBR or procedural materials used to make it.
They will instead get a map of just snips of materials needed for the model they’ve purchased. These won’t be very useful for anything else.
4. We want to bake a high-poly mesh to a low-poly mesh
This last one is a little different. Baking can also be used to reduce a complicated mesh into a simple one with faked lighting effects. This is used sometimes when we need a high-poly model to be optimized for a game engine.
Using this method, we bake all of the lighting effects and small surface details in a complicated model. We then apply the baked texture to a low-poly model in the same general shape of the original.
We get an object with a lot of fake detail which should look fine if it’s off in the distance (and won’t bog down a render or game engine).
How to Texture Bake in Blender (with images)
Now we get into the nitty gritty of texture baking. It’s not an intuitive process by default in Blender. I will walk you through the following steps that are necessary to bake textures in Blender:
IMPORTANT: Texture baking must be done with the Cycles render engine activated. We can bake textures in Cycles and then use them in Eevee, but Eevee does not support the baking process.
Yes, this is a lot and it can take quite a bit of time. I will share that Simple Bake is an affordable add-on that simplifies this process extremely well. It basically turns all the steps we are about to cover into a couple clicks.
Step 1: UV Unwrapping
UV unwrapping is unavoidable if we want to texture bake. For the final bake, we will need all the materials we want to bake unwrapped to NON-OVERLAPPING UV MAPS! This last part is very important.
Side Note: We will need to make sure there are no overlapping faces on our mesh. If two faces occupy the same space on the mesh, Blender won’t be able to tell how to bake the material for that area and we’ll get black spots.
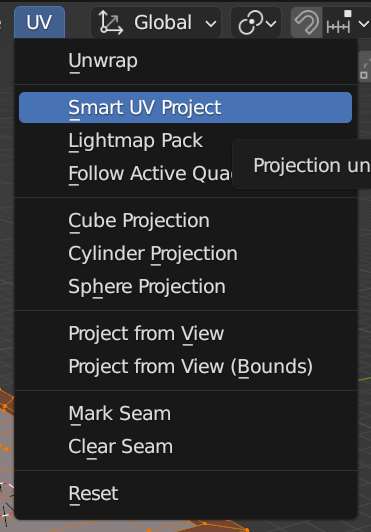
UV unwrapping can be simple or complex depending on how large and intricate the model is. In most cases, selecting the entire mesh in Edit Mode and choosing UV -> Smart UV Project will do the trick.
We can set a small margin to be placed between the UV islands to ensure none of them are overlapping.
But….here’s another thing about UV unwrapping that’s important…
It’s not enough that we simply UV unwrap our object when baking. We also need to be thinking about pixel density of the baked textures. Don’t worry, I’ll explain.
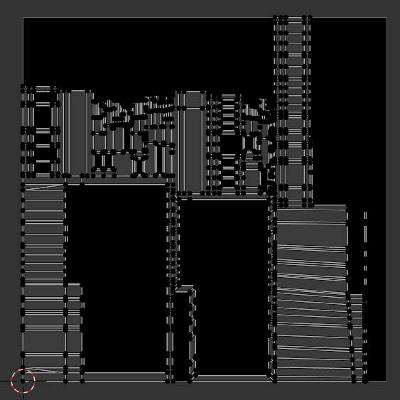
When we bake textures, we bake them to a single image. Let’s call this the “target image.” The target image will be a size of our choosing, but it will have a finite amount of pixels.
When we aren’t baking a texture, we can essentially give unlimited detail to our materials. If we are using PBR materials, we can use the entire image size and even more if we don’t mind having it tile.
Using baked textures is different and we need to lay out our UVs so as much of the area in the UV editor is used – without spilling outside the boundaries.
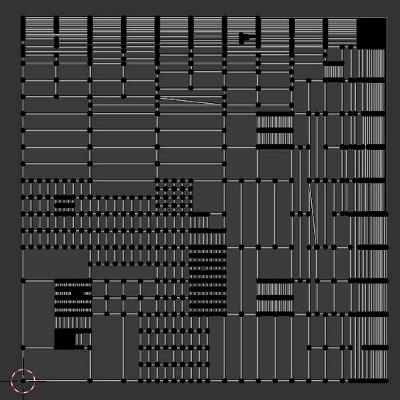
What if I already have my UV set up and don’t want to change it?
If we didn’t originally plan to bake our model, we might not have been diligent with our UV placement. We may have overlapping UVs or UVs that just aren’t efficiently spread out on an image.
We can create a brand new UV in the Object Data Properties. Expand the “UV Maps” tab and press the + icon to add a new UV map. With the new UV map selected, select the entire mesh and UV unwrap it using this new UV map. Our original UV map will not be affected as long as the new one is selected.

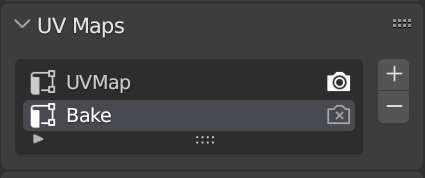
Keep the view icon highlighted for the original UV, but select the new UV as shown in the second image. This new UV map will be extremely important when it’s time to bake.
Step 2: Create Blank Image for Baking
When we bake our textures, we need an image for baking to. We actually will need one image for each map we plan to bake (color, roughness, etc) but let’s focus on one at a time. For the following steps, let’s assume we are baking a color map.
What is a color map? It’s a single image with all the color (AKA “diffuse”) information. It’s all the colors we see in a material without any lighting, roughness, metallic or other effects added. In a Principled BSDF shader, it’s what would be plugged into the base color socket.
Add a New Image
With the object we want to bake selected, go into the Shader Editor and select any material applied to the object.
Press Shift + A in the editor and choose an Image Texture Node. Press the “New Image” button on the node. This will prompt us to add information for the new image we are going to bake to.
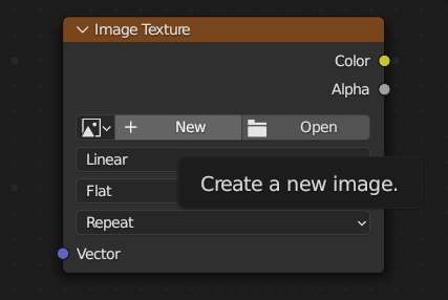
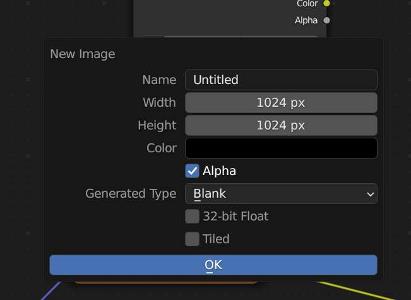
The two important settings will be the name and the image size. Give the image a name that makes sense for the object and to distinguish it as a “color” or “diffuse” map (ie: MyObject_Color).
The size is the most important. How big of an image we choose here will determine how many pixels are available to be baked onto.
Our baked image texture will inevitably be reduced in quality, but having a larger “canvas” to bake onto will give us a higher quality image – as long as we’ve efficiently UV unwrapped the mesh.
NOTE: It’s recommended to check the 32-bit Float box when creating a normal map. Normal maps need a higher dynamic range of color. This will also increase the file size of the image and is not necessary on other maps.
The image needs to be placed somewhere in the material, but DOES NOT need to connect to anything. It’ll just sit alone somewhere in the shader editor.
Step 3: Add New Image to All Materials
This part is a pain. Select the image texture node containing the newly created “target” image. Copy the node using “Ctrl + C”
Now go into every single texture that is applied to the object. If the object has eight textures, we are going to do this for all eight. Paste the copied image texture node somewhere in the material shader by hovering and pressing “Ctrl +V.” Again, it does not need to be connected to anything.
Before baking, the “target” image texture will need to be in every material on the object.
Step 3B: Assign UV Map to All Materials
If we plan on baking to a new or different UV map than what is currently being used for the materials, we have an additional step. We need to also go into the shader editor and add a UV Map node.
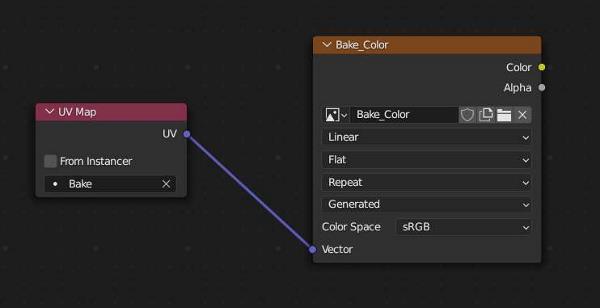
Plug the map node into the “target” image texture we’ve created. On the node, choose the UV map we created in step one specifically for this texture (or any other one you choose to bake to).
Step 4: Ensure Targets are Selected in Each Material
This step seems like one of the most ridiculous in this process. We actually have to go into each material and make sure:
- The “target” image texture node is selected in the shader editor
- If using a different UV, the target UV Map node is selected
- NOTHING ELSE IS SELECTED in the shader editor
A small border will appear around selected nodes in the image editor. We can ensure nothing is selected by pressing “Alt + A” in the image editor and then select only the required nodes.
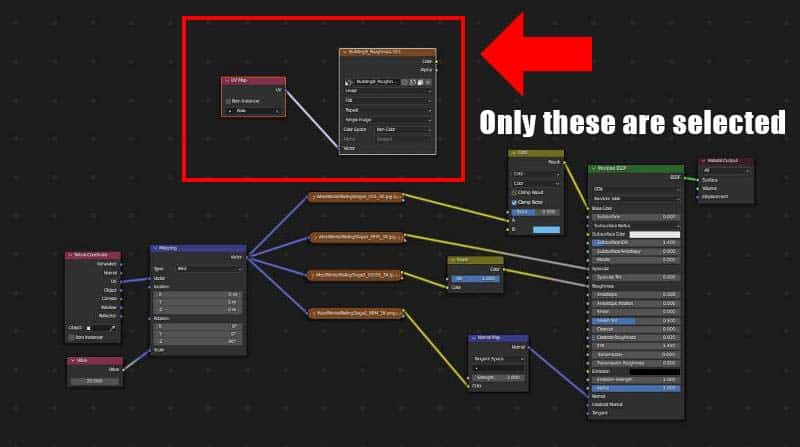
Very Important: Nothing else can be selected in any of the materials!! If we accidentally leave another image texture node selected, it will also bake to that image.
So do this for every material assigned to the object. If we have eight materials on the object, we need to do this for all eight.
If we are baking multiple objects to a single texture, we will need to do this (and all the previous steps) for every object involved in the bake.
Step 5: Set Bake Settings
With our target image set up and selected, we can go to the bake settings. They are located in the Render Properties Panel. There are two important settings.
Bake Type
The bake type setting is where we choose which type of map we want to bake. If we are baking a full set of PBR textures, we will have to bake multiple times and choose a different bake type for each map (color, roughness, etc).
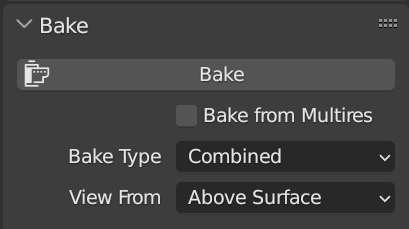
For the basic color map, we will choose “Diffuse” from the bake type. This will give us a single baked image with all the color (diffuse) data from the model.
When we repeat this, we would choose roughness for a roughness map, normal for a normal map, etc.
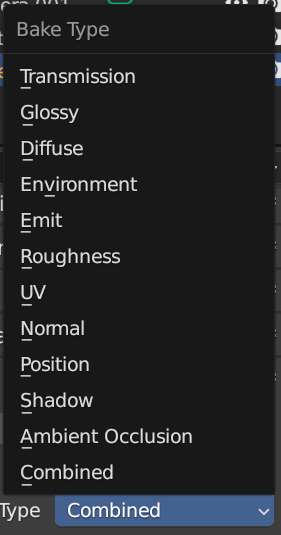
The default “combined” setting will bake everything (color, roughness, etc) into one final combined color image. This is sometimes useful for game engines, but generally we want separate images for each piece of the PBR data.
Influence
The second setting of importance will appear when the color and other bake types are selected. We must choose whether we want light from the current scene to influence our baked texture.
Generally, we will not. If we do include light in our bake, the light may look out of place when the object is used in another scene.
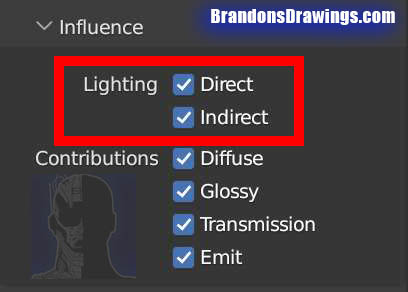
To keep scene lighting from affecting a baked texture in Blender, turn off “Direct” and “Indirect” in the bake influence settings under “lighting.”
Step 6: Bake and Inspect
We are now ready to bake. Ensure only the object(s) we intend to bake are selected in the 3D Viewport. Go to the render properties tab and press “Bake.”

Depending on how complex the bake is, this may take a minute or several minutes. A progress bar will display at the bottom of the workspace.

When the bake is complete, the “target” image will have the baked information in it. Plug it into the appropriate socket of the Principled BSDF shader and inspect it. If there are issues, work on fixing them and bake again.
Most problems with a baked texture are because the UVs were not set up properly.
Step 7: SAVE YOUR IMAGE!
When an image is baked in Blender, it is saved internally. The image will be deleted when we close Blender if we don’t save it. Open the image in the Image Editor.

We should notice an asterisk next to the Image option in the top menu bar. This indicates the image has not been saved externally. Click “Image” and “Save.” Save the image somewhere on your computer.
Step 8: Repeat for Each Map Type
If you’ve successfully completed a bake for the color information, great! Now we have to do the same thing for whatever other maps we want. For example, let’s say we now want to bake a roughness map.
We will need to create a new target image for our roughness to be baked to. We will need to enter that image into every material on the object. We need to be sure the new target image (and only this image) is selected in each material. We will change the bake type to “roughness” and bake again.
Final Thoughts
Yes, the entire baking process in Blender is insanely complex and receives much criticism from those who’ve used other 3D software for baking. Fortunately, Simple Bake takes this entire process and turns it into just a few intuitive clicks. Check out Simple Bake on Blender Market. If you plan to bake textures often, this is a must-have plug-in.
Here is the official Blender Manual’s page on texture baking.
Get Brandon’s Newsletter
By submitting, you agree to receive periodic e-mails from me. You can unsubscribe at any time.


