When we want to apply a particle system to an object in Blender, we may not want the particles evenly distributed all over our object. We may want areas with no particles or to have patches where the particle density is higher or lower.
This page may contain affiliate links which pay me a commission if used to make a purchase. As an Amazon Associate, I earn from qualifying purchases.
Here’s how to adjust particle density with weight paint. It’s just another tool for perfecting 3D models in Blender.
Let’s use grass for example. The best nature asset pack I’ve found is this one on Blender Market. Uniformly dense grass doesn’t look realistic. Lawns and fields have patches where the grass doesn’t grow and areas where it clumps together.
How to Add Density to a Particle System with Vertex Groups
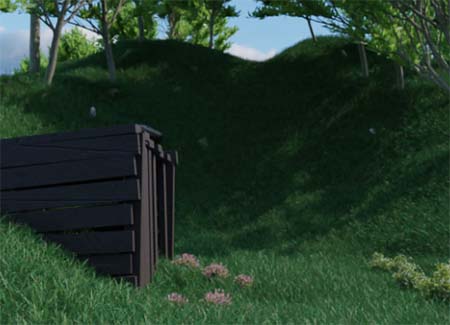
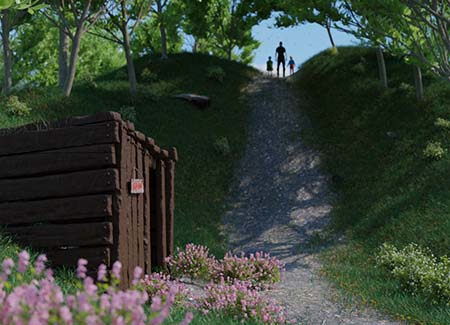
I’ll use the following scene I was working on as an example. At first, my grass was growing everywhere. I wanted to have a path through the grass and add some areas where it was less dense.
By the way, this is all much easier with the GeoScatter add-on for Blender, but let’s continue.
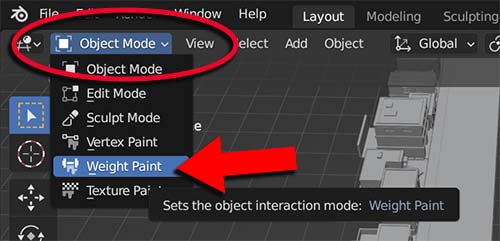
What I needed to use was the weight paint feature in Blender. When we have a particle system set up, click on the emitter object (in my case the ground). Then, switch to “Weight Paint Mode” from the drop-down box where we select “Edit Mode” or “Object Mode.”
Once in “Weight Paint Mode” we will find our object is blue. Blue represents the areas where there is no or “zero” particles. With our cursor (or even better, this drawing table and stylus from Amazon) paint the areas you want to populate with a particle system.
Areas in red will have the highest particle density. Areas in green and yellow will have less density. Areas in blue will have no particles assigned.

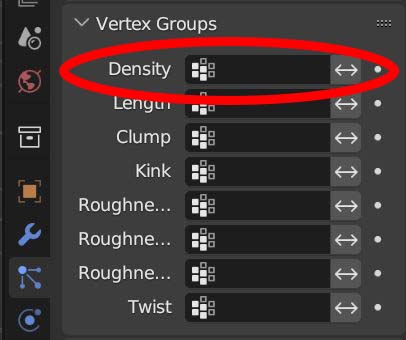
Return to “Object Mode” and go to “Particle Settings” (or “Particles Properties”) in the Properties Menu. Find the “Vertex Groups” drop-down and select it. Look at the “Density Field” at the top of this section.
By painting in “Weight Paint,” we created a vertex group for our object. Select the vertex group titled “group” (default name for the first vertex group created).
This will tell Blender to use the map you painted as a reference for where to distribute the particles.
Vertex Group Efficiency
Using vertex groups to indicate particle density is also more efficient. We can avoid painting the areas that are not in our viewport and therefor won’t be in the final render.
In my example scene, I was able to reduce the particle count by about two thirds because most of the grass on the emitter object was actually growing outside of the rendered area. This sped up my render time a lot.
If we need to adjust the particle density, we can re-enter “Weight Paint” mode with the emitter object selected. Making adjustments will automatically affect the density of our particle system.
Adding Density for a Second Particle System
We can add a second particle system to the same object and use it as a density map for an additional particle system.
To do this, add a second particle system to the same object and set it up as you see fit. If you want to distribute the new particle system along the same weight paint map, you can. If you want to have a different density for the new particle system, follow the steps below…
To add a second vertex weight map for the new particle system, go to the “Object Data Properties” tab and scroll down to “Vertex Groups.”
We will see the first vertex group created with the default name “group.” Click the “+” icon on the right to create a second vertex group. By default it will be named “group.001.”
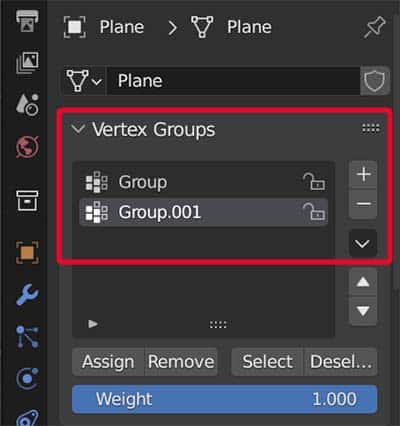
With the emitter object selected re-enter weight paint mode. Now we can paint a new map for the second vertex group. Then go to the second particle system’s settings and – just like before – scroll down to the vertex groups tab.
In the density field area, select the new group (Group.001 unless you renamed it). This will use the second vertex group for the density of the second particle system.
Conclusion
Particle systems are an awesome tool in Blender and there are many settings to understand. While geometry nodes are set to eventually replace particle systems, they are still being used today.
Using vertex groups and weight paint is one of the best ways to give a particle system a more realistic density. They can also improve memory usage and render times.
I also try to provide a lot of useful and “to-the-point” tutorials at my Youtube Channel. Thank you and Stay Creative!
Get Brandon’s Newsletter
By submitting, you agree to receive periodic e-mails from me. You can unsubscribe at any time.


