
In Blender, there are a lot of tools to learn. But for hard surface modeling, there are four basic ones. This Blender tutorial will set you on your way to mastering the art of 3D modeling in Blender.
This page may contain affiliate links which pay me a commission if used to make a purchase. As an Amazon Associate, I earn from qualifying purchases.
All of these tools are used to model an object’s mesh while in Edit Mode.
Extrude
Extrude is a hard surface modeling tool to take a portion of a mesh (usually faces) and extend them in a certain direction. However, it also works on vertices and edges.
While in edit mode, the shortcut to Extrude in Blender is E.
Extruding is most commonly used with faces. Below is Blender’s default cube with one face selected in Edit Mode. We press “E” on the keyboard and then drag our cursor to extrude the face.

This video has everything you could want to learn about extruding in seven minutes.

The face is pushed away from the cube and new geometry is formed to extend the cube with the extruded face. We left click to release the extrude operation.
Extrude in Different Directions
By default, the extrusion will occur along the Normal – meaning in the direction the face is already facing.

However, after pressing “E” we can then press X, Y or Z to move the extruded face along a global axis instead.


Extrude Multiple Faces
We can extrude multiple faces at the same time. These can be adjacent faces that will extrude together or they can be unconnected faces.


The Transform Pivot Point will determine the direction from which multiple faces will extrude. If the pivot point is set to Individual Origins, Median Point or 3D Cursor, the mesh segments will extrude in different directions.
The spin tool is similar to extrude but it’s used to extrude while spinning around a point in 3D space. This is also very useful.
Extrude Set Distance
If we want the selected element(s) to be extruded a certain distance, we can type a numerical value after pressing “E” to extrude.
For example, if the units in a scene were set to meters, pressing “E” and then “2” would extrude the element exactly two meters. We can also use decimal points in the distance value (like 2.5 meters).


Click to Extrude
Whether we are in vertex, edge or face select modes, we can quickly extrude the current selection by pressing “Control” and right clicking anywhere in the scene while in Edit Mode.

The selection will extrude to the location of where we click and at the depth of the 3D cursor. This may be best to use in Orthographic View depending on what you’re trying to accomplish.
Inset
The inset function takes a face (or multiple faces) and creates a smaller face within it. This is used often in hard surface modeling.
While in edit mode, the shortcut to inset faces in Blender is I.
First we must select the face or faces we want to inset in Edit Mode. Then we use the shortcut “I” on our keyboard. Press “I” and drag the mouse to choose the size of the inset face. Left click to release the action.

If only one face or several unconnected faces are selected, the individual faces will inset inside the shape of the original selection. One vertex will be created for each vertex of the original face(s).
If we have multiple adjacent faces selected, there are two methods for which the inset operation can occur. The faces can be inset individually which means a smaller face will be created inside each selected face.
Or, they can be inset together and all of the selected adjacent faces will be treated as one large face.


There are two ways we can tell Blender whether we want to inset the faces individually or together. We can complete the operation by left clicking and then open the Operator Panel in the bottom left corner of the viewport.
There will be a checkbox labeled “Individual.” If the box is checked, the faces are inset individually. If not, they are inset together. We can change this in the panel and the operation will be changed.
The other method (my preferred method) is to use a shortcut before we click to confirm the operation. After pressing “I” on the keyboard to inset, we can again press “I” to toggle the individual setting on and off. Here’s a short clip from my YouTube channel on how to do this.
Inset by Distance
Similarly to the extrude operation, if we want to inset our faces a certain distance, we can press “I” and then the distance (in a numerical value) on our keyboard.
Outset
It is also possible to reverse the Inset operation in what’s called “Outset.” Instead of creating smaller faces on the inside of selected face(s), it creates them on the outside.
To begin the operation, use “I” as if we were going to inset. Then press “O” on the keyboard to toggle to outset. Of course, when we aren’t using inset, “O” is still the shortcut to toggle on and off proportional editing.

Loop Cut and Slide
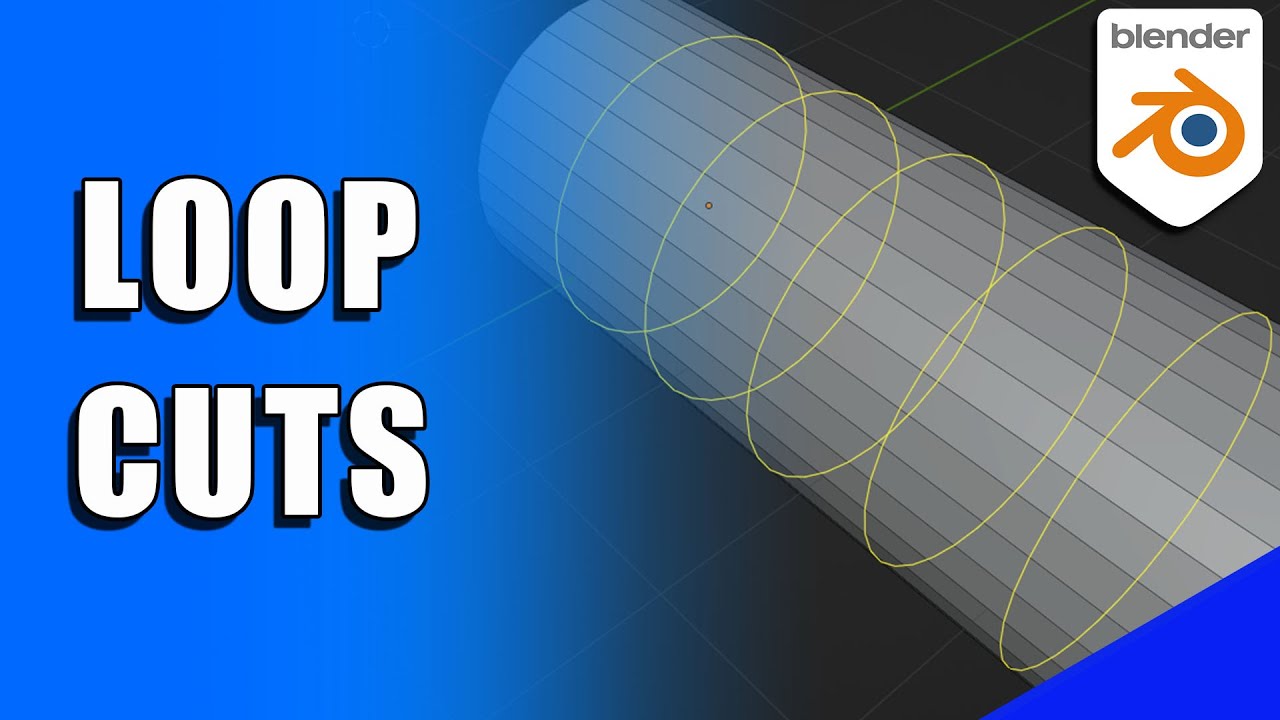
“Loop Cut and Slide” is actually two actions combined into one in Blender. It’s one of my favorite hard surface modeling tools.
Adding a loop cut places a cut through an entire section of connected mesh. It can then slide before the action is confirmed.
To add a Loop Cut to a mesh in Blender, press Ctrl + R while in Edit Mode and hover over the mesh.
Step one is to press Ctrl + R and hover the mouse over a segment of the mesh. A yellow line will appear showing where an available loop cut can be made.
When the line is yellow, we can slide the middle mouse wheel up and down to increase or decrease the number of cuts.


This method requires a mouse with a middle scroll wheel. If you don’t have one, here’s a very affordable one on Amazon.
When we see the line (or lines) where we want them, left click once. The yellow line(s) will turn orange and we can slide them along the cut area.

When the cuts are where we want them, left click again to lock the cuts into place.
If we want the cuts to be perfectly centered and don’t want them to move at all, right click to lock them into place instead of left clicking.
Here’s the Blender manual’s official page on the loop cut and slide tool.
Bevel
To bevel in Blender is to separate an edge or vertex and spread the separated parts away from each other. The results of beveling an edge and a vertex are quite different.


In edit mode, the shortcut to bevel in Blender is Ctrl + B.
Edge Bevel
To bevel an edge in Blender, select it and press “Ctrl + B.” Drag the cursor to change how large the bevel will be. Use the middle mouse scroll wheel to add or subtract segments of the bevel.
Left click to lock the bevel and confirm the operation. Additional changes can be made in the Operator Panel. There’s a lot more to beveling in Blender, but let’s continue.

Bevel Interior “Edges”
In Blender, edges refer to lines. But they don’t necessarily have to be on the edge of an object. Beveling is a great tool for separating a single interior edge into multiple. Here’s an example.
If I want to take a default cube and add evenly spaced cuts, I could place one cut like this.


Then select the center cut using Alt + Left Click in edge select mode. Perform a bevel on the edge with Ctrl + B.

With just a few more combinations of loop cuts, bevels, extrudes and insets, I was able to quickly get this:

Vertex Bevel
We can change between edge bevel and vertex bevel during the operation. After starting the bevel, use the shortcut “V” to toggle between edge and vertex bevel. Once we complete the bevel operation, we can also change this in the Operator Panel.


Similar to an edge, a vertex can be beveled into as many segments as we choose. Using the middle mouse scroll wheel during the operation will increase and decrease the bevel segments of the vertex.

We can also bevel an entire object using the Bevel Modifier which is one of Blender’s 54 mesh modifiers.
Thank You
Extrude, inset, loop cut and bevel are the four most basic hard surface modeling tools in Blender. I hope this serves as a great starting point and future reference if necessary.
Please take a look around the site. I have many more beginner Blender tutorials. I also have a YouTube channel with video tutorials and my e-mail sign-up is below to stay in touch.
Stay creative!
Get Brandon’s Newsletter
By submitting, you agree to receive periodic e-mails from me. You can unsubscribe at any time.