Each face of an object in Blender has a designated front and back. Here’s how to see which direction a face is facing and how to change the face orientation if needed.
This page may contain affiliate links which pay me a commission if used to make a purchase. As an Amazon Associate, I earn from qualifying purchases.
View Face Orientation
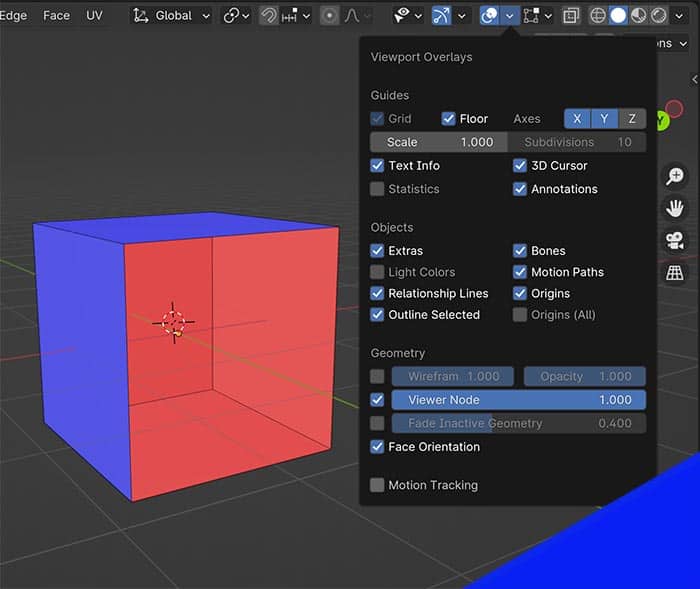
To see the face orientation of objects in Blender, go to the Overlays Menu at the top of the viewport and check the box labeled “Face Orientation.”
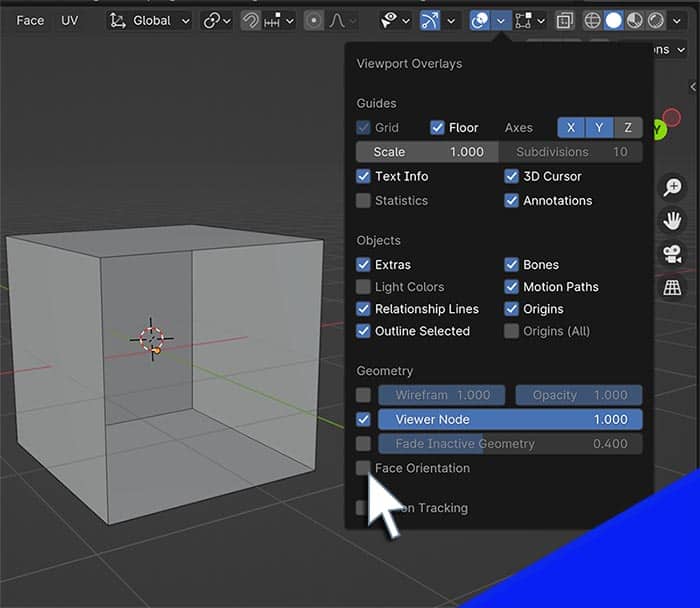
Once activated, the front of faces will appear blue and the backs of faces will appear red.
Recalculate Face Orientation
To recalculate the orientation of a face, go to Edit Mode and select either all or part of the mesh and use the keyboard shortcut “Shift + N.”
Blender will recalculate the inside and outside of objects. An operator panel will open in the bottom left corner of the viewport.
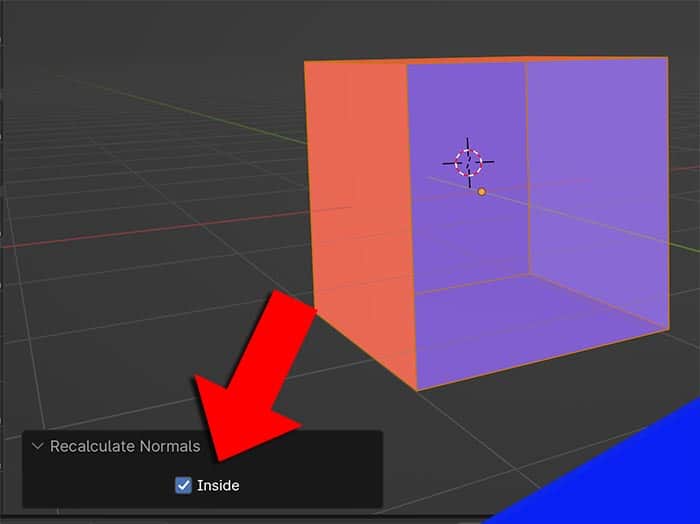
The only available setting in the panel is “Inside.” Checking this box will invert the normals for the newly calculated face orientations. Red will become blue and blue will become red.
Alternatively, we could use the keyboard shortcut “Ctrl + Shift + N” to do this same thing.
Why Face Orientation Matters
Face orientation is important for materials. Normal maps, bump maps, displacement and other features need to know which side of the face is the front.
If a face’s orientation is reversed, ridges will become bumps and vice versa.
There are also materials that show one material on the front and another on the back.
Backface culling removes the backfaces of mesh objects and need to know which face to remove.
I hope this helped, please consider looking at my YouTube channel for more helpful video content. Stay creative!
Author:
Brandon Stocking
