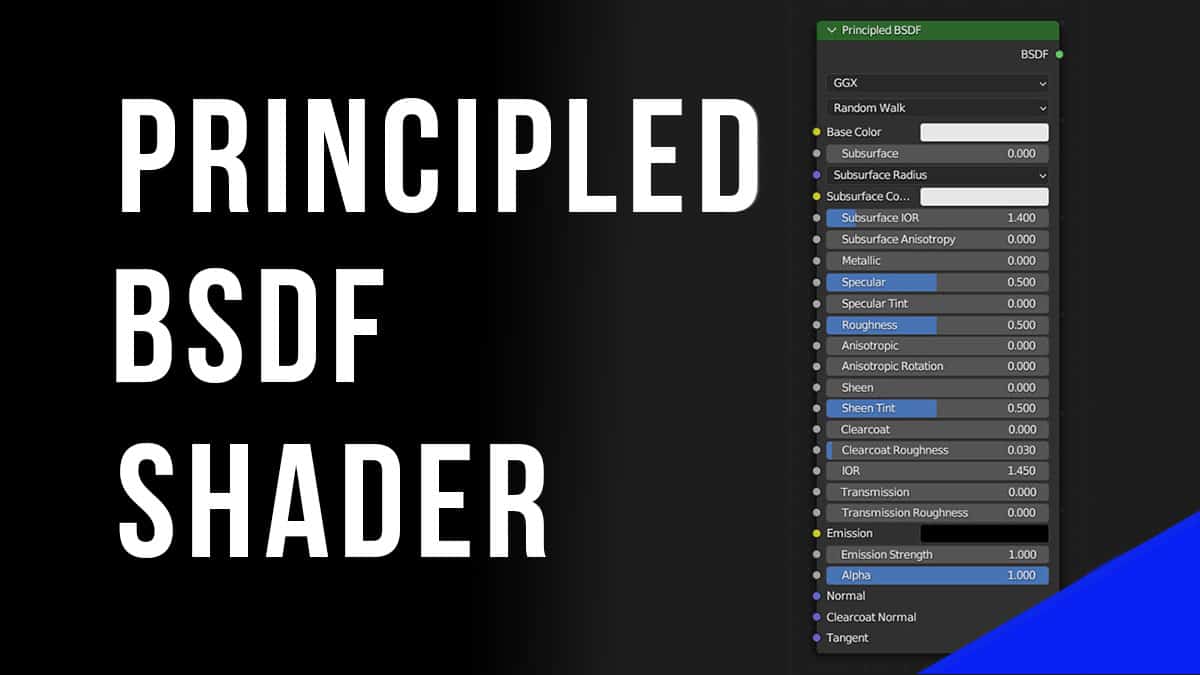
The Principled BSDF Shader in Blender 3D is the default shader for materials and the shader you will most often use. Whether using PBR or procedural textures, Eevee or Cycles, this is the go-to shader node for material shading in Blender.
This page may contain affiliate links which pay me a commission if used to make a purchase. As an Amazon Associate, I earn from qualifying purchases.
For a full introduction to node-based material shading, see my free two-part material shading tutorial series available on YouTube.
What is the Principled BSDF
The Principled BSDF (Bidirectional Scattering Distribution Function) Shader is the default shader for materials in Blender.
It’s an extremely versatile shader and is based off the “Principled” shader used by Disney – which is known for its accuracy and consistency across different lighting conditions.
Before it was added to Blender in version 2.79, it would take many combinations of shaders to do what the Principled BSDF Shader can do alone.
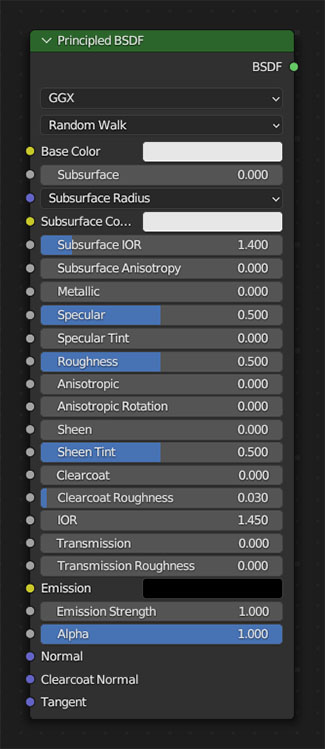
The shader has 25 sockets on its left side for a wide range of inputs. It has a single shader output socket on its right side.
We will cover each input in the Principled BSDF Shader and I will provide examples of how settings affect the final result of a material.
Distribution and Subsurface Scattering Methods
These first two settings never need to be changed by the average Blender user.
“GGX” is the default light scattering setting for rough surfaces. The other option is “Multiscatter GGX” which is slower but gives off more energy-conserving results, which would otherwise appear as excessive darkening.
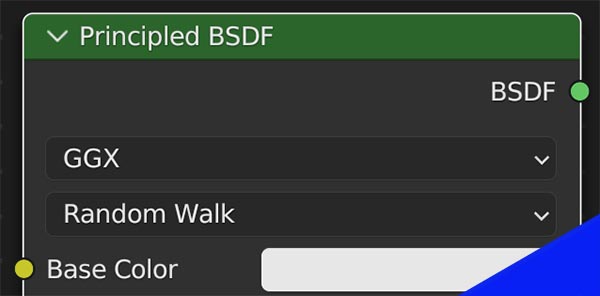
The next setting which defaults to “Random Walk” is a method for calculating sub-surface scattering (which we will cover below).
Principled BSDF Base Color
The first input of the Principled BSDF Shader is the base color. It may be the only setting we change if we want a simple colored material. Its name pretty much describes what it is.
We can attach textures and images to the base color for PBR, image and procedural texturing.
Subsurface Scattering (SSS) Settings
Subsurface scattering is how light scatters under the surface of a material. This effect is visible on many surfaces in the real world. The best example may be human skin. When bright light hits skin, the pinkish tones we see are from light scattering into the tissue beneath the skin. This can be replicated in Blender with the Principled BSDF Shader.
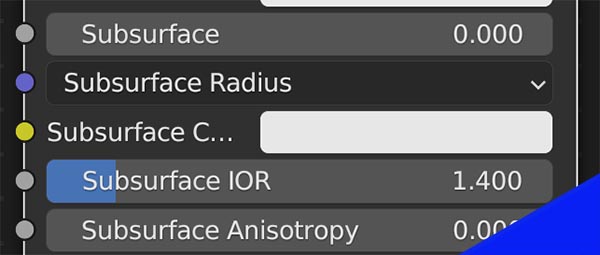
Subsurface
The subsurface setting is how much of the subsurface scattering effect we want. Higher values will increase the effect.
Subsurface Radius
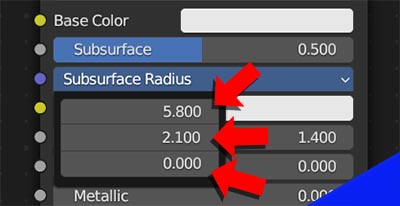
The subsurface radius setting is the average distance light scatters below the surface. When the radius is higher, the effect will appear softer. If we click the setting, we see three settings appear. In order, these are for the red, green and blue channels of the light.
Different spectrums of light may penetrate deeper on some materials. That is also why the input socket is a purple vector input. The RGB data for this input can be mapped with X, Y and Z vector information – like how normal maps work.
Subsurface Color
We can choose a different color for the subsurface scattering effect. For skin, we would set this to a pink color.
Subsurface IOR (Index of Refraction)
An index of refraction is the angle at which light refracts when it hits a surface. The IOR for the subsurface scattering effect can be controlled or mapped independently of the overall material.
Subsurface Anisotropy
Anisotropy refers to the directionality of the subsurface scattering. Similar to how anisotropy can be controlled for reflections on the surface of the material, it can be adjusted for subsurface scattering as well.
Metallic, Specular and Roughness Settings
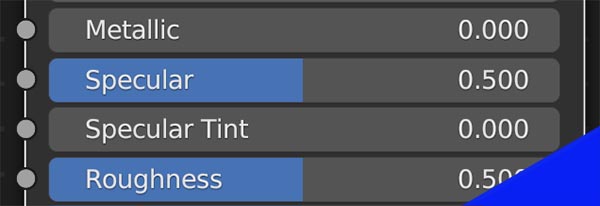
The metallic, specular and roughness settings determine how light interacts above the surface. These are probably the three most used settings besides the base color.
Metallic
There are two workflows to add specular (reflective) elements to a material: a specular workflow and a metallic workflow. Metallic means the reflection actually puts off color from the base material – something metal objects do in the real world.
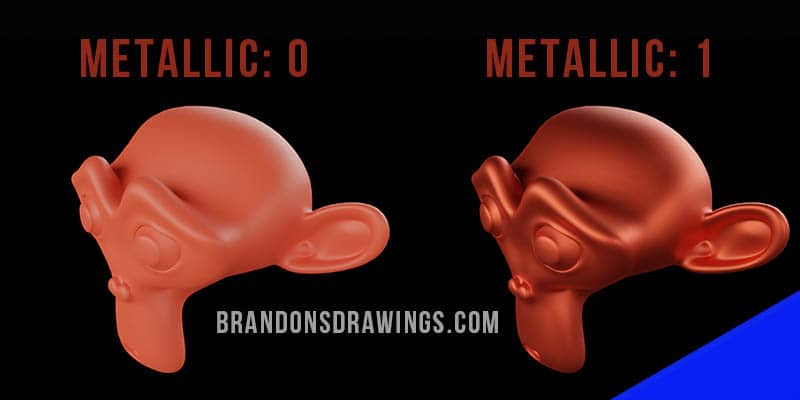
Turning the metallic setting to 1 gives us a 100% metallic reflection with no non-reflective material blended in. Zero gives us a completely diffuse (dull) material.
Specular
Specular is the other workflow for reflections. Unlike “metalness,” the base color doesn’t contribute to the reflection in a specular workflow. Higher values will be more reflective and zero will be a completely non-reflective (diffuse) material.

The specular slider blends the reflectiveness into the base color. At zero, there is no reflection (fully diffuse). With a value of one, it is maximum specular reflection. Often we want a blend between specular and diffuse.
Specular Tint
The specular tint allows us to bring in some tint of the base color into the specular reflection. This gives us controls to make the specular workflow look a little more like a metallic result.
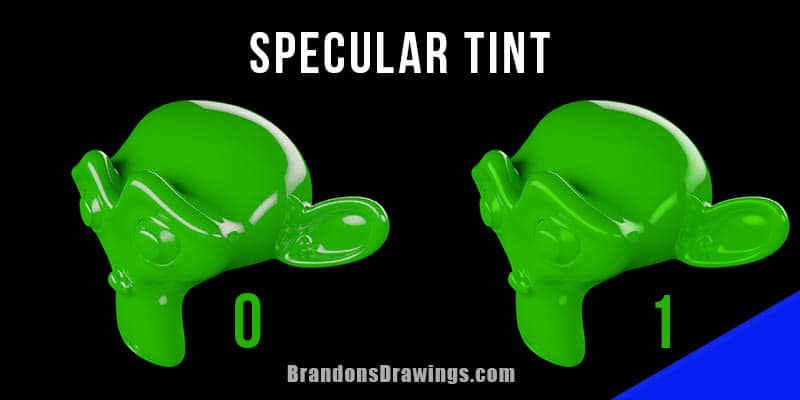
Notice some of the reflective areas in the image above have a green tint to them when the specular tint is turned to 1. At a setting of zero, there will be no tint.
Roughness
Roughness may be the most commonly adjusted setting we will find. It is how “rough” the material surface is at a microscopic level. Paper in the real world may feel smooth, but it is very rough on a microscopic level. So its reflections are not as noticeable. The lenses of sunglasses are not very rough, so you can see reflections in them more clearly.
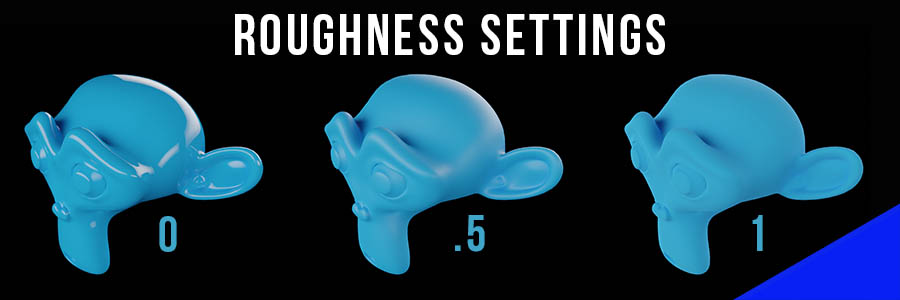
In the above image, we see the differences between zero roughness, 50% roughness and full (1) roughness.
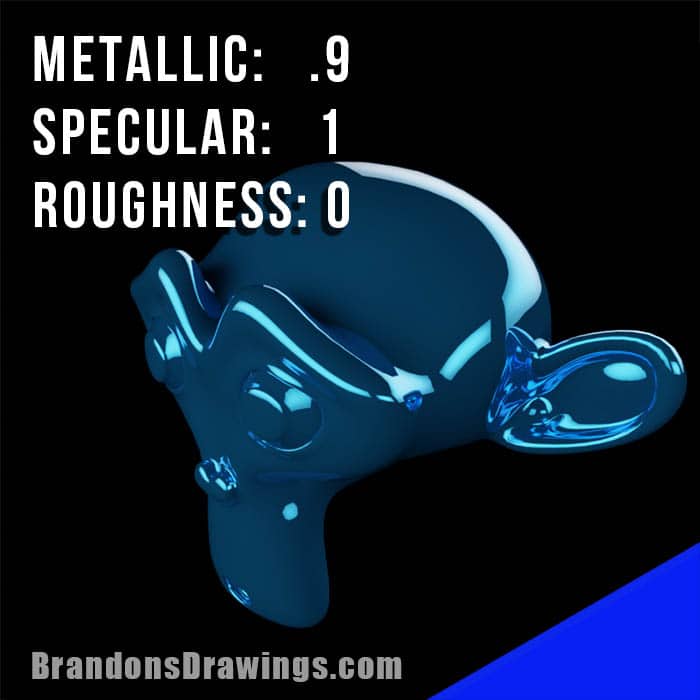
Using combinations of metallic, specular and roughness values on the Principled BSDF Shader allows us to make endless customizations from the same base color, as shown below.
Anisotropic, Sheen and Clearcoat
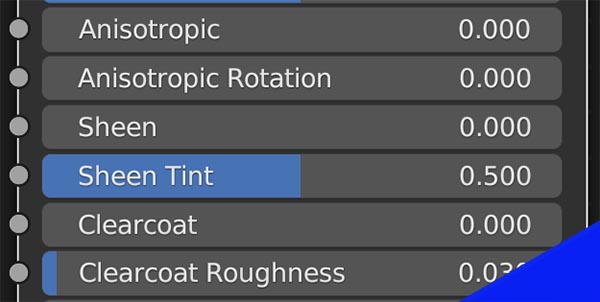
The next series of settings on the Principled BSDF Shader in Blender are the settings for anisotropic, sheen and clearcoat. These make modifications to the basic specular and roughness settings covered above.
Anisotropic
The anisotropic and anisotropic rotation control the directionality of the material’s roughness. “Anisotropic” controls how much of the effect is applied to the material and the anisotropic rotation setting rotates the effect.
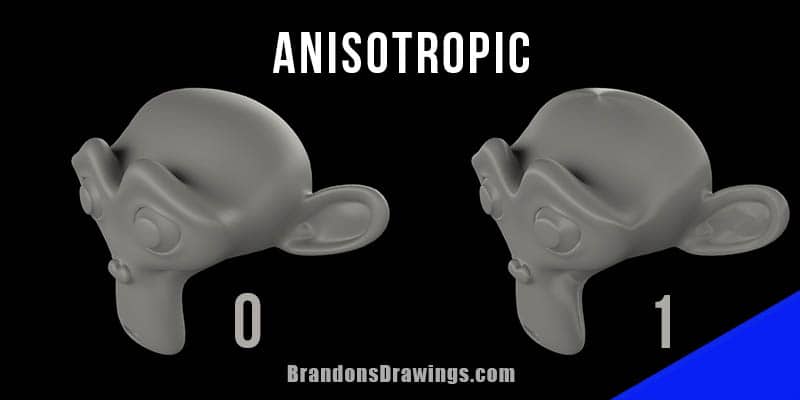
This setting is often used for creating brushed metal effects. Notice the most visible portion of the effect at the top of the Suzanne Monkey’s head.
Sheen & Sheen Tint
According to the Blender Manual, the sheen setting of the Principled BSDF Shader is for adding a soft, velvet-like reflection near edges.

Apparently sheen is an effect commonly used in fabric. I’ve played around with it and am having trouble seeing noticeable differences by changing either the sheen or the sheen tint settings.
Clearcoat
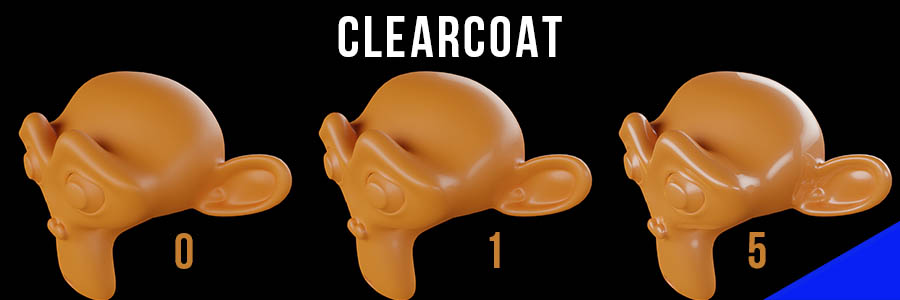
The clearcoat simulates a secondary reflective layer on top of the base material. This would most closely simulate a clearcoat lacquer on a well-waxed car. Higher values give it a better shine. This is one value where going above 1 really exaggerates the effect.
Clearcoat Roughness
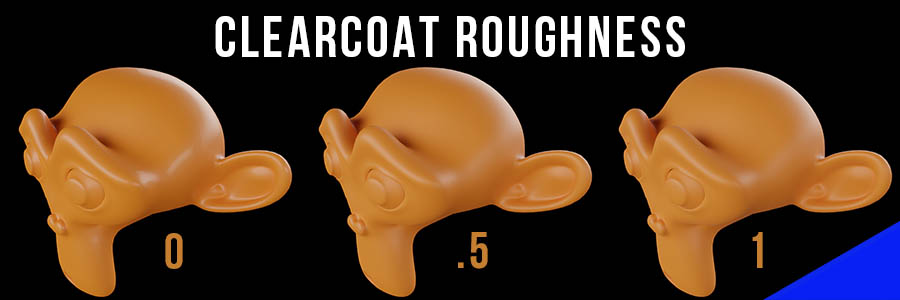
Just like we can change the roughness of the underlying base material, we can also add roughness to the clearcoat. It seems like something you’d probably want to keep very low as it defeats the purpose of the clearcoat in my opinion.
Principled BSDF Transmission & IOR
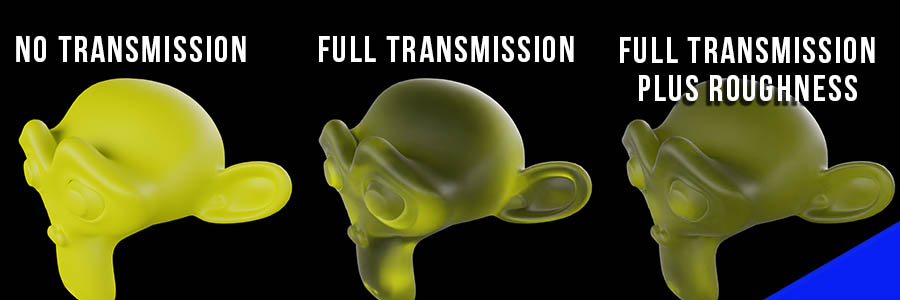
Another feature of Blender’s Principled BSDF Shader is its ability to allow light to be transmitted through the material. This is useful for glass and plastics or anything where light passes partially or entirely through an object.
We can also add roughness and give the transmission an index of refraction (which is really cool).
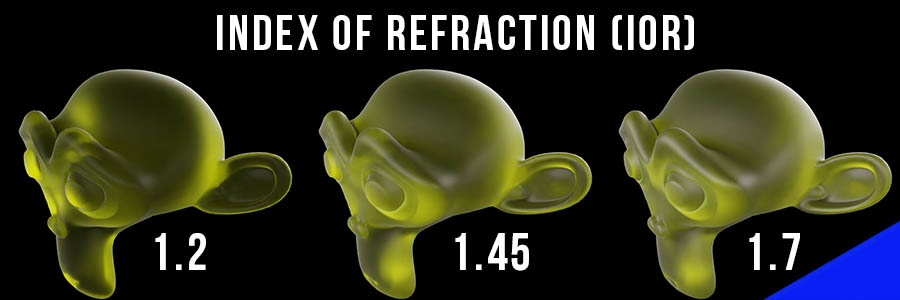
Index of Refraction (IOR) For Transmission
The IOR input on the Principled BSDF Shader will only matter if you’re using some amount of transmission with the shader. Index of Refraction refers to the angle at which light refracts (changes direction when passing through). Different materials in the real world have identified IORs, which I cover in my guide to transparent materials in Blender.
For example, the default IOR of 1.45 is that of common glass. Water has an IOR of about 1.33. Play around with this setting or look up IORs for the material you are trying to recreate.
Principled BSDF Emission Settings
Blender’s Principled BSDF Shader also allows materials to emit light – something most materials don’t actually do in real life, but allows 3D artists make really cool effects.
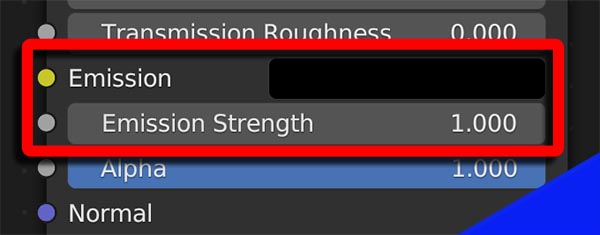
There are two settings for emission on the Principled Shader. The “Emission” setting is a color picker to choose the color of the emitted light. The “Emission Strength” controls how strong the emission is. The emission defaults to pure black which can not emit light (black is the absence of light).
Emission may be used to add light to our scene, to make certain parts of an object stand out or to give a glowing effect.
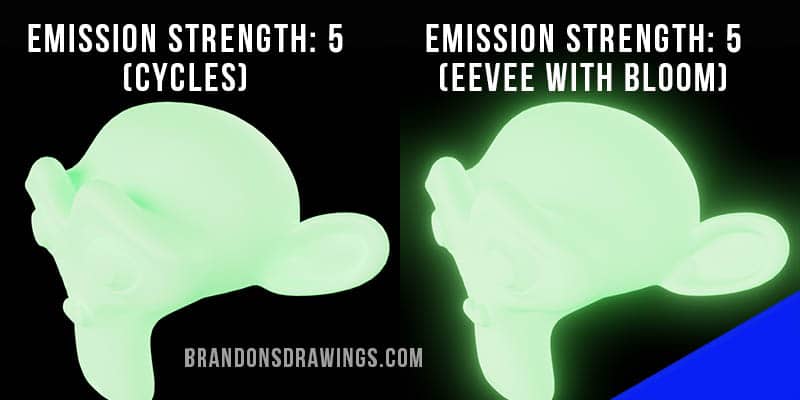
Note that emission will look much different depending on whether we are using the Eevee Render Engine or the Cycles Render Engine. In Cycles, we will need to do compositing to get any type of glowing effect. In Eevee, we can turn on the bloom setting to see a glow from the emission in realtime.
In another post, I fully cover adding glare and glow in Blender using both render engines.
Principled BSDF Alpha
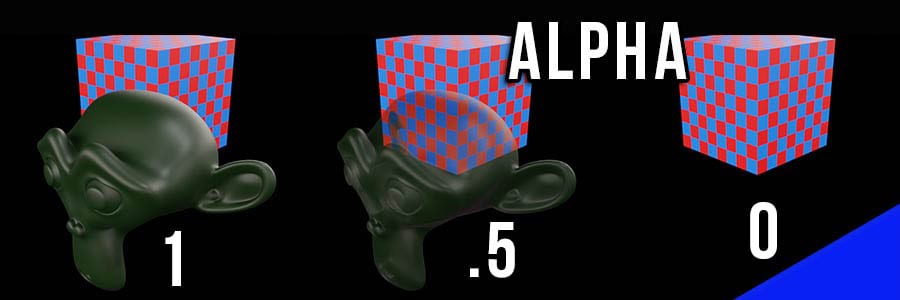
In computer graphics, alpha refers to transparency. Unlike transmission, alpha refers to complete invisibility from the scene. The Principled BSDF Shader can do this too.
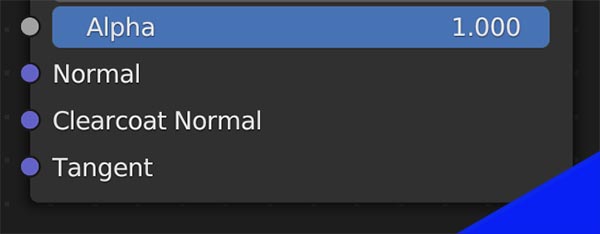
The alpha value as the inverse of transparency. With alpha at 1, the material is fully visible and there’s no effect from this setting. As the alpha value on the Principled BSDF Shader is reduced, the material becomes more transparent.
Normal, Clearcoat Normal and Tangent
The final three settings on the Principled BSDF are vector settings indicated by their purple input sockets on the left. These impact the appearance of the surface’s angle and how light bounces off them.
The Normal Input can be used to connect a Normal Map or Bump Map into the shader. These are common methods to fake fine 3D details like scratches, bumps and indents. I have a full lesson on how normal maps work in Blender.
The Clearcoat can have its own normal so it gets its own input for that.
The Tangent is similar to a normal, but is for controlling the anisotropic settings on the shader.
More About the Principled BSDF Shader
The Principled BSDF Shader in Blender does a lot. It has 25 input sockets which can be used for PBR texturing, procedural texturing or other methods of creating unique effects. The Principled Shader can replace many other shaders, including the Diffuse Shader, Specular Shader, Emission Shader and Transparent Shader. It combines all of these features into one powerful shading node.
The settings for the Principled BSDF Shader can also be found in the material properties panel when the material is selected.
There are many packs of pre-built materials for Blender which can fast track your 3D texturing workflow. Take a look!
Thank you. Stay creative!
Get Brandon’s Newsletter
By submitting, you agree to receive periodic e-mails from me. You can unsubscribe at any time.


