Shade Auto Smooth in Blender is a setting which allows for some parts of an object to be shaded smoothly and others to be shaded sharply. The shading will occur depending on the angle of the geometry.

Shade Smooth vs Shade Flat
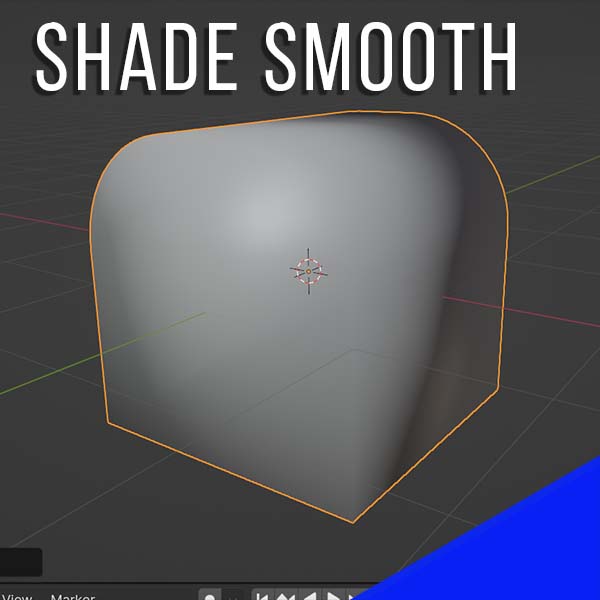
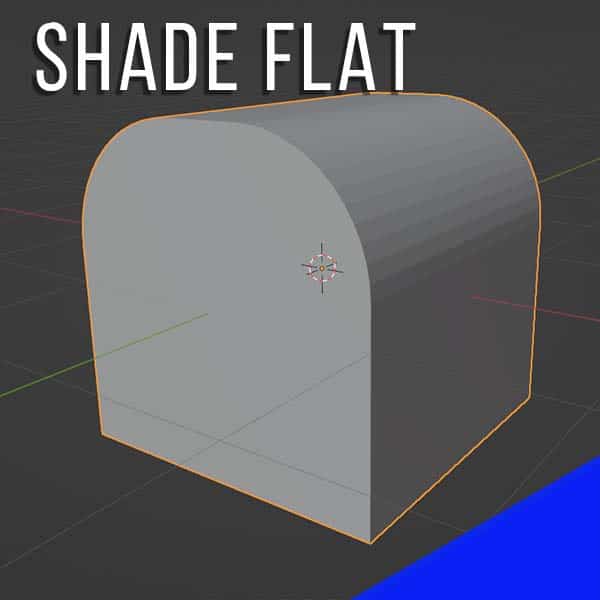
Historically in Blender there have been two quick options for how to shade objects. Shade smooth rounds the edges and gives objects a smooth look. Shade Flat (Previously called “Shade Smooth”) shades the objects as if they had sharp edges.
Some objects needed to be shaded smoothly while others needed to be shaded flat.


Shade Auto Smooth – The Best of Both Worlds
Shade Auto Smooth allows parts of an object to be shaded smoothly and other parts to be shaded flat. In the image below, neither “Shade Smooth” nor “Shade Flat” works because some parts are rounded while others have sharp edges.
If we apply “Shade Auto Smooth” Blender shades the object based on the angle in which each face intersects another face. The result is parts needing to be sharp are shaded flat while parts needed to be round are shaded smooth.
How to Auto Shade Smooth in Blender
To apply “Auto Shade Smooth” to an object in Blender, select the object while in Object Mode. Right click on the object to open an options menu. Near the top, we see options for “Shade Smooth,” “Shade Auto Smooth,” and “Shade Flat.”
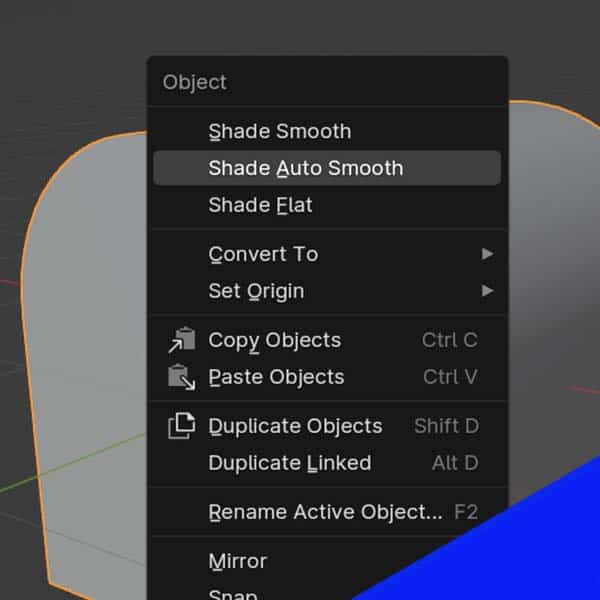
Select “Shade Auto Smooth” to apply automatic smooth shading to the object.
When to Use Auto Shade Smooth
You won’t necessarily need to apply “Auto Shade Smooth” to every object in Blender. But, if you have an object that has both rounded (smooth) surfaces as well as sharp edges, activate the setting.
There’s no downside to having “Auto Shade Smooth” activated on an object that doesn’t need it. So, in general, if you don’t know which to choose – Auto Shade Smooth is a safer bet than Shade Smooth or Shade Flat.


Adjust Shade Auto Smooth Settings
We can adjust how Blender automatically shades an object by going to the Object Data Properties in the Properties Panel.
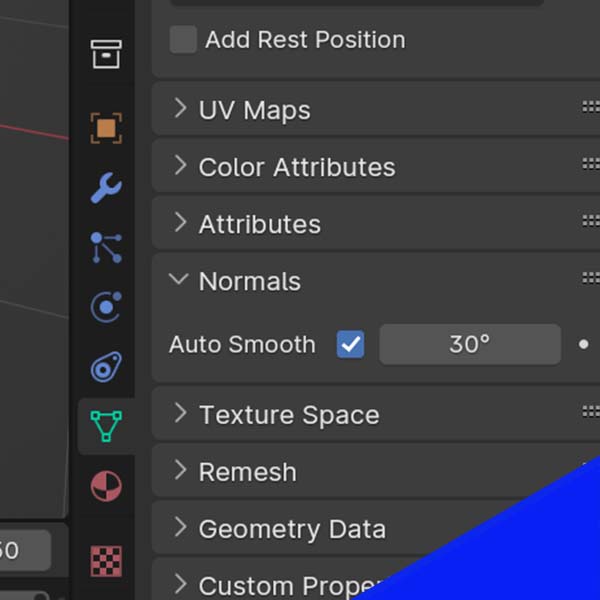
Expand the tab labeled “Normals” and we find a box labeled “Auto Smooth.” If we have auto smooth enabled for the object, the box will already be checked.
We also see a slider value with an angle displayed. This is the angle at which the object’s intersecting faces will be shaded flat. Angles below this value will be shaded smooth.
The default value is 30 degrees. Increase it to have more smooth shading on angles and decrease it to have more angles shaded flat.
Author:
Brandon’s Drawings
