
The mist pass in Blender is an additional rendering pass to be used in post-compositing. It creates a gradient map based on distance from the camera and is great for simulating fog or mist in a render.
Here’s how to use it.
This page may contain affiliate links which pay me a commission if used to make a purchase. As an Amazon Associate, I earn from qualifying purchases.
Video Tutorial
Activating the Mist Pass
By default, the mist pass in Blender is turned off. We need to turn it on before we render our image or animation. To activate the mist pass, go to the View Layer Properties in the Properties Panel.
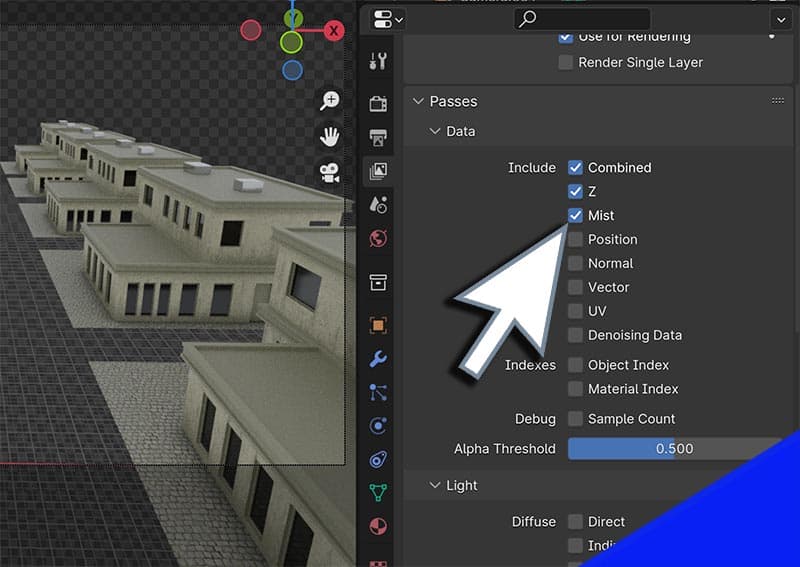
Now the mist pass is activated for the next render. Let’s see how to adjust its settings.
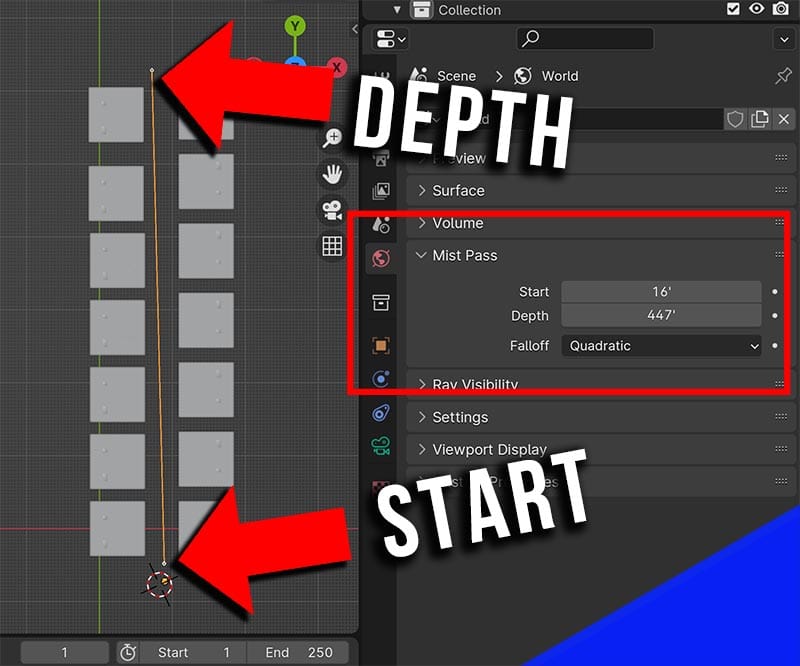
View Mist Pass Distance
The mist pass uses a distance range from the camera to create a gradient mask. It’s important to visualize where the mist pass effect will begin and end in our scene.
Select the camera in Object Mode and go to the Camera Properties Panel. Under “Viewport Display” check the box for “Mist Pass.”
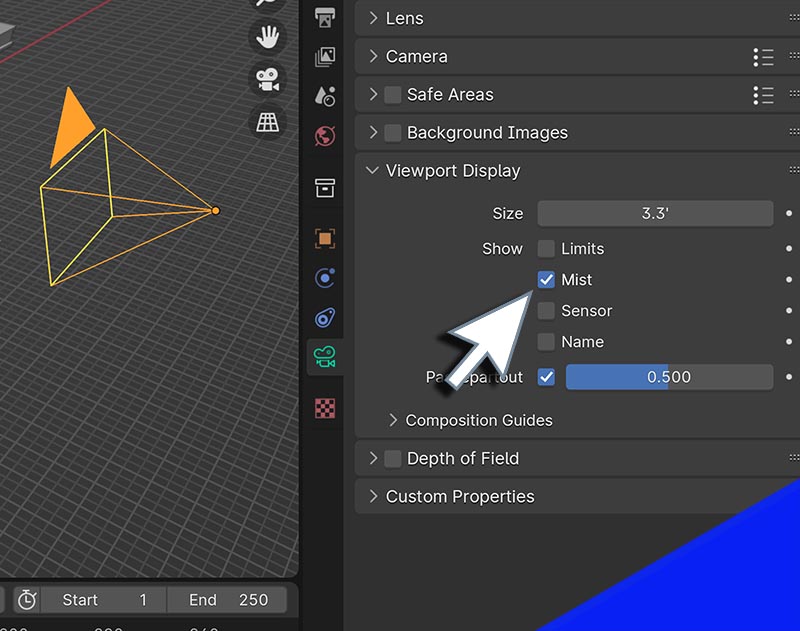
Now we can see the mist pass’s start and end distances displayed as an orange line with two points at each end, extending from the camera in the 3D viewport.
Adjust Mist Pass Settings
The mist pass calculates the distance from the camera and creates a gradient color mask. The start and end points of the mist pass’s distance is where the effect will begin and end.
By default, the start and end points probably don’t line up to our scene.
We adjust the mist pass settings in the World Properties.
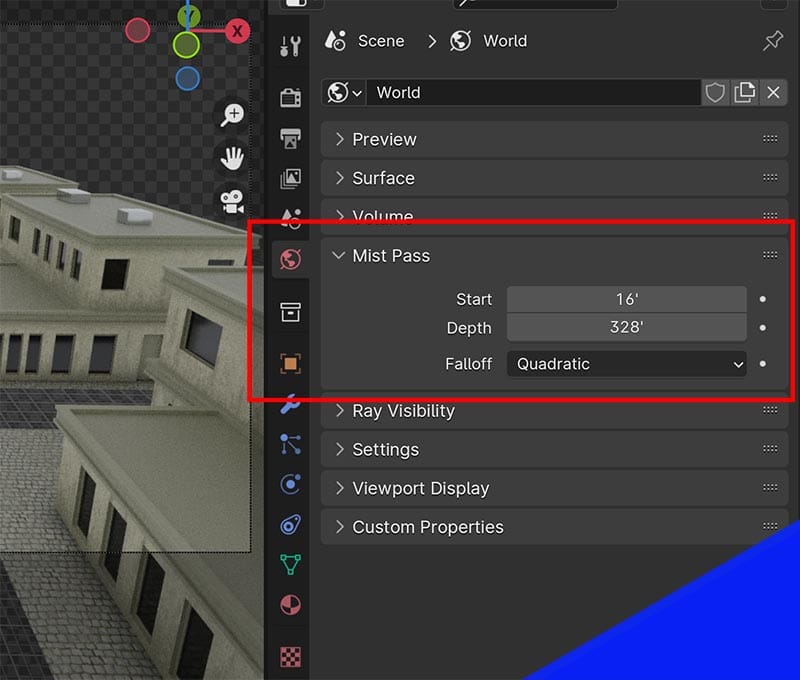
Start and Depth Settings
Adjusting the “Start” and “Depth” settings of the mist pass adjust where the effect begins and ends. The settings will be measured in units based on what’s set up in your world settings. Learn how to adjust units in Blender.
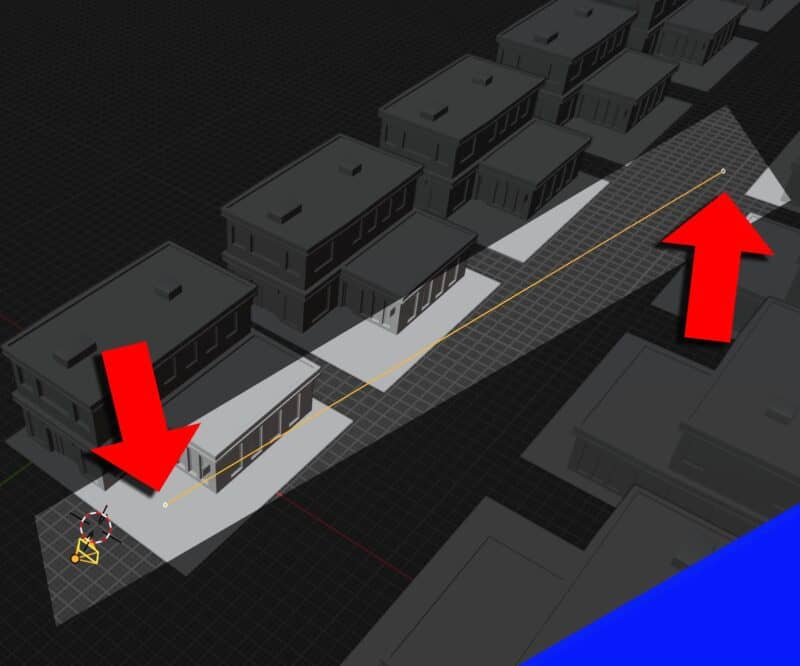
If we want the mist pass to capture the entire visual range of the scene in our render, we’ll need to adjust the start and depth settings.
Increase or decrease the depth setting until the orange line in the viewport ends at the end of the scene. Set the start point so it’s before the closest objects in our render.
Mist Pass Falloff
The “Falloff” setting for the mist pass determines how the “Far” and “Close” eslements are blended together. The default “Quadratic” works fine for me. But, we can play around with other options.
Rendering the Mist Pass
Because we activated the mist pass, the next time we render, Blender will calculate the mist pass based on the settings we established. After rendering, take a look at the Compositor.
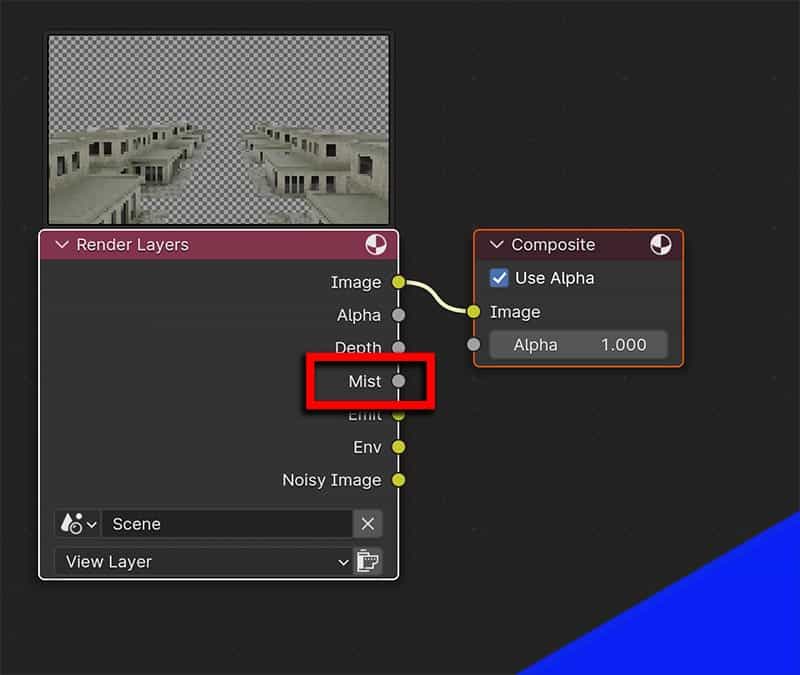
On the render layers node, we now have an output node labeled “Mist.” If we want to see just the mist pass, we can connect it to the composite node.
The mist pass displays as black where it is closest to the camera and white where it is farthest. Every distance between is denoted by a scale of grey.
Save this image if you wish to use it as a mask outside of Blender.
Mixing the Mist Pass to Create Fog
There are many combinations of ways we can mix the mist pass into our original image. We can use it as a mask in an imaging editor like Photoshop.
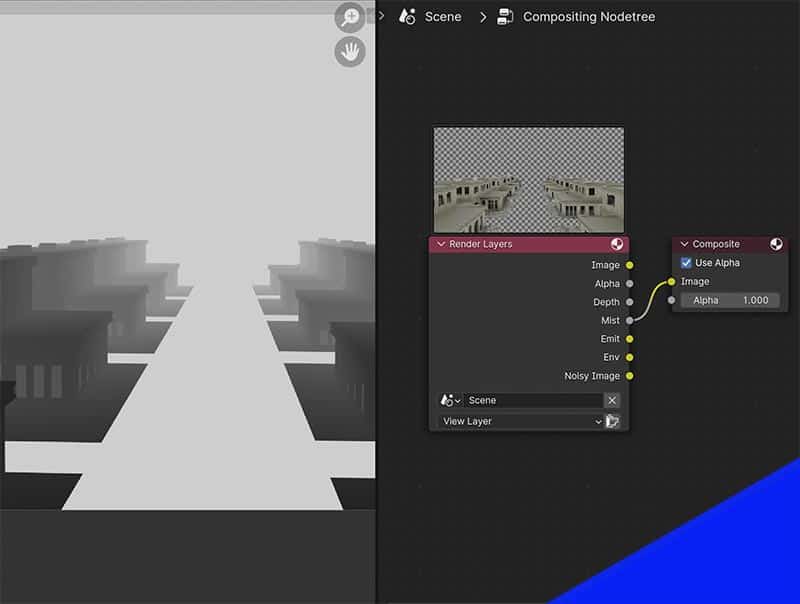
We can also do it right inside of Blender. Here’s a starting compositor node setup.
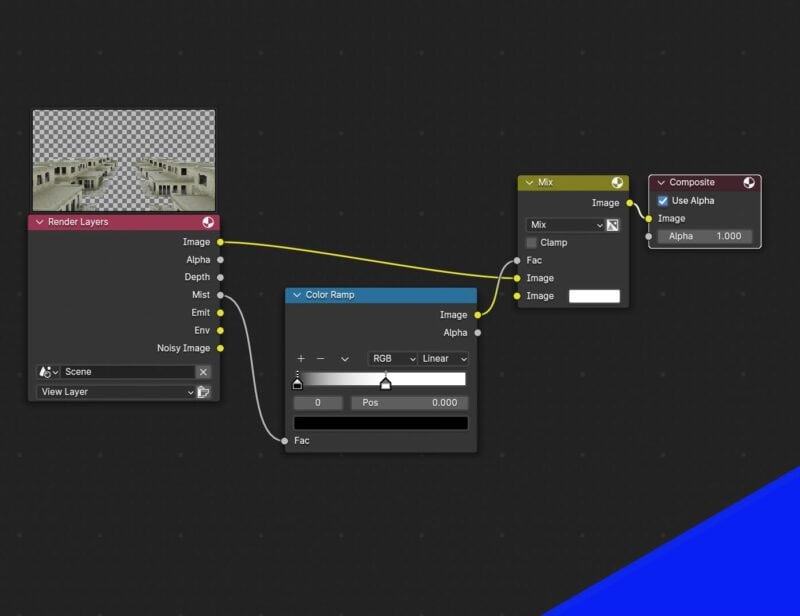
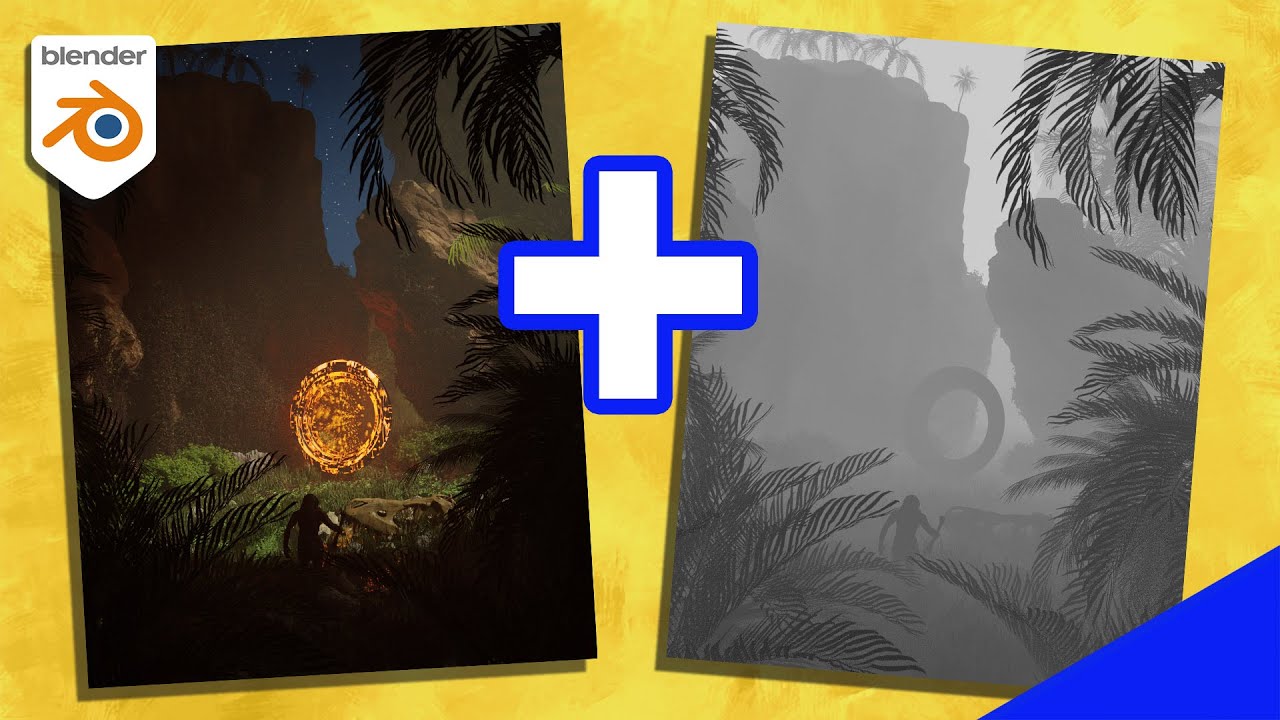
This setup with the render used in our example, will create this:
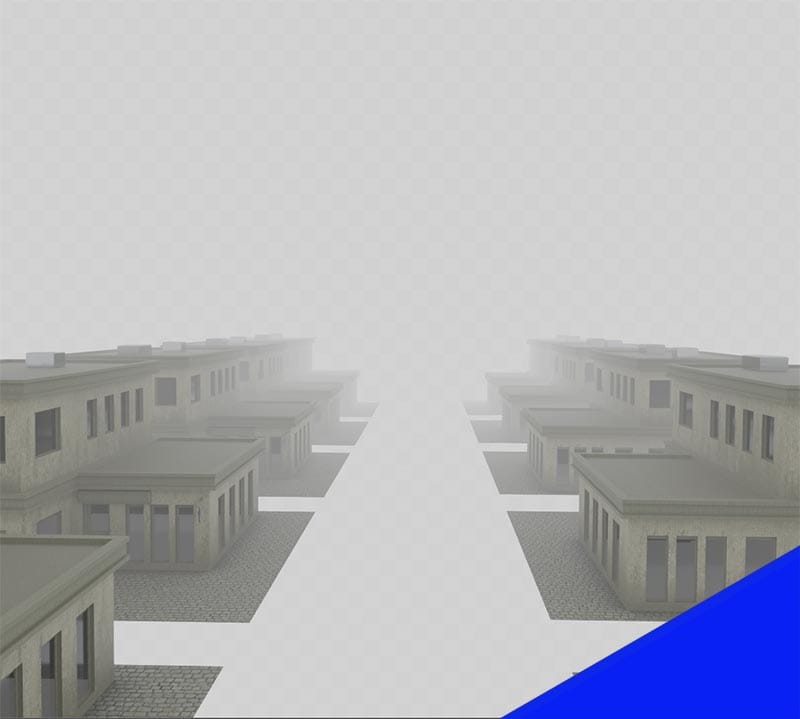
Notice the fog effect? This will be much easier on our hardware to render than using volumetric fog. It’s a great way to add fog, mist and other effects with the compositor or other image editing software.


Conclusion
The mist pass in Blender uses distance from the camera to create a black and white mask that can be used to add fog and mist in the compositor. We can also save just the mist pass image and use it as a mask in Photoshop or other programs.
The mist pass needs to be activated before rendering and the start and depth settings need to be adjusted to fit each scene. It will render as its own pass.
To visualize the mist pass, we can turn it on with the camera selected by going to “Viewport Display settings in the camera properties panel.
Thank you for the support here, on my YouTube channel and on Patreon.
Take care and stay creative!