The new Mix Node in Blender 3D allows us to mix numerical, color and vector data using a single node. It combines the old “Mix RGB” and “Mix” nodes.


This page may contain affiliate links which pay me a commission if used to make a purchase. As an Amazon Associate, I earn from qualifying purchases.
Introduction to the Mix Node
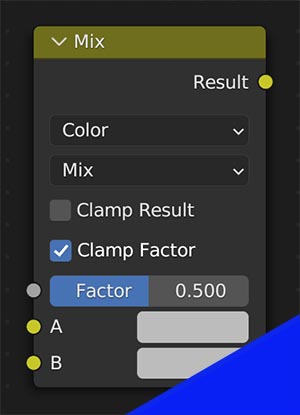
The Mix Node in Blender mixes two values. These values can be color values, vector values or float (number) values. Depending on which of these settings you choose, the Mix Node will look different:
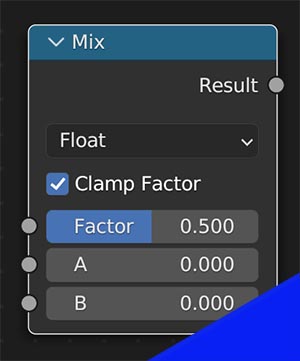

The Mix Node takes two values of the same kind (either float, vector or color values) and combines them.
On the left, there are two input sockets for the two values that will be mixed. There is also a “Factor” input which determines how the two are going to be mixed.
The “Mix Factor” value is the most important setting.
The Mix Factor
The most important input of the Mix Node is the “Mix Factor.” It tells the node how to mix the two values (whatever they are).
The mix factor accepts value information, that’s why it has a grey input socket. Value information can be conveyed in numbers or in greyscale image maps.
With an image input, wherever there is black one value will appear. Wherever there is white, the other will appear. Grey areas are a mixture of the two values determined by how dark or light the grey is.
For a more complete explanation of this, I recommend my introduction to shading tutorial on YouTube:
Black and White (Or Grey) Value Inputs
The most powerful feature of the Mix Node is that it accepts black/white/greyscale maps to be used as “mix factors.” Where the input image is black, one value will appear. Where the input value is white, the other value will appear. Where it is grey, it will be mixed based on how close to black or white the grey is.
Here’s the simplest example I can think of. If we plugged a simple checkered pattern into the Mix Node’s factor input, we’d have squares that are either black or white.
There’s no grey in this example.
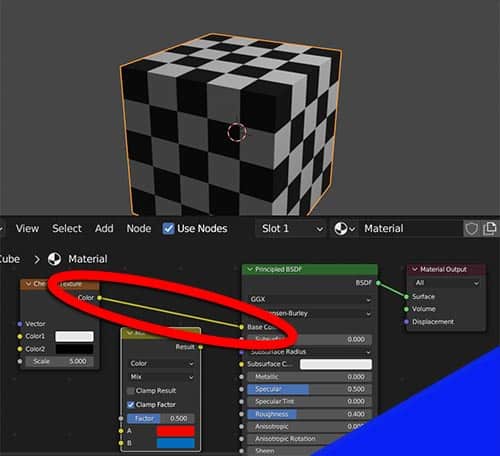
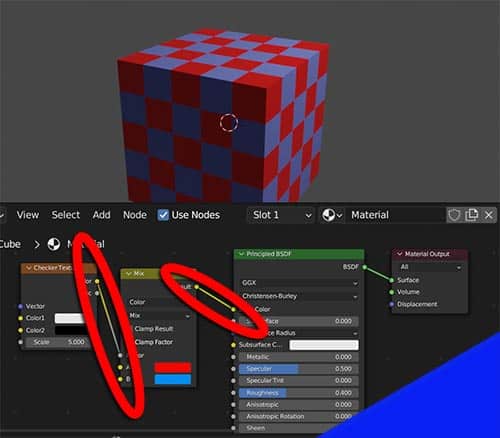
In the above image, the black parts of the checker texture are where the red values are and white parts of the texture are where blue values are displayed. This could be used for far more complicated mixtures and every kind of value we can imagine.
Float vs. Vector vs. Color Values of the Mix Node
Float, vector and color are three types of values in Blender. Whether you’re using shading nodes or geometry nodes, you should understand these three basic values.
Float
A “Float” value is simply a number with a decimal point. The number can have no decimal places or five decimal places or 100 decimal places.
Examples of float values may include:


Vector
A “Vector” value always consists of three values or coordinate points. Vectors are points in 3D space, so each vector value has a value for the X, Y and Z coordinates.
Nodes in Blender indicate a vector value is being used when an input socket is purple. Vector values are often used for displacement and normal maps.
Unfortunately, when we mix two vectors together in Blender, there’s no way to see the numerical outcome of the mixture. We can see what goes into the equation, but not what comes out.
Color
A color value is what it sounds like – it represents a color. Color values are often in the form of “RGB” – which stands for “Red, Green and Blue.” Combinations of these three colors make up every imaginable color a computer can display.
Here are some examples:
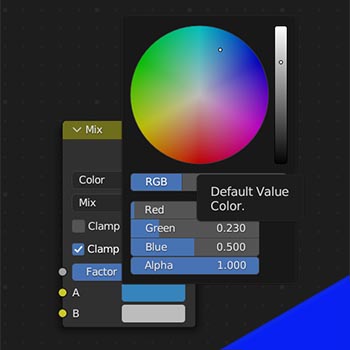
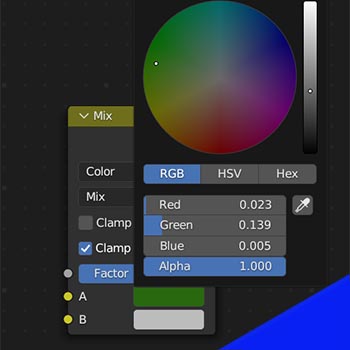
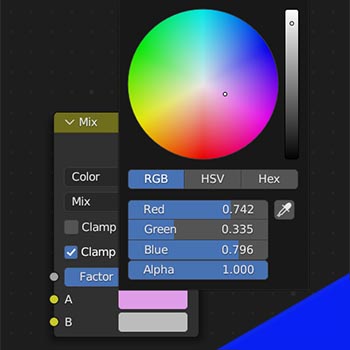
Notice each color is created by using a combination of red, green and blue. The “Alpha” value refers to the color’s transparency which is an entirely different topic.
Alternative methods of calculating a color’s value are the HSV (Hue, Saturation, Value) method and with a “Hex” code which assigns a six character code to every possible display of color (ie: #fff045).
Mixing Float Values (Numbers) with the Mix Node
When we “mix” two float values, we average them. It wasn’t obvious, but I found a way to demonstrate this with geometry nodes using the “Value to String” and “String to Curves” nodes.
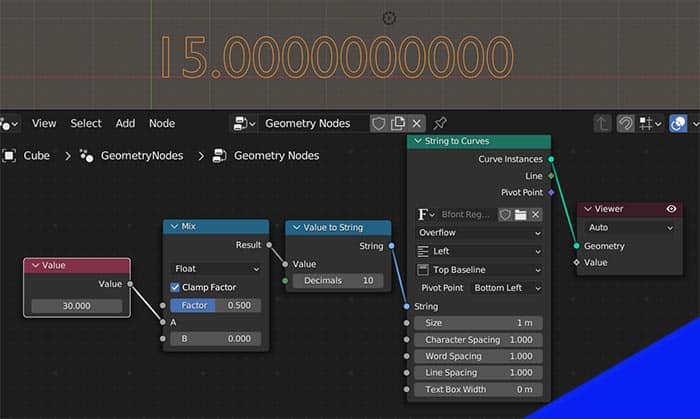
When we mix a value of “30” and a value of “0,” we get “15” as displayed in the geometry of the curve.
Mixing Vector Values
Mixing vector values sounds a lot like “Vector Math” – which is scary.
Well, it totally is vector math because we are taking one vector (a set of three individual values) and mixing it with another.
Imagine doing what we did with the float values but doing it once for each axis of the geometry we are mixing together. This node simplifies the math by 1/3. That’s awesome!
Mixing Color Values
Here’s what many of you came here for….
The Mix Node can mix two colors together in several ways. If you’ve ever used an image editor like Photoshop, you’ve probably seen the “Blend Type” term before.
Colors can be mixed in different ways. While “Mix” is the most basic, there are many others.

Blender groups the blend types. Darken, Multiply and Color Burn will tend to create a darker color than the original.
Lighten, Screen, Color Dodge and Add will make lighter final products.
Normally when mixing color, we are going to use the “Mix” blend type. But feel free to play around with other options and see what it looks like.


Conclusion
The Mix Node is a very powerful and fundamental node to understand.
It mixes two “values” – whatever they may be – and map them using black/white/grey image maps. Get a good feel for how these work and you will be on your way to mastering texturing in Blender.
If you haven’t watched my full introduction to material shading, you should! Stay Creative!
Also, here’s the official Blender reference for the Mix Node!
Author:
Brandon’s Drawings
