
Modifiers in Blender are used to change an object non-destructively. The mirror modifier is a common and simple modifier that reduces the amount of work to model a symmetrical object. Here’s a full guide on how to use the mirror modifier in Blender 3D.
This page may contain affiliate links which pay me a commission if used to make a purchase. As an Amazon Associate, I earn from qualifying purchases.
What Does the Mirror Modifier Do?
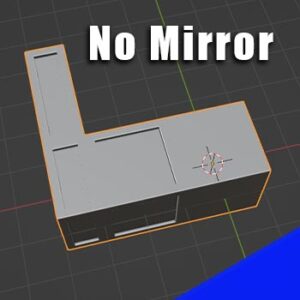
The Mirror Modifier in Blender “mirrors” an object across one or more of its axes. It causes any changes you make to one side of an object be mirrored to the other side. If we are trying to make a symmetrical object, the mirror modifier will make the symmetry more precise and reduce the amount of time spent on modeling.
Learn about all the other modifiers available in Blender.
How to Add the Mirror Modifier in Blender
The mirror modifier is added the same way other mesh object modifiers are added. Go to the modifiers tab in the properties panel.
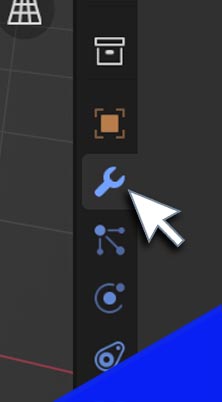
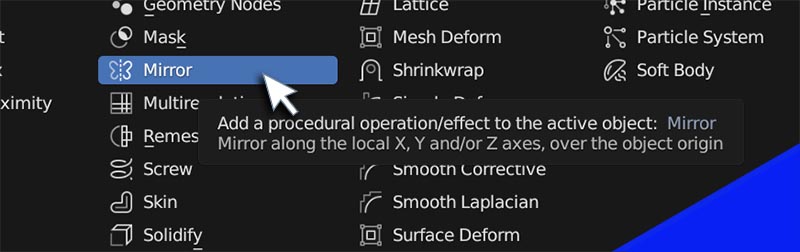
Choose “Add Modifier” and select “Mirror” from the list.
The Mirror Modifier will be added to the modifier stack in the modifier properties panel.

Mirror Modifier Settings
The Mirror Modifier in Blender has several settings that we’ll explain here. These settings give us control over the modifier, but because modifiers are non-destructive, all settings can be changed or removed without permanently changing the underlying object.


Visibility Settings
All modifiers in Blender have visibility settings. We can tell Blender to display the modifier’s effects in the object’s “cage” or in edit mode. We can tell Blender to display the modifier in the 3D viewport, the final render or both.

Whichever icons are highlighted blue in the visibility settings will be activated. Hovering over the icons will show tooltips explaining what they do.
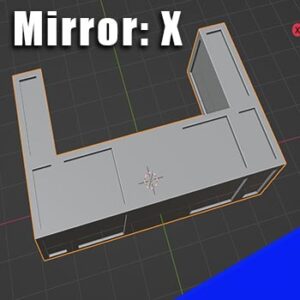
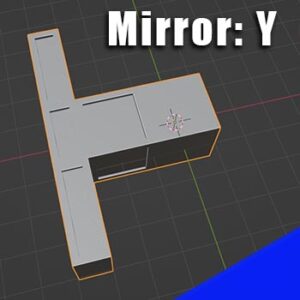
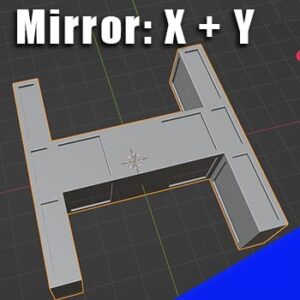
Axis
In the Mirror Modifier’s axis settings, we choose which of the three axes (X, Y and Z) we want the object to be mirrored across. We can choose a single axis, two axes or even all three. The boxes representing each axis that are highlighted blue will be the ones that are mirrored across.
We can easily add or remove an axis to mirror across by clicking the corresponding box.
Bisect
The bisect settings can similarly be set for all three axes. When a mesh already exists on both sides of an axis, bisecting it will cut off mesh on one side of the mirrored object. By default it will be the “positive” side of the axis.
Bisecting may or may not have an effect on your mesh. Only bisecting on an axis that is mirrored and has mesh which crosses the “mirror line” of the axis will show an effect.
Flip
The flip settings for each axis only matter if you are using the bisect settings. This allows us to “flip” or invert which side of the axis the bisect operation affects. So, if you’re trying to bisect your mesh across an axis, but it’s not working properly. Try also turning on the “flip” setting for that axis.
Mirror Object
By default, the Mirror Modifier in Blender uses the object’s origin point to mirror across the selected axis. This can be limiting. Another option is to use the “Mirror Object” setting which allows us to use another object as the point where the mirror occurs.
As you move the object (an empty object in the above example), the Mirror Modifier adjusts.
To select an object you want to use as the mirror point, choose it from the drop down box in the settings of the Mirror Modifier. You would usually use an empty object for this, but it can be any object.
Clipping
When the checkbox for “clipping” is activated, mesh that moves across the mirrored axis in Edit Mode will be cut off. It won’t clip any mesh that’s already on another side of the mirrored plane.
Moving mesh across a mirrored plane and causing it to clip will be destructive to the mesh and can’t be undone by removing the Mirror Modifier.


Merge
The merge setting for the Mirror Modifier allows us to set a distance at which point vertices near the mirrored plane will be merged. If a vertex falls within this distance from the mirrored plane, it will become a single, merged vertex at the mirror axis and won’t be able to be disconnected.
Bisect Distance
The bisect distance setting is only available if the bisect setting is turned on for at least one axis. This distance determines how far away a vertex must be from the axis to not be removed when bisect is used.
Mirror Modifier Data Settings
The Mirror Modifier has an expandable tab labeled “Data” which allows for more controls over what is to be mirrored by the modifier.
UV Mirror
There is a setting for “Mirror U” and “Mirror V.” Each of these are checkboxes and when one is checked, the UV map will also be mirrored for the object. This will come into play when you have materials applied to the object using UV maps.
UV Offset
We can independently offset the UV map along either the “U” or “V” axis.
Vertex Groups
If the “Vertex Groups” box is checked on the Mirror Modifier settings, any existing vertex groups will be mirrored.
Flip UDIM
If using a UDIM, you can check the “Flip UDIM” box on the Mirror Modifier to mirror the texture coordinate around each tile center.
How to Apply a Mirror Modifier in Blender
For many purposes, we don’t need to apply a mirror modifier in Blender. But, if we want to export the object outside of Blender, we will need to apply it. Once a modifier is applied, it is no longer non-destructive. Changes made to the geometry will not be reversible once a modifier is applied.

To apply a mirror modifier, go to the modifier properties panel with the object selected in Object Mode (it won’t apply in Edit Mode). At the top of the modifier, click the downward arrow icon for more options. Then choose “Apply.”
Learn how to apply all modifiers to all objects at once in Blender.
Here’s Blender’s official documentation on the Mirror Modifier.
Get Brandon’s Newsletter
By submitting, you agree to receive periodic e-mails from me. You can unsubscribe at any time.