Blender 3.5 introduced Vector Displacement Map (VDM) brushes to the sculpting workflow. Blender.org provides some sample VDM brushes to use. If you have one, here’s how to set up a VDM brush in Blender.
Other new features in Blender 3.5 include real-time compositing in the viewport. It’s probably worth updating to the latest Blender version if you haven’t!
This page may contain affiliate links which pay me a commission if used to make a purchase. As an Amazon Associate, I earn from qualifying purchases.

What is a Vector Displacement Map (VDM)
A vector displacement map is a texture that can be assigned to a brush to allow 3D displacement while sculpting. VDMs use red, green and blue color to map X, Y and Z vector information. Entire 3D shapes can be added to a mesh in sculpt mode.
We can quickly add eyes, noses, ears and horns to characters. Of course, it’s not limited to that.

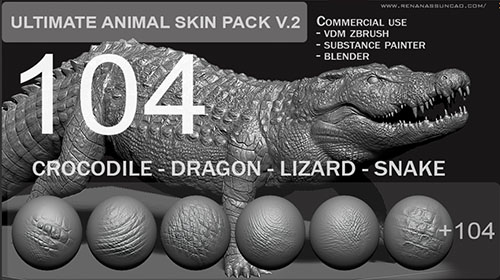
See more of my favorite VDM brushes for Blender
What’s the Difference between VDM and Alpha Brushes in Blender?
So what’s the big deal about VDM brushes? We’ve been able to use custom brushes in Blender for a long time, right?
Traditional sculpting brushes are known as “Alpha” brushes. Their textures are produced by black and white image files that affect the “bump” of a surface. Alpha brushes only move geometry up or down (positive or negative) based on which parts of the texture are black or white.
Artists will use VDM and alpha brushes with a pressure-sensitive drawing tablet (Like this one on Amazon) to achieve better results than using a mouse.
Vector Displacement Maps (VDMs) use three dimensional vector information. That means they add geometry which extrudes in any direction. Importantly, VDMs can even add geometry which hangs over other parts of a brush. This couldn’t be done with Alpha brushes which are two dimensional.
VDM brushes will be EXR files that appear red, blue and green against a black background. Here are some examples:


Let’s say you downloaded a vector displacement map and wanted to use it in Blender. If you’re lucky, you got a pack of VDMs like these ones already in a Blender file.
But if you just got the EXR image, here’s how to manually set up a brush.
How to Set Up a VDM Brush in Blender Manually
The first thing you’ll need is a VDM texture file that looks something like the examples shown above. Ensure it’s not in a .Zip file and is saved somewhere on your computer.
Remember, VDM brushes only work with version 3.5 of Blender or higher. Update Blender if you need to.
Step 1: Create New Brush
We will want to create a new brush to use as our VDM brush. When in sculpt mode, go to the Active Tool Properties Panel. It’s the top icon in the properties panel and displays a screwdriver and a wrench as its icon.

The draw brush will be selected by default. Under the draw brush’s preview image, click the icon labeled “Add Brush.” A new brush will be named. If you haven’t changed anything, it will be named SculptDraw.001.
Rename the brush if you wish.
Step 2: Add Texture to Brush
A brush is a tool in Blender. A texture is the image assigned to the brush to define the design it paints or sculpts. To add a texture to our newly created brush, scroll down in the active tool properties panel and expand the “Texture” tab.

You’ll see a blank texture with a button below it labeled “New.” Press this button to create a new texture assigned to the brush.
Now to adjust the texture settings, we go to the texture properties panel. Below the new texture is a slider icon on the far right. Pressing this takes us directly to the Texture Properties Panel.

In the Texture Properties Panel, press “Open” to assign an image to the texture. A file browser opens. Navigate to the stored EXR file on your computer.
Select it and press “Open Image.”

The image should be added to the texture and visible in the preview image area. For the next step we are going to return to the Active Tool Properties.
Step 3: Set Mapping to “Area Plane”
Return to the Active Tool Properties Panel where we were before.
In the texture tab, change the setting labeled “Mapping” from its default of “Tiled’ to “Area Plane.”

This is the only mapping option that works with VDMs.
Step 4: Check box for “Vector Displacement”
When the mapping is set to “Area Plane” a check box will appear at the bottom of the texture section. The box is labeled “Vector Displacement.” Check this box to use VDMs for the brush.
Step 5: Set Stroke Method to “Anchored”
Scroll down to the “Stroke” section of the Active Tool Settings. The top setting is the “Stroke Method.”
Change this to “Anchored.”

The anchored stroke method is how the VDM will apply to the mesh when we create a stroke with our brush.
How to Sculpt with a VDM Brush in Blender
Assuming we have a VDM brush added to a scene in Blender version 3.5 or higher, here’s how to sculpt with it.
This isn’t an introduction to sculpting, but when sculpting, we will need enough geometry to work with.
Generally a multiresolution modifier will be added to the object we are sculpting and it will be set to “Shade Smooth.”
We can now also use the improved “Auto Shade Smooth” feature in Blender.

In the 3D Viewport (while in Sculpt Mode) and with the VDM brush selected, left click and hold on the mesh we want to sculpt.
With the left mouse button pressed, drag the cursor out to scale the sculpt created with the brush.
Rotate around where we originally clicked in order to rotate the VDM shape.
Release the left mouse button when the VDM is how we want it.
We can immediately click again and repeat this process to add additional sculpted geometry with the brush. This is a huge time saver over having to manually sculpt these types of shapes.
What versions of Blender support VDM brushes?
Vector Displacement Maps or VDM brushes are supported in Blender version 3.5 or higher.
Get Brandon’s Newsletter
By submitting, you agree to receive periodic e-mails from me. You can unsubscribe at any time.
Author:
Brandon Stocking
