In Blender, light groups allow us to control the light from individual lamps AFTER we render! It’s done in the compositor and is a great tool for perfecting a scene’s lighting. Here’s everything you need to know about how to use light groups in Blender.
This page may contain affiliate links which pay me a commission if used to make a purchase. As an Amazon Associate, I earn from qualifying purchases.
How to Use Light Groups in Blender
An important note – Light Groups only work in Cycles! They won’t work in Eevee (sorry).
Light groups are even more exciting with the addition of Blender’s real-time compositor released in Blender 3.5. Be sure to use the latest version of Blender in order to have all the available features.
Before we can use light groups in the compositor, we have to create light groups and assign lights to the groups.
Step 1: Create or Add Light Groups
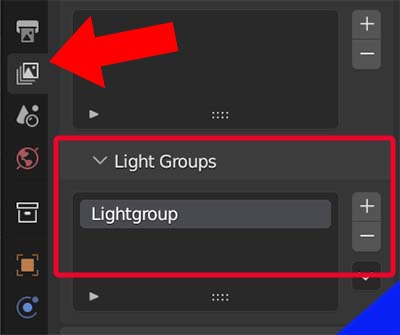
To create a light group in Blender, go to the View Layers Properties Panel. Find the section for Light Groups and press the plus (+) icon to add a new group.
Add as many groups as you need and name them appropriately.
To change the name of a light group you created, double click it in the light groups panel and type a new name.
We can also delete selected light groups from this panel by selecting a group and pressing the minus (-) icon.
Example of Groups
An example of how we may want to label our light groups would be “Background” for background lights or “Street” for street lamps. Whatever groups of lights we will want to control together will need their own group.
If we are using an HDRI to light our scene, we won’t be able to add it to a light group. We would instead need to use the environment render layer to control light from the HDRI.
Step 2: Add Individual Lamps to Light Groups
After we’ve created one or more light groups, we will need to add individual lamps to groups. We do this from the selected object’s Object Properties Panel.
We can add multiple lamps to a group at once by selecting more than one lamp at a time.
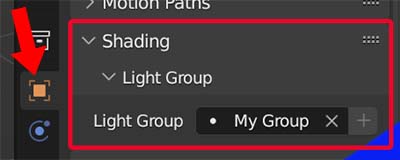
To add the selected lamp(s) to a light group, go to the Object Properties panel and expand the “Shading” tab. In the light group box, choose the light group to add the lamps to.
Tip: Quick Add Light Group
We can also create a new light group from the Object Properties panel. Click inside the light group box and type the name of the new group you want to create. Then press the plus (+) icon on the right. The group will be created and the selected lamp(s) will be added to it.
Step 3: Render Your Image
The true magic of light groups comes into play after we render. Ensure “Compositing” is checked in the Output Properties panel under “Post Processing.” Render the image (or animation) by pressing F12 or from the render tab in the top menu.
Step 4: Compositing
After we render, we will go into the Compositor. The easiest way to go to the Compositor is to switch to the Compositing Workspace. In the Compositor, ensure “Use Nodes” is checked and a basic compositing node setup will be visible.

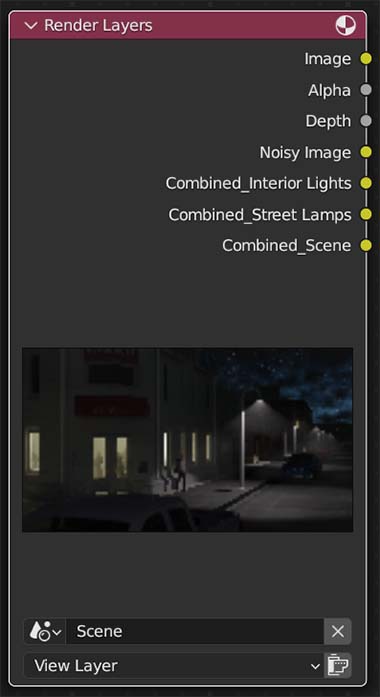
The default compositor node setup includes a render layers node connected to a composite node. In the above example, we see two additional output sockets on the render layers node for the two light groups assigned to the scene.
Light groups in Blender are probably not used to their full potential. I believe the same goes for working with IES light files.
How to Use Light Groups in the Compositor
Now that we’ve covered how to add light groups, let me show you how they can be used in the Blender Compositor. There are endless possibilities for what we can do here, but I’ll walk you through an example that I used recently.
Light Groups Example / Case Study
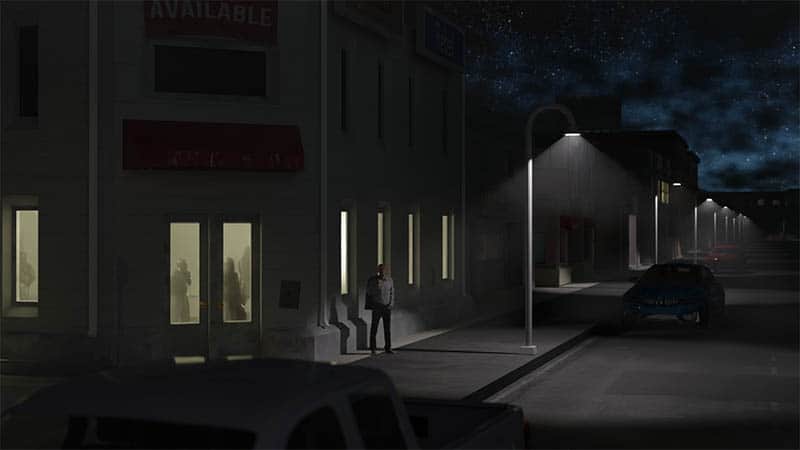
I created the following scene using buildings from the BrandonVille Commercial Collection. I added street lights, interior lights to some buildings and some area lamps to give overall fill lighting to the scene.

The street lamps were placed in one light group. All interior lights were placed in a second light group. The scene lamps were placed in a third light group. I rendered it out in Cycles and here’s the basic image before any compositing.
Then I went into the Compositor. All three light groups were separated as different passes in the Render Layers node.
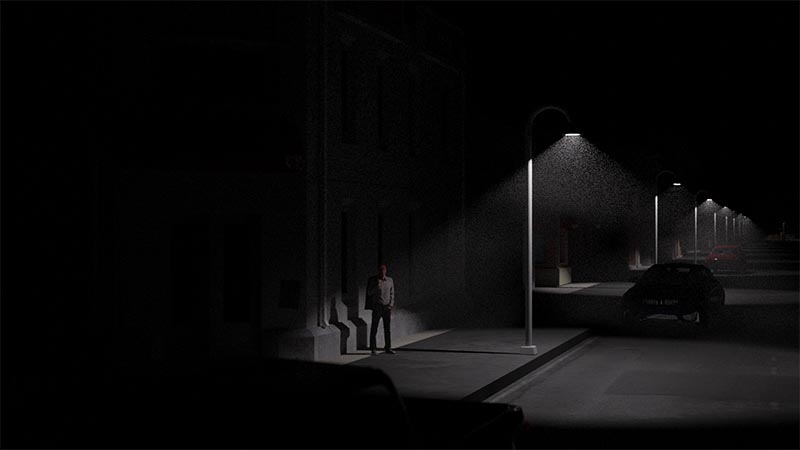
If we connect the “Combined Street Lamps” layer directly into the compositor output, this is what it will look like. It’s a noisy image using only light from the “Street Lamps” group.
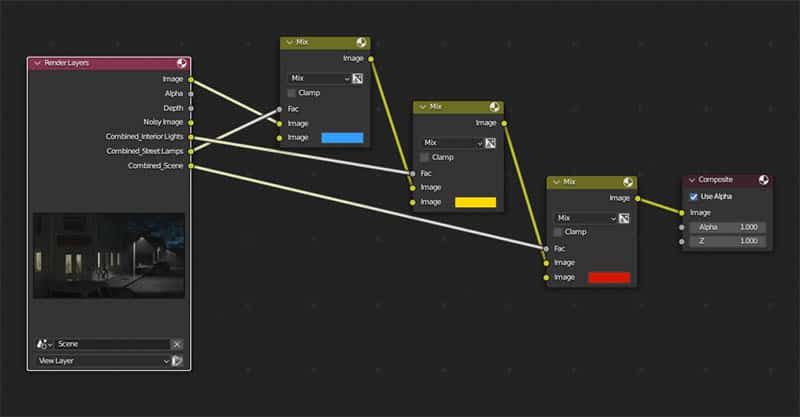
This is what I did next. I mixed the image with different colors, using the Mix Node. The output for each light group layer served as the factor input for the mix nodes. This mean every mix node controlled the color for one of the light groups.
Again, there are a hundred different things you could do here and many ways to mix these image layers together.
And this is the result…
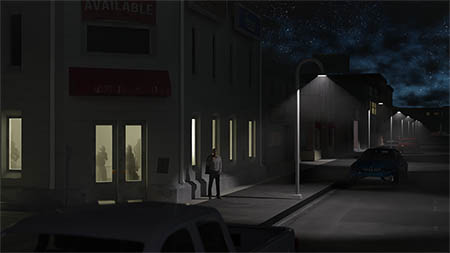
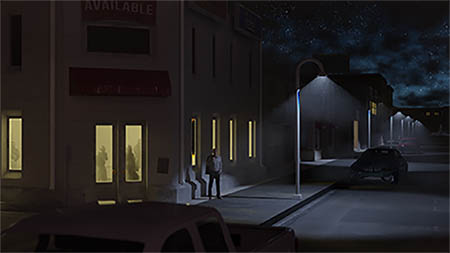
I was able to adjust the colors of each light group individually. The interior lights are warmer. The exterior lights are more blue. The scene lights that fill in the rest have a red tint to them. This is a lot of control over the lighting AFTER the image is rendered.
Conclusion
Light groups were introduced in Blender 3.0 and they give us a ton of control to adjust lighting after we render. We first must create the light groups and assign individual lights to groups. Then the magic happens in the Compositor.
I’m betting this is a tool that’s not fully used to its potential by a lot of Blender artists. I hope this helped you add it to your workflow. Please have a look around the site. I have a lot more Blender tutorials here and on my YouTube channel. Stay creative!
Get Brandon’s Newsletter
By submitting, you agree to receive periodic e-mails from me. You can unsubscribe at any time.


